
Choosing the Right Beam Angle for Wall Washing
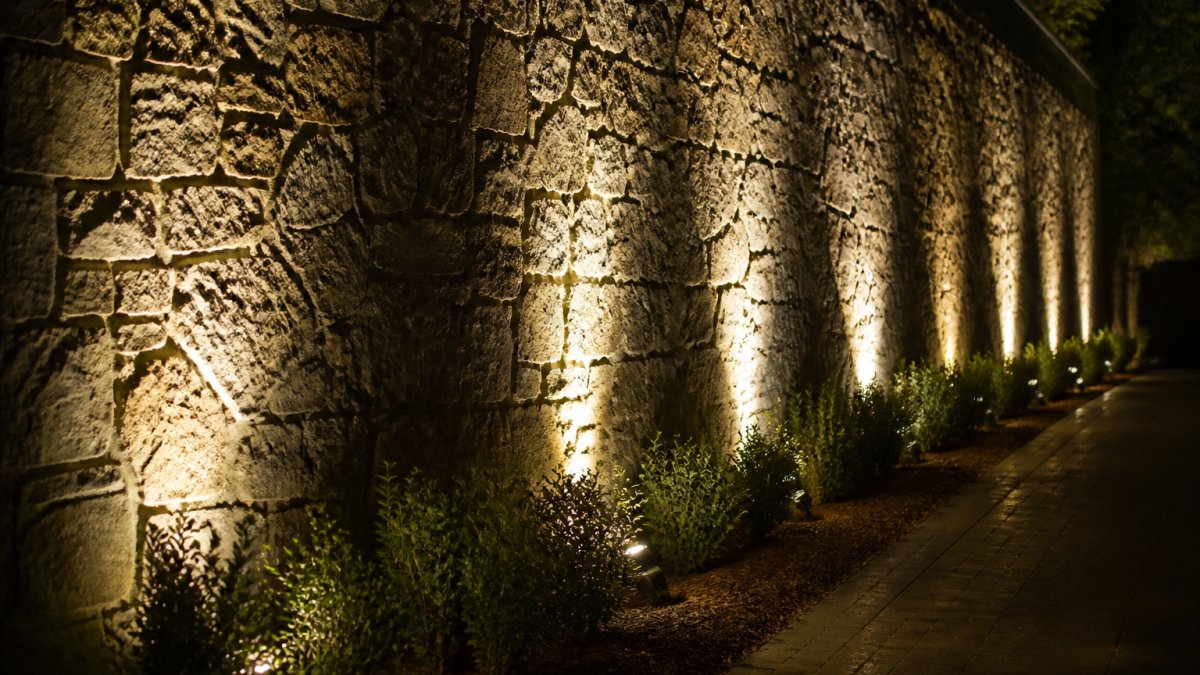
Table of Contents
- Understanding Beam Angle and Wall Washing Basics
- Wall Washing vs. Wall Grazing: Key Differences
- Calculating Beam Angle Based on Wall Height and Fixture Distance
- Wall Washer Light Placement: Distance, Height, and Mounting
- The three placement variables
- Worked layout A: 8-foot residential wall, 20-foot length
- Worked layout B: 12-foot commercial wall, 40-foot length
- Worked layout C: 16-foot facade, 60-foot length
- The trade-offs nobody puts in a spec sheet
- On-site commissioning checklist
- Common placement mistakes and their fixes
- Wall Washer Spacing and Overlap to Achieve Uniform Illumination
- How to Avoid Scallops and Dark Spots in Wall Washing
- Adjusting for Wall Color, Texture, and Surface Reflectance
- Frequently Asked Questions
Last Updated: October 12, 2026
Understanding Beam Angle and Wall Washing Basics
Wall washing fills an entire vertical surface with soft, uniform illumination rather than spotlighting one area.
Beam angle isn't just a spec on a label, it's the foundation of your lighting design.
Beam angles range from 15 degrees (very narrow) to 60 degrees (very wide). For wall washing, you typically want 20 to 45 degrees, depending on wall height and fixture distance.
Wall Washing vs. Wall Grazing: Key Differences
Wall grazing and wall washing sound similar but produce different effects. The distinction helps you choose the right beam angle for your goal.
Wall grazing uses narrow beam angles and mounts fixtures very close to the wall surface. Light skims the wall at a shallow angle so every bump and ridge casts shadows, ideal on textured brick, stone, or wood where you want to showcase the material's character.
For wall washing, choose 30 to 50 degrees; for wall grazing, go narrower at 15 to 25 degrees.
Calculating Beam Angle Based on Wall Height and Fixture Distance
Most guides tell you to "pick a beam angle" and stop there. Here is a repeatable method for sizing the beam to your wall.
The geometry in plain terms
A fixture's beam angle describes the full cone of light it throws, with a measurable width at any distance:
Beam width at the wall = 2 × (distance from fixture to wall) × tan(beam angle ÷ 2)
Two consequences drive every wall-washing decision: doubling the distance doubles beam width at the wall, and widening the angle widens beam width at the wall. That is why a narrow beam mounted far away and a wide beam mounted close can produce similar coverage, but not similar uniformity, glare, or efficiency.
A worked method you can repeat
Use this five-step process for any wall; numbers are illustrative.
-
Measure the wall height you want to wash. Say it is 10 feet from grade to the top of the wash zone.
-
Choose your fixture setback. Common residential setbacks are 18 to 36 inches; use 24 inches (2 feet) here.
-
Add overlap headroom. Target the wall height plus 20 to 30 percent extra so the top and bottom do not fall into shadow, about 12 feet of coverage for a 10-foot wall.
-
Solve for the angle. Rearranged, the formula becomes:
Beam angle = 2 × arctan( (target coverage ÷ 2) ÷ distance )
With a 12-foot target and 2-foot distance: 2 × arctan(6 ÷ 2) = 2 × arctan(3) ≈ 143°. That is far wider than any practical wall-washing optic, meaning the fixture is too close to cover a 10-foot wall top-to-bottom.
-
Adjust a variable and re-solve. Move the fixture farther from the wall, or accept that one fixture cannot wash the full height and plan a second row or different mounting position.
What the math actually tells you
The 143° result is the useful insight most guides skip: a single wall washer mounted 2 feet from a 10-foot wall cannot cover the full height with a realistic optic. Three responses:
- Increase setback. At 4 feet, the required angle drops to about 113°; at 6 feet, about 90°. Even 90° is wider than most wall-washing optics, so setback alone rarely solves a tall wall.
- Use a narrower wash zone. Washing only the lower 6 feet at 2-foot setback needs about 113°, still wide, but closer to achievable.
- Stack fixtures. Two rows, one low, one high, each covering roughly half the wall height is the standard solution for tall walls, and each row needs a much narrower beam.
At 2-foot setback, a 4-foot wash zone needs about 90° and a 3-foot zone about 74°. The pattern: the shorter the wash zone, the narrower the beam you can use, and narrower beams are generally more efficient and easier to control.
How beam angle specs relate to photometric data
A single beam-angle number on a spec sheet is a simplification. Manufacturers derive it from the fixture's intensity distribution, the photometric file (often an IES file) recording how much light the fixture emits in every direction.
When reading a spec sheet or photometric file, look for:
- Beam angle, the angle at which intensity falls to 50 percent of peak, the number most manufacturers publish.
- Field angle, the angle at which intensity falls to 10 percent of peak; always wider than beam angle, it describes the soft outer edge.
- Center beam candlepower (CBCP), center-of-beam intensity in candelas; higher CBCP means a punchier beam.
For wall washing, field angle often matters more than beam angle, because the soft outer edge blends one fixture's output into the next. Design only to the beam angle and you will underlap and get scallops.
Quick reference: required beam angle by wash zone and setback
Use this table as a starting point, then verify against the fixture's photometric data.
| Wash zone height | Setback 18 in. | Setback 24 in. | Setback 36 in. |
|---|---|---|---|
| 3 ft | ~90° | ~74° | ~53° |
| 4 ft | ~113° | ~90° | ~59° |
| 6 ft | ~127° | ~113° | ~90° |
| 8 ft | ~131° | ~127° | ~113° |
Two takeaways: taller wash zones demand wider beams at any given setback, and more setback lets you use a narrower beam for the same wash zone, usually meaning better efficiency and less glare. If the required angle exceeds what your fixture offers, add a second row, reduce the wash zone, or increase setback.
Wall Washer Light Placement: Distance, Height, and Mounting
Placement is where beam-angle theory meets the wall. Here are dimensioned layouts, a commissioning checklist, and the trade-offs that separate professional results from improvised ones.
The three placement variables
Every wall-washing layout is defined by three numbers:
- Setback, horizontal distance from fixture to wall.
- Mounting height, vertical distance from grade to fixture.
- Spacing, horizontal distance between adjacent fixtures.
Beam angle ties all three together: change one and the others must adjust.
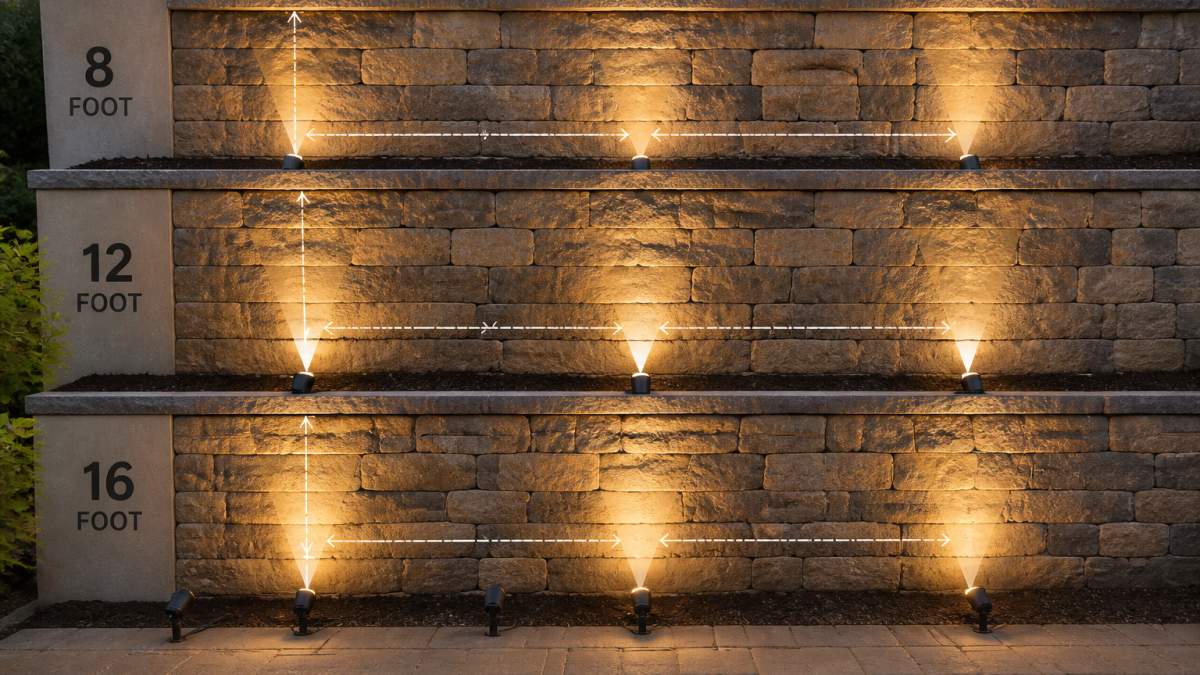
Worked layout A: 8-foot residential wall, 20-foot length
- Wall: 8 ft tall, 20 ft long, smooth painted stucco, light beige.
- Goal: even wash from grade to top of wall.
- Setback: 24 in.
Worked layout B: 12-foot commercial wall, 40-foot length
- Wall: 12 ft tall, 40 ft long, smooth concrete, medium gray.
- Goal: uniform wash with no visible scallops.
- Setback: 36 in.
Worked layout C: 16-foot facade, 60-foot length
- Wall: 16 ft tall, 60 ft long, textured brick, dark red.
- Goal: even wash that also reveals some texture without full grazing.
- Setback: 48 in.
Across all three layouts: taller walls need more rows, not wider beams. Beams beyond about 60° become hard to control and spill past the wall edges.
The trade-offs nobody puts in a spec sheet
Beam angle is not a free variable. Every choice trades one outcome for another:
- Uniformity vs. brightness. Wider beams and tighter spacing produce flatter walls, but the same output spread over a larger area looks dimmer; wanting both means more fixtures or higher output.
- Uniformity vs. glare. Wider beams from a shallow setback can shine into the eyes of anyone near the wall; narrower beams with more setback reduce glare but need more fixtures.
- Energy use vs. fixture count. One wide-beam fixture uses less energy than three narrow-beam ones but usually cannot match their uniformity.
Practical rule: decide which outcome matters most, uniformity, brightness, low glare, or low fixture count, and let that drive the beam angle.
On-site commissioning checklist
Spec sheets and calculations get you close; the wall decides the rest. Before permanent installation, run this checklist at night:
- Temporary-mount one fixture at the planned setback and height and aim it at the wall.
- Check top and bottom coverage. If the top of the wash zone is dimmer than the bottom, adjust mounting height or setback.
- Check for scallops. Look for curved bright-and-dark bands between where fixtures will go; if you see them with one fixture, you will see them with many.
- Check for hotspots. A bright pool directly in front of the fixture means increase setback or narrow the beam.
- Check for glare. Walk to the sides and look back toward the fixture; if you can see the light source, add a shield, increase setback, or reduce the beam angle.
- Check the wall edges. If beams spill past the ends, reduce end spacing or add a shield.
- Replicate the tested interval. Once one fixture and spacing interval look right, copy that interval across the wall rather than testing every fixture.
- Live with it for a few nights. Lighting looks different on clear versus cloudy nights and with interior lights on or off; adjust before final mounting.
Common placement mistakes and their fixes
- Fixtures mounted too high. Bottom bright, top dark. Fix: lower the fixture or add a second row.
- Fixtures mounted too low. Top bright, bottom dark. Fix: raise the fixture or add a second row.
- Fixtures too close to the wall. Beam too narrow to cover wall height; hotspots appear. Fix: increase setback.
Wall Washer Spacing and Overlap to Achieve Uniform Illumination
Spacing fixtures correctly prevents the most visible wall-washing problem: scallops and dark bands between fixtures.
Overlapping beams are essential. If two fixtures' light cones just touch at the wall, you'll see a dark line between them.
Here's a practical spacing formula:
- For 30-degree beams: Space fixtures 4 to 6 feet apart
- For 40-degree beams: Space fixtures 6 to 9 feet apart
- For 50-degree beams: Space fixtures 8 to 12 feet apart
These are starting points; actual spacing depends on wall height, fixture distance, and desired overlap. More overlap means more uniform results but more fixtures and higher cost.
How to Avoid Scallops and Dark Spots in Wall Washing
Scallops are curved bright and dark bands that appear between wall-washing fixtures when spacing is too wide or beam angles too narrow; dark spots concentrate in corners and at wall edges.
Scallops happen when beam overlap is insufficient. Each fixture creates a cone of light, and if those cones don't overlap enough, the wall shows individual cone shapes instead of one continuous wash.
Fix scallops by:
- Reducing fixture spacing (move fixtures closer together)
- Widening beam angles (if your fixtures allow angle adjustment)
- Increasing fixture distance slightly (counterintuitively, moving fixtures farther away can spread the beam wider at the wall)
Dark spots at corners and edges occur when fixtures don't reach the wall edges or top/bottom.
Fix dark spots by:
- Lowering fixture mounting height slightly
- Moving fixtures closer to the wall
- Adding fixtures at corners for extra coverage
Adjusting for Wall Color, Texture, and Surface Reflectance
Wall color and texture dramatically affect how your lighting looks, even with identical beam angles and placement.
Textured surfaces scatter light in multiple directions.
Reflectance matters. Matte finishes absorb and scatter light; glossy or semi-gloss finishes reflect it more directly.
Before finalizing your design, ask: What color is the wall? Is the surface smooth or textured?
Choosing the right beam angle for wall washing starts with understanding your wall dimensions, fixture distance, and desired lighting effect.
Frequently Asked Questions
What beam angle is best for wall washing?
The ideal beam angle depends on your wall height and how far the fixture sits from the wall. Narrower beams (15-20 degrees) suit taller walls or fixtures mounted far from the surface; wider beams (40-50 degrees) cover shorter walls or closer installations. Test your specific setup to confirm even wall coverage without dark gaps or bright hotspots.
How far should a wall-washer light be from the wall?
Typical wall washer spacing ranges from 18 inches to 3 feet from the wall, depending on beam angle and desired coverage. Closer mounting (18-24 inches) works with narrower beams; farther placement (2-3 feet) suits wider beams. The greater the distance, the wider your beam angle must be to maintain uniform illumination. Always verify the fixture's photometric data and test on-site to confirm even light distribution across your wall.
How do you avoid scallops and dark spots when wall washing?
Scallops and dark spots occur when beam overlap is insufficient or fixtures are spaced too far apart. Ensure overlapping beams create even coverage by spacing fixtures closer together and using a beam angle wide enough for your mounting height and distance. Test the layout before final installation. Adjust fixture aiming angles slightly if needed to fill gaps. Wall color and texture also affect visibility of imperfections; lighter, smoother surfaces show flaws more readily than textured or darker walls.
What is the difference between wall washing and wall grazing?
Wall washing uses a wider beam angle and closer fixture placement to create even, uniform light across the entire wall surface, emphasizing overall color and shape. Wall grazing employs a narrower beam angle and fixtures positioned very close to the wall (often just 6-12 inches away), creating dramatic shadow and texture emphasis. Wall grazing highlights surface details and architectural features; wall washing provides general facade illumination. Choose based on whether you want to showcase texture or achieve even, flattering coverage.