
How to Troubleshoot Outdoor Lighting Systems
Table of Contents
- Start Here: A Symptom-Based Troubleshooting Flow for Outdoor Lighting Systems
- When Outdoor Lights Are Not Working: Power, Outlets, and Breakers
- Low-Voltage Landscape Lighting Troubleshooting: Wiring, Fixtures, and Voltage Drop
- Landscape Lighting Transformer Troubleshooting: Is the Transformer the Problem?
- Outdoor Motion Sensor Light Troubleshooting: Settings, Sensitivity, and Sensor Repair
- Weather-Related Faults, Solar and Smart Lights, and When to Stop
- Repair, Replace, or Call a Professional? Costs and Maintenance
- Conclusion: Keep Your Outdoor Lighting System Working Year-Round
- Frequently Asked Questions
Last Updated: October 7, 2026
Start Here: A Symptom-Based Troubleshooting Flow for Outdoor Lighting Systems
When your outdoor lights stop working, the problem usually comes down to one of five things: power, a tripped breaker, a bad connection, a failed transformer, or a sensor setting. This guide from Paramount Outdoor Lighting Group walks you through how to troubleshoot outdoor lighting systems step by step, from the outlet to the last fixture.
Here is the order that saves the most time:
- Confirm the light has power
- Check the outlet and breaker
- Inspect the power adapter or transformer
- Test the wiring and connections
- Test the fixture itself
- Check sensors and settings
- Decide: repair, replace, or call an electrician
Work through these in order. Skipping ahead usually means replacing parts that were never broken.
What You'll Need Before You Start
Gather these first:
- A voltage tester or multimeter
- A flashlight or headlamp
- Work gloves
Total time: 30-60 minutes for most home systems.
When Outdoor Lights Are Not Working: Power, Outlets, and Breakers
If an entire run of outdoor lights is dead, the fault is almost always upstream of the fixtures. Start at the power source.
Checking the Outlet and Circuit Breaker
Test the outlet the system plugs into with a small lamp or phone charger. If it does not work, check your electrical panel for a tripped breaker and reset it once.
If the outlet sits in a weather-exposed spot, confirm it has a working cover. Moisture in an outlet is one of the most common reasons outdoor lights not working issues start in spring.
Inspecting the Power Adapter or Transformer
Most residential systems run through a power adapter or transformer that steps household current down to low voltage. Look for:
- A loose or partially seated plug
- A blown fuse inside the transformer housing
- A tripped thermal cutout (some units reset after cooling)
If the transformer hums but no lights come on, the unit may be failing.
Low-Voltage Landscape Lighting Troubleshooting: Wiring, Fixtures, and Voltage Drop
Low-voltage landscape lighting troubleshooting follows one rule: test at the source, then work outward. Voltage drop, loose connections, and corroded splices cause most failures, a multimeter and a few readings separate guessing from knowing.
Set Up Your Multimeter for Low-Voltage Work
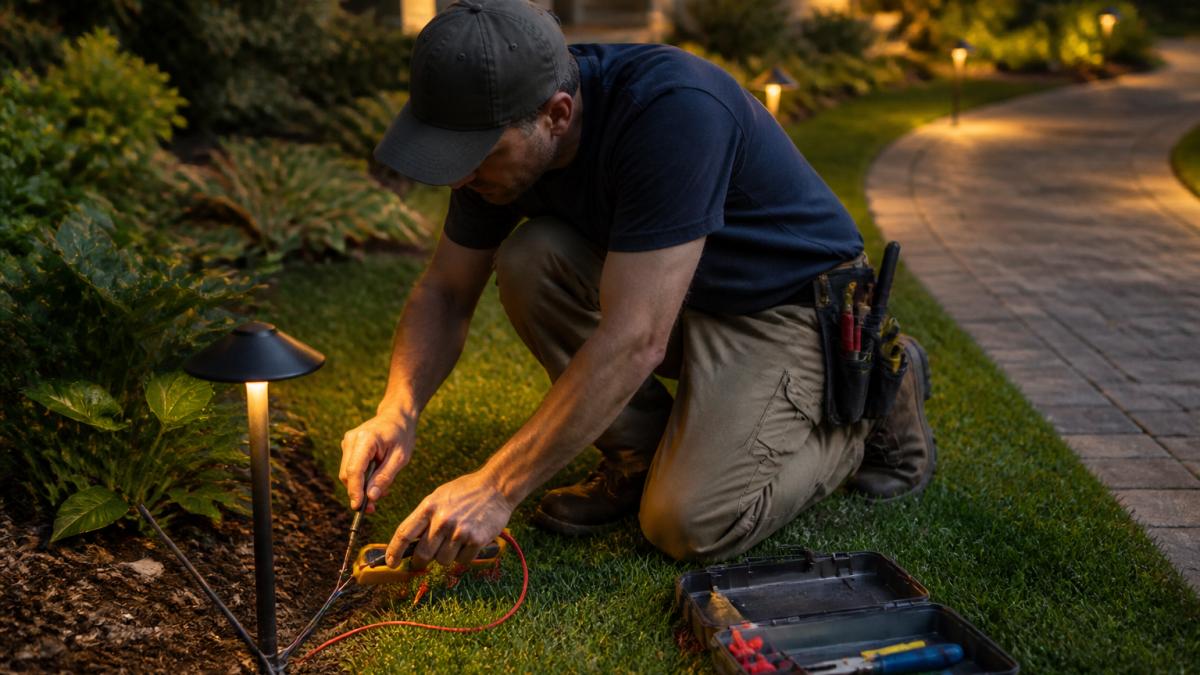
Most residential landscape systems run on 12-15 volts AC, though some transformers offer a 12V/13V/14V/15V tap. Set your meter to AC voltage in the 0-200V range (or auto-range); DC-only meters will not read a magnetic transformer output correctly.
A few practical notes:
- Use meter leads with fine tips so you can probe inside wire nuts and terminal blocks.
- If your meter has a min/max mode, use it to catch intermittent drops while you wiggle connections.
- A non-contact voltage tester is fine for a quick "is this live?" check, but it will not tell you the actual voltage, so it cannot diagnose voltage drop.
Measure Voltage at the Transformer First
Before you walk the run, confirm the transformer output.
- Unplug the transformer from the outlet.
- Open the low-voltage terminal compartment (usually a hinged door or a few screws).
- Plug the transformer back in with the compartment accessible and the meter leads already positioned.
- Touch one lead to each low-voltage terminal and read the AC voltage.
A healthy 12V transformer typically reads around 12-14 volts AC with no load and drops slightly under load. If you read well under the rated output with nothing connected, the transformer is the problem. If it reads correctly unloaded but collapses under load, it is undersized or failing.
Walk the Run and Test Fixture by Fixture
With the transformer confirmed, work outward from the first fixture to the last.
- At each fixture, probe the two wires feeding it and note the voltage.
- A healthy reading at the first fixture on a 12V system is usually 11-12V under load.
- Expect a gradual drop down the run; keep the last fixture at or above about 10.5-11 volts AC so it still lights at full brightness.
Write the readings down, a voltage map turns a vague "some lights are dim" complaint into a specific location.
Diagnose Voltage Drop
Voltage drop is the loss of voltage as current travels through resistance in the cable. It worsens with long runs, thin-gauge cable (16-gauge drops faster than 12-gauge), high total wattage, and corroded or loose connections.
If the first fixtures look bright and the far ones look dim or amber, you have a voltage drop problem, not a dead fixture. Practical fixes, in order of effort:
- Move the transformer tap to a higher voltage setting (13V, 14V, or 15V) if your unit has one.
- Re-terminate every connection on the run with fresh, waterproof connectors.
- Split the run into two shorter home runs back to the transformer.
Inspect Wiring and Electrical Connections
Walk the run and check every connection point for loose wire nuts, nicks from edging tools or shovels, green or white corrosion on copper, splices sitting in standing water, and cable pinched under edging, pavers, or roots. Re-strip and re-terminate any suspect connection with waterproof connectors rated for direct burial, and keep splices above the soil line so they drain rather than soak.
Test the Fixture Itself
Swap a known-working fixture into the suspect socket. If it lights up, the original fixture is the problem; if it stays dark, the fault is upstream in the wiring or transformer. Check the bulb or LED module too, a single failed LED can break the circuit on older series-wired systems, while on parallel-wired systems one dead fixture usually does not take down the rest of the run.
Landscape Lighting Transformer Troubleshooting: Is the Transformer the Problem?
Landscape lighting transformer troubleshooting starts with one measurement: voltage at the transformer's low-voltage terminals. If the reading is well below the rated output, the transformer is likely failing; if it reads correctly, the problem is downstream. Check, in order: the wattage rating against all connected fixtures, voltage at the terminals with a multimeter, the internal fuse or breaker, and any thermal cutout tripped from overload.
Outdoor Motion Sensor Light Troubleshooting: Settings, Sensitivity, and Sensor Repair
Outdoor motion sensor light troubleshooting usually comes down to settings, not hardware. Before replacing anything: cover the lens and confirm the light turns off, walk through the detection zone at a normal pace, check the sensitivity and range dials, confirm the time-delay setting, and clean the lens of dirt, cobwebs, or insect nests. If the light stays on constantly, the sensor may be stuck in "test" mode or set too sensitive; if it never triggers, the sensor head may have failed.
Weather-Related Faults, Solar and Smart Lights, and When to Stop
Weather is the leading cause of outdoor lighting faults. Water intrusion, freeze-thaw cycles, and UV damage break down connections over time. After a storm, inspect every exposed splice and fixture gasket before assuming a component failed.
Diagnosing Weather-Related Faults
Work through these checks after any major storm, freeze, or heat wave:
- Water ingress: Open each fixture and look for standing water, droplets on the lens, or rust streaks. Water inside a line-voltage fixture is a stop-work condition; in a low-voltage fixture it usually means a failed gasket or cracked lens.
- Corrosion: Green or white powder on copper, or chalky residue on aluminum terminals, means moisture has been sitting in the connection. Clean with a wire brush, re-strip, and re-terminate with a waterproof connector.
- Freeze-thaw damage: Look for cable heaved out of the ground, cracked conduit, or splices pulled apart. Re-bury cable at least 6 inches deep where it crosses lawns or beds.
A simple seasonal habit prevents most of this: after the first hard freeze and again after the first spring thaw, walk the run and check every exposed splice and fixture gasket.
Solar Outdoor Lighting Problems
Solar lights fail for a short list of reasons, most diagnosable in a few minutes:
- Dirty or shaded panels: Wipe the panel with a damp cloth and confirm it gets several hours of direct sun; a shaded panel will never fully charge the battery.
- Dead battery: Most solar fixtures use a rechargeable battery that lasts a few seasons. If the light runs an hour or two after a sunny day and dies, the battery is the likely culprit. Match the replacement to the voltage and chemistry printed on the old cell.
- Failed photocell: If the light stays on in daylight or never comes on at night, clean the sensor window first; the photocell or its cover may be dirty or failed.
Smart and App-Controlled Outdoor Lighting Problems
Smart fixtures add a network layer on top of the electrical one. When a smart light misbehaves, separate the two:
- Confirm the fixture works locally. If it works locally but not from the app, the problem is the network, not the fixture.
- Check Wi-Fi or hub connection. Most smart outdoor lights connect over 2.4 GHz Wi-Fi or a proprietary hub. If your router changed or you added an access point, the light may have dropped off.
- Power-cycle in the right order. Unplug the hub or bridge, wait about 30 seconds, plug it back in, and let it fully boot before re-pairing. Re-pairing too early is a common cause of failed setups.
If the fixture works locally but never reconnects, the radio module or hub is the likely failure point, not the LED or driver.
When to Stop and Call a Licensed Electrician
Some problems are not DIY. Stop work, switch off the circuit at the panel, and call a licensed electrician if you find burned, melted, or scorched wiring; a breaker that trips again immediately after reset; exposed conductors at line voltage (120V or 240V); water inside a line-voltage fixture, box, or outlet; a burning smell near a fixture, transformer, or outlet; damage from rodents, digging, or a vehicle strike on line-voltage cable; or any work at height where you cannot safely stabilize a ladder.
Repair, Replace, or Call a Professional? Costs and Maintenance
Most low-voltage failures are repairable: a loose connection, a corroded splice, or a failed LED module. Replacement makes more sense when a transformer is undersized, a fixture housing is cracked, or a sensor has failed twice in the same season.
A simple maintenance routine prevents most repeat failures:
| Task | Frequency | Why It Matters |
|---|---|---|
| Inspect connections | Every 3 months | Catches corrosion early |
| Clean fixture lenses | Every 3 months | Keeps light output steady |
| Check transformer load | Yearly | Prevents overload trips |
| Test sensors | Seasonally | Confirms detection range |
| Trim landscaping | Seasonally | Stops wire damage |
If you would rather not climb a ladder every season, Paramount Outdoor Lighting Group handles design, installation, and ongoing maintenance for low-voltage landscape and architectural systems, including our JellyFish Lighting options for year-round color and holiday displays.
Conclusion: Keep Your Outdoor Lighting System Working Year-Round
Outdoor lighting fails for predictable reasons: power loss, loose connections, failed transformers, or sensor settings. Working through the flow above in order helps you find the real fault fast instead of replacing parts at random.
When a system keeps failing, the fix is usually a better-designed install, not another repair.
Request a walk-through with Paramount Outdoor Lighting Group and get a lighting system built to last.
Frequently Asked Questions
What are the most common problems with outdoor lighting systems?
Most failures trace back to five things: a tripped circuit breaker or dead outlet, a loose or corroded electrical connection, a failed transformer, a burned-out bulb or LED module, or a sensor that has drifted out of adjustment. Start your outdoor lighting troubleshooting at the power source, then work outward through the wiring and fixtures. This order saves time because it rules out the cheapest and most common causes first.
How can I tell whether an outdoor lighting problem is caused by the transformer?
Test the transformer's low-voltage output terminals with a multimeter. If the input voltage is present but the output reads zero or well below the rated voltage, the transformer has likely failed. Also check for a tripped built-in breaker, a blown fuse, or a photocell that thinks it is still daytime. If the transformer checks out but only some lights work, the fault is downstream in the wiring or a fixture.
Why do some landscape lights stop working while others stay on?
When part of a low-voltage system stays lit, the transformer and main feed are fine. The problem sits in a branch circuit or a single fixture. Look for a loose connection at the first dark light, corrosion inside a wire nut, a failed LED module, or voltage drop on a long run. Re-seating connections and testing voltage at each fixture usually isolates the fault within minutes.
When should I call a professional to repair outdoor lighting?
Call a licensed electrician or lighting professional if you see scorched wires, smell burning, find water inside a transformer or fixture housing, or if the circuit breaker trips again immediately after you reset it. The same applies to any work on line-voltage wiring or a buried cable you cannot safely isolate. Low-voltage connector swaps and sensor adjustments are reasonable DIY tasks; anything involving the electrical panel is not.