
Troubleshooting Flickering Outdoor Path Lights

Table of Contents
- Why Flickering Outdoor Path Lights Happen: The 6 Most Common Causes
- How to Fix Loose Wire Connections in Outdoor Lights
- Landscape Lighting Transformer Troubleshooting: Load, Voltage, and Corrosion
- Bulb Compatibility, Dimmer Switches, and Smart Lighting Upgrades
- Voltage Drop and Weather Damage: Two Hidden Causes of Flickering
- When to Call a Professional for Landscape Lighting Repair
- Frequently Asked Questions
Last Updated: September 10, 2026
Why Flickering Outdoor Path Lights Happen: The 6 Most Common Causes
Troubleshooting flickering outdoor path lights almost always traces back to one of six problems: loose wire connections, a failing transformer, bulb incompatibility, voltage drop, weather-related damage, or a mismatched dimmer switch. Identifying which one takes about ten minutes with a multimeter. This guide walks through each cause, the fix, and when the job belongs in a professional's hands.
Most homeowners replace the bulb first, the least likely culprit in a low-voltage system.
Landscape lighting transformer troubleshooting starts with the power source, not the fixture. A transformer that's overloaded, corroded, or undersized makes every light on the run flicker in unison; a single flickering fixture points to a local problem.
| Symptom | Most Likely Cause | First Check |
|---|---|---|
| One light flickers | Loose connection or bad bulb | Wire nuts at that fixture |
| All lights flicker together | Transformer overload or voltage drop | Transformer wattage vs. total load |
| Flicker after rain | Corrosion or moisture ingress | Connectors and fixture housing |
| Flicker when dimmed | Incompatible dimmer switch | Dimmer and driver compatibility |
How to Fix Loose Wire Connections in Outdoor Lights
Loose wiring is the most common cause of flickering path lights and the cheapest to fix. A loose connection lets current arc intermittently, which reads as a flicker or blink.
Work through these steps with the transformer unplugged:
- Kill the power. Unplug the transformer from the outlet before touching any connection.
- Open the fixture housing and inspect the wire nuts or terminal block.
- Look for corrosion. Green or white residue on copper means oxidization. Cut the wire back to clean copper.
- Re-strip and reconnect. Strip roughly 1/2 inch of insulation and twist a fresh wire nut on tight.
- Test continuity. Set your multimeter to continuity and confirm the connection reads closed.
- Apply dielectric grease to the connector to block moisture.
- Restore power and observe for a full minute before closing the housing.
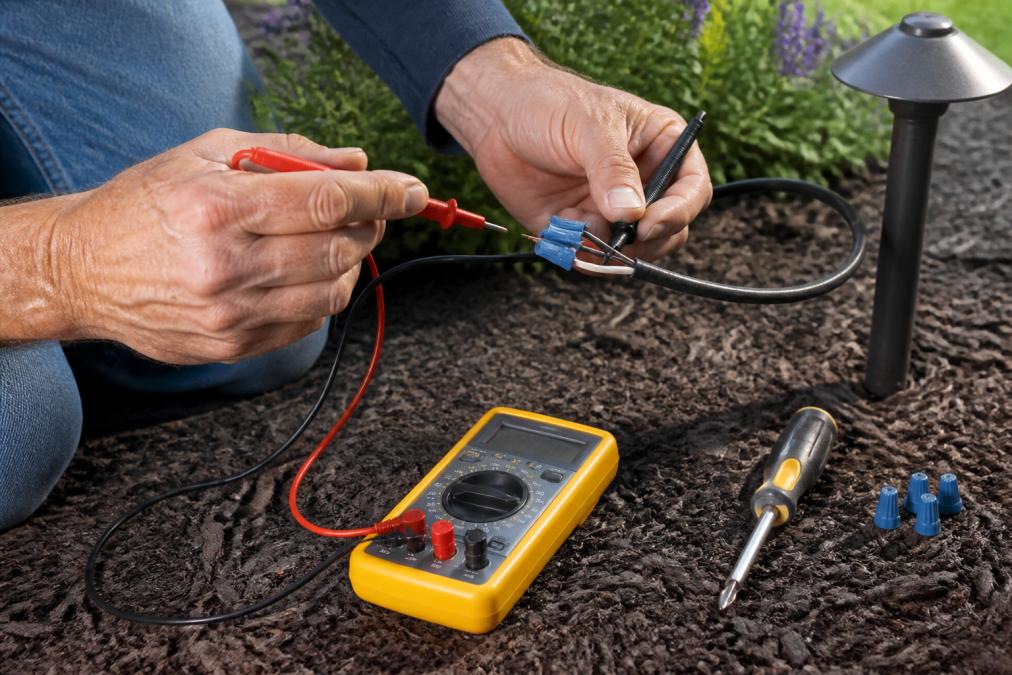
Don't reuse a wire nut that's been twisted on and off, the spring loses tension and the connection fails again within a season. Use a new connector every time.
Landscape Lighting Transformer Troubleshooting: Load, Voltage, and Corrosion
An overloaded transformer is the most overlooked cause of flickering, and it's easy to test: compare total connected wattage against the transformer's rated capacity.
How to Calculate Total Load vs. Transformer Capacity
Every fixture has a wattage rating printed on the fixture body, the bulb, or the LED driver. Add them up.
- 8 path lights at 4W each = 32W
- 2 uplights at 7W each = 14W
- 1 spotlight at 12W = 12W
- Total connected load = 58W
Now compare that to the transformer's rated output. A 60W transformer running a 58W load sits at roughly 97% capacity, well into the danger zone (energy.gov). The 80% rule matters because LED drivers draw a brief inrush current at startup, often several times their running wattage, so a transformer near its ceiling may flicker every time it powers on.
A 58W load belongs on a 100W transformer, which puts you at 58% capacity and leaves real headroom for future fixtures.
Testing Transformer Output Under Load
A transformer can read a healthy 12V with nothing connected and sag badly once fixtures come on, so test under load.
- Leave the system fully connected and powered.
- Set your multimeter to AC volts.
- Probe the transformer's output terminals where the main cable lands.
- Read the number. A 12V transformer should hold roughly 11.5V-13V under a properly sized load (ul.com). If it drops below 11V with everything on, the transformer is either overloaded, failing, or both.
- Probe the farthest fixture and compare. A large gap between transformer and fixture points to voltage drop, not transformer failure.
If output is unstable with no load connected at all, fluctuating wildly or reading far off the rated voltage, the transformer itself has failed and needs replacement.
Load Balancing Across Two Transformers
When a single transformer is maxed out, splitting the run across two units often solves what looks like a single-unit failure. Divide fixtures so each transformer sits under 80% of its rating, and balance the runs by length as well as wattage, a 40W load on a 120-foot run will still sag at the far end.
Inspecting for Corrosion and Scorching
With the transformer unplugged, open the enclosure and inspect the terminal block. Look for:
- Green or white residue on copper, oxidized connections that add resistance
- Brown or black discoloration around terminals, heat damage from a loose or overloaded connection
- A burning smell, stop and replace the affected wiring before restoring power
- Loose screws on the terminal block, retorque them; a loose terminal is a flicker waiting to happen
Cut corroded wire back to clean copper, re-strip, re-terminate, and apply dielectric grease to slow future oxidation.
Bulb Compatibility, Dimmer Switches, and Smart Lighting Upgrades
Not every LED bulb works in every low-voltage fixture, and mismatched dimmers cause more flicker complaints than any other modern upgrade. LED bulbs contain drivers that expect a specific voltage range and dimming signal.
If your lights flicker only when dimmed, the dimmer switch is almost certainly the problem. Traditional dimmers were built for incandescent loads. LEDs draw far less current, so the dimmer can't regulate them cleanly. Swap to a dimmer rated for LED loads, or one listed as compatible with the fixture's driver.
Smart lighting adds another variable: many systems expect a constant voltage supply and control brightness at the fixture rather than the transformer. The smart route usually needs a dedicated transformer and compatible drivers throughout, and retrofitting smart control onto an older analog system is where most compatibility headaches begin.
Voltage Drop and Weather Damage: Two Hidden Causes of Flickering
Voltage drop is what happens when power loses strength traveling down a long cable run: the farther a fixture sits from the transformer, the less voltage it receives. When voltage sags below what the fixture needs, you get dimming, flickering, or a fixture that won't start. Here's how to measure and calculate it.
How to Measure Voltage Drop With a Multimeter
You need a multimeter that reads AC voltage in the 0-50V range. Set it to AC volts, not DC, landscape transformers output AC unless you're running a DC smart system.
- Measure at the transformer first. With the system powered and all fixtures on, touch the probes to the transformer's output terminals. Write that number down. A healthy 12V transformer typically reads somewhere between 11.5V and 13V at the terminals under load.
- Measure at the farthest fixture. Open the fixture housing and probe the two input wires where they meet the fixture's socket leads. Record that number.
- Subtract. The difference between the two readings is your voltage drop on that run.
A common rule of thumb among installers is to keep total drop under about 1V on a 12V system, so the farthest fixture still sees at least 11V. If you're reading 9V or 10V at the end of the run, that fixture is starving, and flickering is the predictable result.
The Voltage Drop Calculation
To predict drop before you dig or rewire, you need three numbers: total wattage on the run, one-way cable length in feet, and wire gauge.
For 12V AC systems, a widely used approximation is:
Voltage drop ≈ (2 × length × current × resistance per foot) ÷ 1000
Where current in amps equals total watts divided by 12, and resistance per foot depends on gauge. Common values for stranded copper landscape cable:
- 18 AWG: roughly 0.0064 ohms per foot
- 16 AWG: roughly 0.0040 ohms per foot
- 14 AWG: roughly 0.0025 ohms per foot
- 12 AWG: roughly 0.0016 ohms per foot
Run the numbers on a 100-foot, 16 AWG run carrying 60 watts: current is 5 amps, so drop ≈ (2 × 100 × 5 × 0.0040) = 4V. That's a failing run. Drop to 12 AWG on the same length and load, and you get ≈ 1.6V, still high but workable if you shorten the run or split it.
Weather Damage: What to Look For and When
Weather damage works on a slower timeline than voltage drop. Direct burial cable is designed for underground use, but above-ground connections still take on water. Over a few seasons, insulation cracks, connectors corrode, and the circuit shorts intermittently, flickering after heavy rain that then clears up is a strong signal of moisture ingress.
The failure points, in order of how often they show up:
- Wire nuts at each fixture, the most common entry point for water
- Splices along the run, any place two cables were joined with a connector
- The transformer terminal block, especially if the enclosure isn't gasketed
- Cable jackets nicked during installation, small cuts wick water along the copper
A multimeter set to continuity will find a wet short: disconnect the suspect section and probe across the two conductors, any reading other than open (OL) means current is leaking. Dry the connection, cut back to clean copper, and re-terminate with a fresh connector and dielectric grease.
When to Call a Professional for Landscape Lighting Repair
Call a professional when the fault is underground, the transformer itself has failed, or you've replaced connectors and bulbs and the flicker persists. Digging up direct burial cable is slow, messy work, and a misdiagnosed repair means doing it twice.
The clearest signals it's time to hand it off:
- The transformer hums, runs hot, or trips its breaker repeatedly
- Voltage at the transformer is unstable with no load connected
- You've traced the run and found a break in buried cable
- The system uses a ground fault circuit interrupter that keeps tripping
- Multiple fixtures on different circuits flicker at once
A GFCI that trips repeatedly is a safety issue, not a nuisance (osha.gov). It means current is escaping the circuit somewhere, and that needs proper diagnosis rather than a reset.
If your system keeps failing, a walk-through will tell you whether it needs repair or replacement.
Frequently Asked Questions
What could be causing my outdoor lights to flicker?
Flickering outdoor path lights usually trace back to loose or corroded wire connections, a failing or overloaded transformer, incompatible LED bulbs, voltage drop over long cable runs, or weather-related wire damage. Start by checking connections at each fixture and the transformer terminal block. If those are tight, test voltage output with a multimeter. Loose wiring and transformer issues account for most cases.
How to tell if a landscape light transformer is bad?
Test the transformer's voltage output with a multimeter at the terminal block. If it reads below the rated voltage (typically 12V or 15V), the transformer may be failing or overloaded. Also check for a hot smell, buzzing, or a tripped internal breaker. If the total wattage of your fixtures exceeds the transformer's capacity, it will struggle and cause flickering. A transformer load test confirms whether it can handle the connected load.
Do flickering lights indicate an electrical problem?
Yes. Flickering path lights signal an issue somewhere in the circuit, whether a loose connection, corrosion, voltage drop, or a failing transformer. While low-voltage landscape systems are safer than 120V lines, ignoring the problem can lead to short circuits, damaged fixtures, or a transformer failure. Address flickering promptly to avoid more costly repairs.
Is it safe to leave flickering outdoor lights on?
It is not recommended. Flickering often means a loose wire or failing component that could overheat or short out. While low-voltage systems pose less shock risk, a short circuit can damage the transformer and fixtures. Turn the system off at the transformer until you can inspect connections, test voltage, and repair the cause.