
Prevent Flickering in Outdoor Lighting: 7 Steps
Table of Contents
- Step 1: Identify the Type of Flickering and Check for Loose Bulb Connections
- Step 2: Verify LED and CFL Bulb Compatibility with Your Fixture
- Step 3: Troubleshooting Low Voltage Landscape Lighting Circuits
- Step 4: Address Outdoor Lighting Photocell Sensor Problems
- Step 5: Diagnose Voltage Drop in Landscape Lighting and LED Drivers
- Step 6: Inspect Wiring, Corrosion, and Grounding
- Step 7: Weatherproof Your Fixture and Test Smart Home Integration
- Prevent Flickering in Outdoor Lighting Before Problems Start
- Frequently Asked Questions
Last Updated: September 2, 2026
Step 1: Identify the Type of Flickering and Check for Loose Bulb Connections
Flickering outdoor lights fall into two patterns: rapid strobing (50-120 times per second) typically indicates LED driver issues or incompatible bulbs, while gradual dimming suggests voltage problems or loose connections.
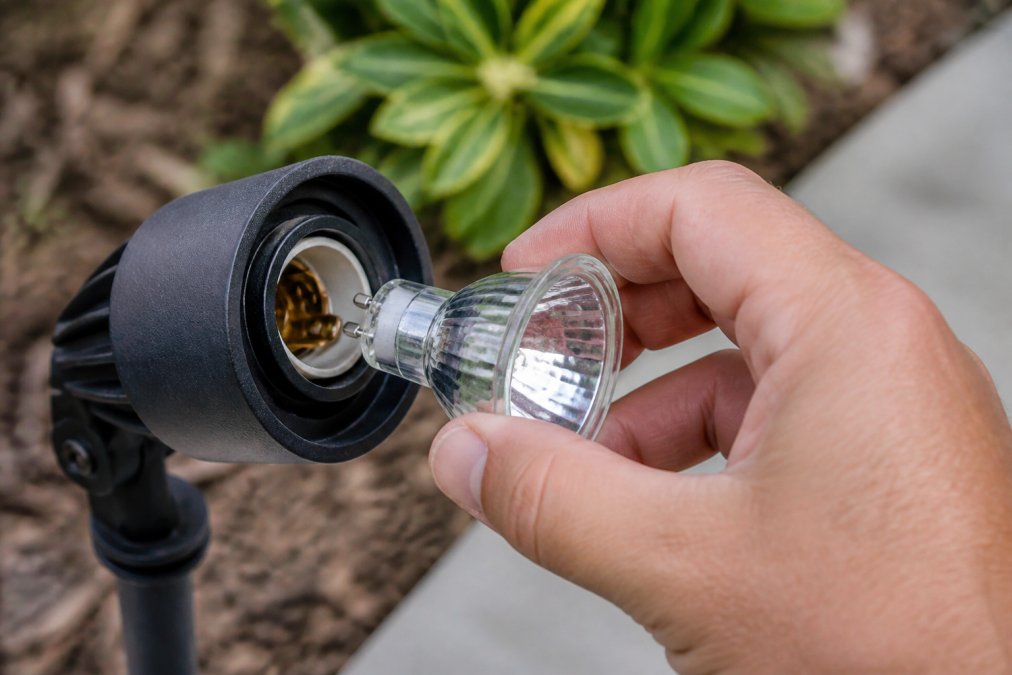
Start with the simplest culprit: the bulb itself. Turn off power at the fixture and gently twist the bulb clockwise until it seats firmly. A bulb that screws in too easily or feels loose indicates a worn socket or undersized bulb base.
Rapid strobing versus gradual dimming
Rapid strobing is most common with LED bulbs in fixtures designed for incandescent or CFL technology. Gradual dimming cycles slowly and suggests voltage fluctuation or a failing power supply component.
Socket inspection and the black tape test
Turn off power, remove the bulb, and inspect the metal contacts inside the socket for corrosion or pitting. For a quick functionality check, wrap a small piece of electrical tape around the base of the bulb (not the threads), reinsert it, and power on. If flickering stops, the socket contacts are worn and need replacement.
Loose connections at the junction box also cause flickering. Inspect where the fixture wiring connects to the main circuit for corrosion, loose wire nuts, or burn marks. Many flickering issues stem from connections that loosen over time due to thermal expansion and contraction.
Step 2: Verify LED and CFL Bulb Compatibility with Your Fixture
Not all LED and CFL bulbs work reliably in all outdoor fixtures. LED drivers, the electronic components inside LED bulbs that regulate power, interact with the fixture's wiring and any dimming controls. When an LED driver receives unstable voltage, it compensates by rapidly cycling on and off, producing strobing.
Check your fixture's specifications and the bulb's compatibility rating. If your fixture uses a dimmer, ensure the bulb is rated "dimmable", non-dimmable LEDs will flicker when dimmed. For low-voltage landscape lighting systems, verify that your LED bulbs match the transformer's output specifications, typically 12V or 24V.
CFL bulbs are more sensitive to voltage fluctuation than incandescent bulbs and will flicker if supplied with unstable power. Switching to quality LED bulbs often resolves the issue, but always confirm that your fixture can support the LED bulb's wattage and driver requirements.
Step 3: Troubleshooting Low Voltage Landscape Lighting Circuits
Low-voltage landscape lighting systems operate at 12 or 24 volts and depend on voltage remaining relatively consistent throughout the circuit. Voltage naturally drops as distance from the transformer increases. When voltage drop exceeds acceptable levels, lights at the end of the circuit flicker or dim noticeably.
Measuring voltage drop across the circuit
Use a multimeter set to DC voltage mode to measure voltage at three points: directly at the transformer output, midway along the circuit run, and at the furthest fixture. If the transformer outputs 12V but the distant fixture receives only 10V or less, voltage drop is your problem. Acceptable voltage drop is typically no more than 10% of the transformer's rated output, so for a 12V system, fixtures should receive at least 10.8V (ieee.org).
Thicker wire reduces resistance and voltage drop. If your landscape lighting circuit runs more than 50 feet from the transformer, consider upgrading to thicker gauge wire (8 or 10 gauge instead of 12 gauge).
Checking amperage and wattage load
Verify that your circuit's total wattage doesn't exceed the transformer's rated capacity. Most landscape lighting transformers are rated for 100-300 watts total load (nema.org). Exceeding this capacity causes voltage to sag under load, resulting in flickering. Reduce the load by removing fixtures, using lower-wattage bulbs, or adding a second transformer to split the circuit.
Step 4: Address Outdoor Lighting Photocell Sensor Problems
Photocells control outdoor lights automatically, turning them on at dusk and off at dawn. A faulty or misaligned photocell causes erratic flickering as the sensor rapidly switches between on and off states, especially during twilight hours.
Cleaning and repositioning the sensor
Photocells accumulate dirt, dust, and insect debris over time, interfering with their ability to accurately sense ambient light levels. Turn off power and gently clean the photocell lens with a soft, dry cloth. Avoid harsh chemicals or water, which can damage internal components.
Photocells must face away from any light sources, including the fixture they control. If a photocell points toward the fixture's light or nearby streetlights, it receives conflicting signals and cycles erratically. Reposition the photocell to face north or away from all artificial light sources. Some photocells have adjustable sensitivity dials; try lowering sensitivity slightly so the sensor doesn't trigger on marginal light levels near dusk and dawn.
Testing at nightfall and dusk
Observe the fixture for several minutes as light levels drop during the transition between day and night. If the light flickers repeatedly or cycles on and off every few seconds during this period, the photocell is likely the culprit. If the light remains steady once fully dark, the sensor is functioning normally.
Step 5: Diagnose Voltage Drop in Landscape Lighting and LED Drivers
LED drivers, the small electronic modules inside LED bulbs or built into LED fixtures, are sensitive to power supply stability. When an LED driver receives voltage that fluctuates or falls below its minimum operating threshold, it enters a protection mode that causes flickering.
Understanding LED driver frequency and power supply stability
LED drivers convert incoming AC or DC power into the precise voltage and current the LED requires. They operate at a specific frequency, typically 100-240 Hz for quality drivers. If incoming power supply frequency is unstable or voltage fluctuates, the driver struggles to maintain consistent output, and the LED flickers.
Quality drivers from reputable manufacturers operate at higher frequencies and tolerate wider voltage ranges. If you're experiencing flickering with budget LED bulbs, upgrading to name-brand bulbs with better drivers often resolves the issue.
Low-voltage landscape lighting systems depend on a stable transformer output. Test the transformer's output voltage under full load (all fixtures on). If voltage drops more than 10% from the rated output, the transformer needs replacement.
Thermal protection and inrush current issues
LED drivers include thermal protection circuits that shut down or reduce power if the driver overheats. In outdoor fixtures exposed to direct sunlight, poor ventilation can cause driver overheating, triggering thermal protection and causing intermittent flickering. Ensure fixtures have adequate ventilation and aren't covered by landscaping or mounting hardware that blocks airflow.
Step 6: Inspect Wiring, Corrosion, and Grounding
Corroded wiring and poor grounding cause flickering by creating high resistance in the circuit. As electrical current flows through corroded connections, voltage drops unpredictably, causing intermittent interruptions that appear as flickering.
Checking the junction box and electrical connections
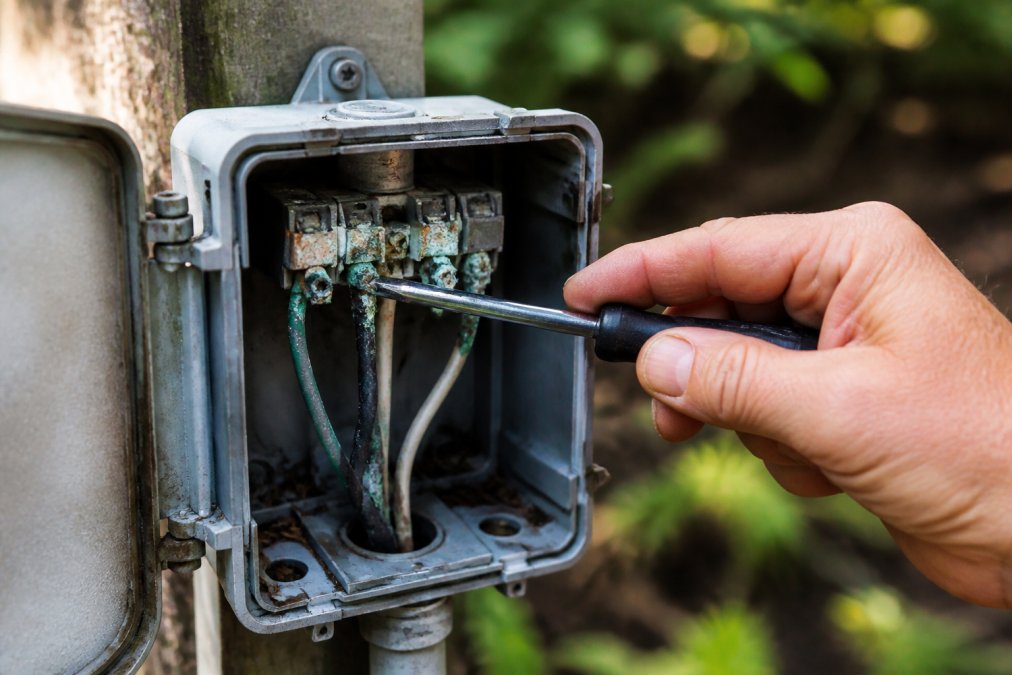
The junction box is where outdoor fixture wiring connects to your home's main electrical system. Turn off power at the breaker, then carefully inspect the junction box for discoloration, white or green crusty deposits (corrosion), or burn marks around wire connections.
If you see corrosion, gently loosen the wire nut, separate the wires, and inspect the connection points. If corrosion is light, clean it with a wire brush and reconnect with a new wire nut. For heavy corrosion, the affected wire section should be cut away and the connection remade using fresh wire and a quality wire nut rated for outdoor use.
All outdoor electrical connections must be made with waterproof wire nuts or sealed connectors. Replace any standard wire nuts with outdoor-rated connectors.
Repairing corroded contacts and improving grounding
Grounding provides a safe path for electrical faults and reduces electrical noise that can interfere with LED drivers. Outdoor lighting systems should include a proper ground wire connected to a grounding rod or your home's main ground. Check that all metal fixture housings are properly grounded using a multimeter set to resistance mode. If resistance between the fixture housing and ground exceeds a few ohms, improve grounding by adding a dedicated ground wire.
If underground wiring shows signs of corrosion, it should be replaced with UV-rated, outdoor-grade wire rated for direct burial.
Step 7: Weatherproof Your Fixture and Test Smart Home Integration
Moisture is a primary cause of flickering in outdoor lighting. Water intrusion into fixtures, junction boxes, or wiring creates corrosion and electrical leakage paths that cause intermittent flickering.
Sealing moisture intrusion and checking smart home interference
Inspect all fixture seals, gaskets, and caulking. Silicone caulk rated for outdoor use should seal any gaps around the fixture base or mounting points. Pay special attention to the junction box, where water most commonly enters the system.
For fixtures with removable lenses or covers, ensure gaskets are intact and seated properly. A missing or cracked gasket allows moisture directly into the fixture housing.
Smart home integration, including WiFi-connected switches, dimmer modules, or app-controlled systems, can interfere with LED drivers if not properly installed. If flickering began after adding smart home controls, test by temporarily disconnecting the smart device and powering the fixture directly. If flickering stops, the smart device is likely the culprit. Use shielded wiring and ferrite noise suppressors to isolate the smart device's signal from the lighting circuit.
Prevent Flickering in Outdoor Lighting Before Problems Start
Most flickering causes are preventable through regular maintenance and correct installation. Schedule annual inspections of your outdoor lighting system, especially before winter. Check for loose bulbs, corroded connections, and damaged wiring. Replace photocell batteries annually and clean sensor lenses twice yearly.
When installing new outdoor lighting or upgrading existing fixtures, invest in quality components. Premium LED bulbs with strong drivers, transformers rated for your circuit load, and outdoor-rated wiring and connectors eliminate most flickering issues.
At Paramount Outdoor Lighting Group, we design and install outdoor lighting systems that prevent flickering through proper component selection, correct voltage management, and professional-grade weatherproofing. If you're planning a new landscape lighting installation or struggling with persistent flickering, we can help you achieve reliable, flicker-free outdoor lighting. Request a walk-through to discuss your outdoor lighting needs and explore how expertly designed low-voltage systems can transform your property's nighttime appearance.
Flickering outdoor lights don't have to be a permanent problem. By systematically working through these seven diagnostic steps, you can identify the root cause and implement a lasting fix. Whether the issue is a loose bulb, incompatible LED bulbs, voltage drop, photocell malfunction, LED driver instability, corroded wiring, or moisture intrusion, each problem has a concrete solution. Professional installation and quality components ensure your outdoor lighting system performs reliably without flickering.
Frequently Asked Questions
Q: What is the most common cause of flickering in outdoor lights?
A: Loose bulb connections and socket issues are the leading causes. Start by removing the bulb, inspecting the socket threads for corrosion or damage, and reinstalling with a snug fit. If flickering persists after tightening all connections, the problem likely involves voltage fluctuation, LED driver incompatibility, or wiring issues deeper in the circuit.
Q: How do I know if my outdoor lighting photocell sensor is causing the problem?
A: Photocell sensors trigger flickering when they're dirty, misaligned, or detecting interference from nearby light sources. Turn off the fixture manually (bypass the sensor) and observe whether flickering stops. If it does, clean the sensor lens with a soft cloth, reposition it to face away from competing light sources, and test again at nightfall. Sensor malfunctions typically cause on-off cycling rather than continuous strobing.
Q: Can voltage drop in landscape lighting be fixed without replacing wiring?
A: Minor voltage drop can sometimes be corrected by reducing the electrical load on the circuit, cleaning corroded connections, or adjusting the power supply frequency settings on your LED driver. However, if voltage drop exceeds 10% across the circuit, rewiring with larger gauge wire is often necessary. Use a multimeter to measure voltage at the fixture versus at the transformer to diagnose the extent of the problem.
Q: Will a surge protector stop my outdoor lights from flickering?
A: A surge protector may help if the flickering is caused by electrical surges from nearby equipment or weather-related voltage spikes, but it won't solve most common outdoor lighting issues. Flickering from loose connections, incompatible LED bulbs, sensor problems, or wiring corrosion requires direct troubleshooting of those components. A surge protector is a preventive measure, not a cure for existing flicker.
This article was written using GrandRanker