
How to Light a Brick House Exterior at Night
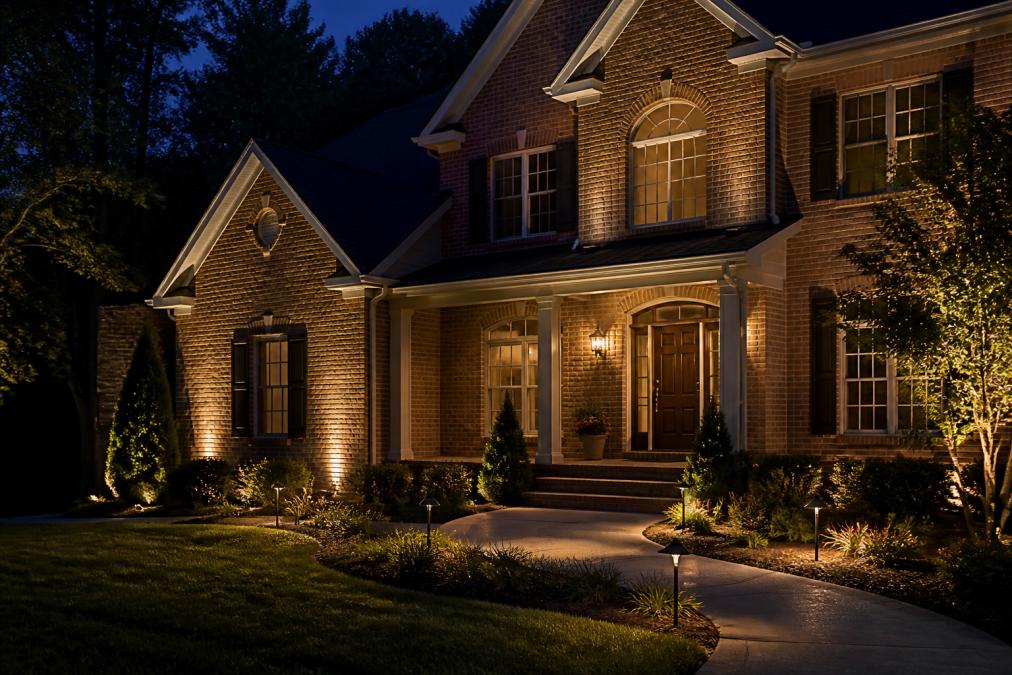
Table of Contents
- What You'll Need Before You Start
- How to Light a Brick House Exterior at Night: Step-by-Step
- Best Outdoor Lighting for Brick Walls
- Architectural Uplighting Techniques That Flatter Brick
- Outdoor Lighting Color Temperature Guide for Brick Facades
- No-Drill Mounting Alternatives and Surface Mount Options
- Common Mistakes to Avoid When Lighting Brick
- Conclusion
- Frequently Asked Questions
Last Updated: September 16, 2026
What You'll Need Before You Start
Learning how to light a brick house exterior at night starts with understanding what makes brick different. Brick is dense, fired clay: it does not flex, it does not forgive a wandering drill bit, and it chips if you rush the hole.
- Masonry drill bits in 3/16-inch and 1/4-inch sizes, carbide-tipped
- Hammer drill with a rotary-only setting for tile and a hammer setting for brick
- Tapcon concrete screws or masonry anchors sized to your fixture base
- Surface mount box or recessed electrical junction box rated for wet locations
- Weatherproof sealant and silicone caulk for every penetration
- Wire nuts, conduit, and a wiring harness rated for outdoor use
- GFCI outlet protection on the circuit, required by code for exterior receptacles
- Drilling template and painter's tape to mark hole centers
- Low voltage lighting transformer if you are running a 12V or 24V system
- Dusk-to-dawn sensor or smart controller for automation
How to Light a Brick House Exterior at Night: Step-by-Step
The process breaks into three phases: planning, mounting, and wiring. Rushing the planning phase is the biggest reason projects look uneven or fail inspection, so map the facade before you drill.
Step 1: Map Your Facade and Choose Fixture Locations
Walk the property at dusk and note where natural shadows fall. Uplighting works best when it grazes texture rather than blasting it flat. Mark positions with painter's tape so you can evaluate the composition from the street.
Focus on three things during this pass:
- Vertical rhythm. Space uplights evenly along the facade, typically one every 4 to 6 feet for a continuous wash.
- Feature hierarchy. Pick one or two architectural elements to highlight, such as an entry or a chimney, and let the rest recede.
- Pathway illumination. Coordinate facade fixtures with walkway lights so the two systems read as one design.
Step 2: Drill and Mount Fixtures Into Brick
Mark hole centers with a drilling template, then drill into the mortar joint whenever possible, mortar is softer and easier to repair. If you must drill the brick face, stay at least 1 inch from any edge to avoid chipping.
Step 3: Wire and Connect to Power
Run conduit or direct-burial cable to your power source, keeping the run short to limit voltage drop. Join conductors with wire nuts rated for the wire gauge, then tuck them so they are not pinched when you close the box.
Best Outdoor Lighting for Brick Walls
The best outdoor lighting for brick walls uses fixtures that throw a narrow, controlled beam rather than a wide flood. A wide beam strikes the brick face and mortar joint at nearly the same angle, so both return similar light and the relief disappears. A narrow beam approaches from a low angle, so the raised brick catches light while the recessed joint falls into shadow, that contrast reads as texture from the street.
- Well lights and in-grade uplights. Buried at the base of the wall, they shoot light upward and are nearly invisible in daylight. Best for grazing and wall washing. Look for a field-adjustable beam angle so you can tune the spread after installation.
- Gooseneck sconces. Ideal beside entry doors and garage bays. The curved arm throws light down and out, keeping glare out of a visitor's eyes while lighting the door face.
- Hardscape and step lights. Pathway illumination that complements the facade without competing with it. Keep them lower in output than the facade fixtures so the wall stays the focal point.
| Fixture Type | Best For | Mounting Style | Beam Control |
|---|---|---|---|
| In-grade uplight | Wall washing, texture | Buried at grade | Narrow to medium |
| Gooseneck sconce | Entries, garage bays | Surface mount box | Directional |
| Step light | Pathways, patios | Recessed or surface | Wide, low glare |
| Grazing fixture | Vertical texture | Surface or in-grade | Very narrow |
Beam Angle and Spacing: The Numbers That Matter
Beam angle is the specification most homeowners ignore and then regret. A 10-degree beam at 3 feet produces a tight, dramatic graze; a 60-degree beam at the same distance produces a soft wash with almost no shadow definition. Neither is wrong, but they are not interchangeable.
A common pattern that works on two-story brick facades:
- Grazing fixtures: 10 to 15 degree beam, mounted 6 to 12 inches from the wall, aimed 80 to 90 degrees upward.
- Wall-wash fixtures: 30 to 45 degree beam, mounted 18 to 24 inches from the wall, aimed 45 to 60 degrees upward.
- Accent fixtures: 15 to 25 degree beam, aimed at a single feature such as a column, arch, or chimney.
Output and Wattage: Matching the Fixture to the Wall
Brick is a dark, light-absorbing surface compared with stucco or painted siding, so a fixture that looks bright on a white wall can look dim on brick. Size output to the wall, not the fixture catalog.
Dark Sky and Neighbor-Friendly Fixture Selection
Outdoor lighting that spills upward into the night sky is both a design problem and, in many jurisdictions, a code problem. Dark sky principles favor fully shielded fixtures, meaning the light source is hidden and all light is directed below the horizontal plane. On a brick facade, that means in-grade uplights with a shielded aperture and sconces with a solid top cap.
Architectural Uplighting Techniques That Flatter Brick
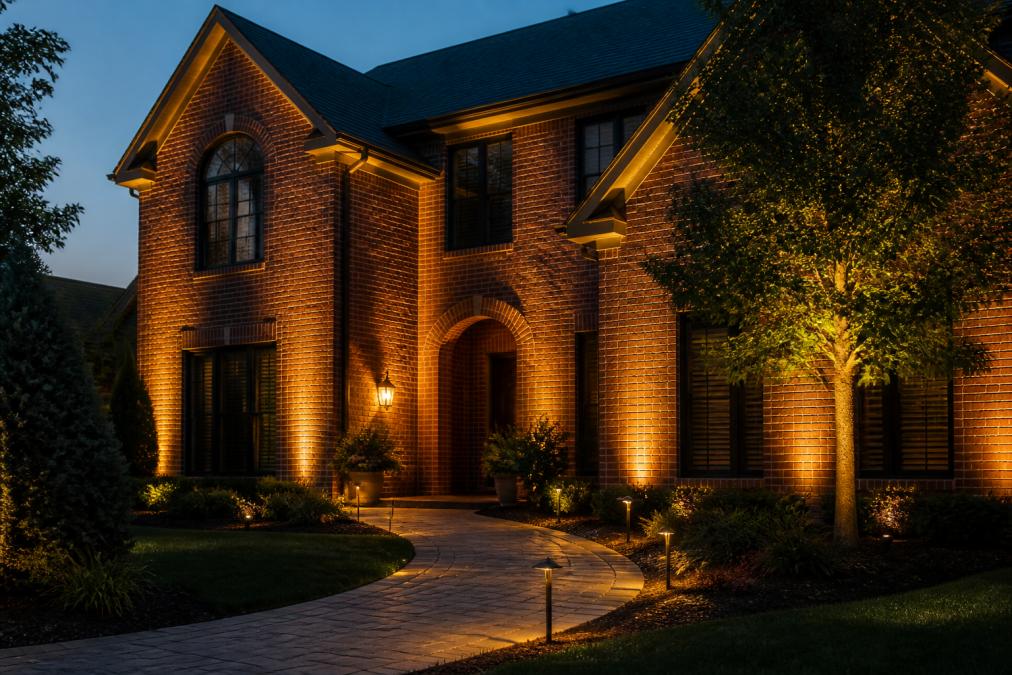
Architectural uplighting techniques fall into three approaches. Grazing light skims the wall at a steep angle and exaggerates every mortar joint and brick face. Wall washing spreads an even, softer field. Accent lighting picks out a single feature, like a column or an arch.
Outdoor Lighting Color Temperature Guide for Brick Facades
Color temperature determines whether brick reads as warm and inviting or harsh and clinical. The right range for brick facades is 2700K to 3000K, a warm white that complements the red, orange, and brown tones in most brick.
No-Drill Mounting Alternatives and Surface Mount Options
Not every homeowner wants to drill into brick, and sometimes the brick is historic or too hard to risk. No-drill mounting alternatives are worth considering before you commit to a hammer drill, especially for older masonry, a rental, or a wall you may want to restore later.
The Three No-Drill Families
Adhesive mounting plates. These use a high-bond exterior-grade adhesive to bond a metal or plastic plate to the brick face; the fixture then clips or screws onto the plate. They work best on clean, dry, unpainted brick with a flat face. Adhesive strength drops sharply on dusty, chalky, or sealed brick, and further on a surface that stays wet, a plate that holds 5 pounds indoors may hold far less on a south-facing wall.
What No-Drill Mounts Cannot Do
The honest trade-off is weight and permanence. A no-drill mount is kinder to the masonry and easier to reposition, but it holds less weight and offers fewer aiming options than a properly anchored surface mount box. A heavy die-cast sconce, a large glass globe, or anything that catches wind on a two-story wall belongs on a mechanical anchor.
Surface Mount Boxes: The Permanent Option
When you do commit to drilling, a surface mount box is the standard for brick. It sits proud of the wall, so you are not cutting a deep recess, and it gives the fixture a flat, stable base on an uneven surface. Recessed boxes look cleaner but require cutting a pocket into the brick, slower, dustier, and much harder to undo.
For a surface mount box on brick:
- Anchor into mortar joints where possible, and use masonry anchors or Tapcon-style concrete screws sized to the box.
- Seal the top and both sides with exterior silicone, and leave the bottom edge open as a drain path.
- Use a box rated for wet locations, and match the box material to the fixture so dissimilar metals do not corrode at the contact point.
Smart Control Without New Wiring
No-drill and stake-mounted systems pair naturally with smart controls. A plug-in smart outlet or a low voltage transformer with a built-in controller adds motion sensing, dusk-to-dawn scheduling, and app-based dimming without opening a wall. On a brick facade, you can run the lights bright for the evening and dim them to a low glow after a set hour, cutting light pollution and neighbor complaints.
Check the Rules Before You Mount Anything
Exterior lighting is regulated in more places than most homeowners expect. Local ordinances may cap fixture output, require full shielding, or restrict uplighting above the horizontal. Neighborhood association rules can be stricter still, sometimes specifying fixture color, style, or a maximum number of visible fixtures.
Before you buy, do three things:
- Check your local code for any dark sky or light trespass provisions.
- Read your neighborhood association's architectural guidelines for exterior lighting.
- If your home is in a historic district, confirm whether exterior fixtures require review or approval.
Common Mistakes to Avoid When Lighting Brick
The mistakes that ruin brick lighting are predictable, and most happen before the first fixture goes up.
- Flooding instead of grazing. Wide floodlights wash out texture and create glare for neighbors.
- Mixing color temperatures. A 2700K fixture next to a 4000K fixture looks broken, not layered.
- Skipping the GFCI. Exterior circuits need ground-fault protection, and inspectors check for it.
- Ignoring voltage drop. Long low voltage runs without adequate wire gauge cause flickering and dim ends.
- Sealing a box completely. Junction boxes need a drain path at the bottom, or trapped moisture corrodes connections.
- Over-lighting. More fixtures do not mean better design. Three well-aimed lights beat ten scattered ones.
Conclusion
Lighting a brick house well comes down to three decisions: how you aim the light, what color temperature you use, and how you mount fixtures without damaging the masonry. Get those right and the rest is detail work.
Frequently Asked Questions
What color temperature is best for highlighting red or brown brick?
Warm white light in the 2700K to 3000K range works best for red and brown brick. This range brings out the natural warmth of the masonry without making it look orange or washed out. Cooler temperatures above 4000K tend to make red brick appear flat and gray. For a cohesive look, keep all fixtures on the same color temperature and use a CRI of 80 or higher so the brick's natural tones read accurately.
Should I use uplighting or wall washing for a brick house?
Uplighting and wall washing serve different purposes on brick. Uplighting places fixtures at ground level and aims light upward to graze the texture, creating dramatic shadows that emphasize depth. Wall washing uses fixtures mounted further out to spread even, soft light across the surface, which is better for highlighting architectural features like columns or arches. Many brick homes benefit from combining both: uplighting for texture and wall washing for wider, even coverage.
How do you avoid glare when lighting a brick exterior?
Glare happens when the light source itself is visible from normal viewing angles. Shield fixtures with louvers, hoods, or glare guards so the bulb stays hidden. Aim uplights at a steep enough angle that the beam hits the wall before the viewer's eye catches the source. Also choose fixtures with a low lumen output per unit and rely on multiple fixtures rather than a few bright ones. Dark sky compliant fixtures reduce glare and light trespass at the same time.
How can permanent architectural lighting enhance a brick facade?
Permanent architectural lighting mounts along the roofline or soffit and stays in place year-round, so you get consistent curb appeal without seasonal setup. On brick, it can wash the facade with even light, accent architectural details, or switch to colored scenes for holidays. Low-voltage LED systems use far less power than traditional incandescent, and a dusk-to-dawn sensor or smart controller lets you schedule scenes from a phone. This approach works well for homeowners who want the look without drilling into brick repeatedly.