
Best Low Voltage Outdoor Lighting Fixtures
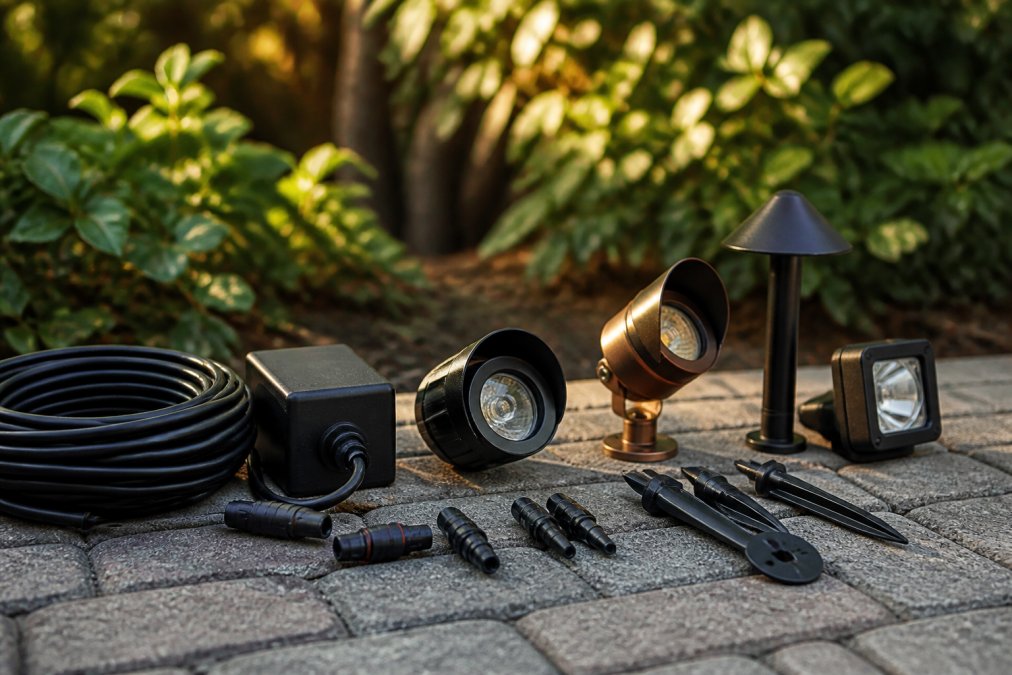
Table of Contents
- What Makes Low Voltage Outdoor Lighting the Right Choice
- Types of Low Voltage Landscape Lighting Fixtures
- LED vs Halogen Outdoor Lighting: What You Need to Know
- Landscape Lighting Transformer Sizing and Installation Best Practices
- Low Voltage Lighting Installation Best Practices
- Design and Placement Strategies for Maximum Impact
- Energy Efficiency and Long-Term Cost Savings
- Maintenance, Troubleshooting, and Repair
- Frequently Asked Questions
Last Updated: September 14, 2026
What Makes Low Voltage Outdoor Lighting the Right Choice
Low voltage outdoor lighting runs on 12 to 24 volts instead of standard 120-volt household current, using a transformer to step power down (Electricity 101). For most residential and hospitality properties, that lower voltage is the biggest reason to choose it: safer wiring, simpler installation, and far more flexibility in fixture placement.
A 120-volt system forces conduit and deep trenches; a low voltage system lets you run direct burial cable in shallow trenches, route it around hardscape, and adjust fixtures as plantings mature. The trade-off: voltage drop becomes a design constraint you must calculate, not ignore.
That constraint is exactly where most DIY installations fail. According to U.S. Department of Energy guidance on outdoor lighting, well-designed outdoor illumination improves both safety and energy performance, but only when the system is properly sized. Below, we'll show you exactly how to match fixtures, transformers, and cable so your system performs for years, not months.
Types of Low Voltage Landscape Lighting Fixtures
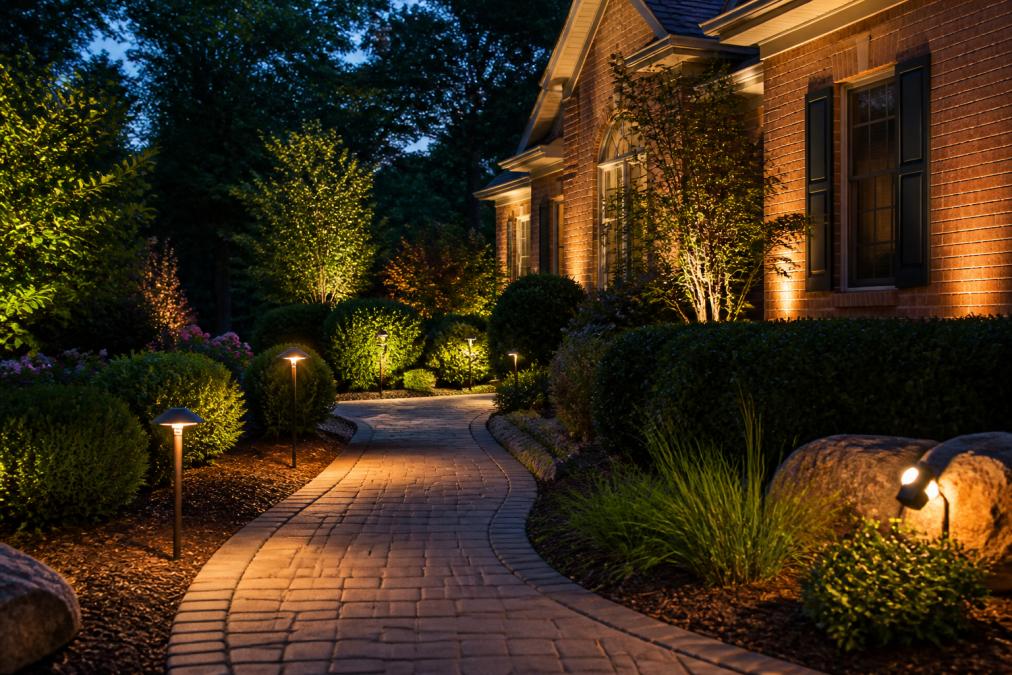
The best low voltage outdoor lighting fixtures fall into three categories, and most properties need a mix: path lighting for safety and wayfinding, spotlights for drama and depth, and hardscape fixtures integrated into the architecture.
Path Lighting and Step Lights
Path lights are the workhorses of a low voltage system, lining walkways, driveways, and garden edges at roughly 12 to 24 inches tall and throwing a soft pool of light downward. Step lights mount flush into stairs, retaining walls, or deck risers. A common mistake is spacing path lights evenly by habit rather than beam spread, you want overlap at the ground, not at the fixture head.
Spotlights and Accent Lighting
Spotlights and accent fixtures aim light at a specific target: a tree canopy, statue, textured wall, or sign. Beam spread matters more than raw brightness, a narrow beam on a tall tree trunk reads as deliberate, while a wide beam washes it out. Two well-aimed accent lights often outperform five poorly aimed ones.
Hardscape and Architectural Fixtures
Hardscape lighting sits inside the structure itself, recessed into retaining walls, patio pavers, or step risers. Architectural fixtures graze walls, columns, and eaves to define a building's shape after dark. These are the hardest to retrofit, so plan them before hardscape is installed or replaced.
LED vs Halogen Outdoor Lighting: What You Need to Know
LED has effectively replaced halogen in low voltage outdoor lighting: LEDs deliver the same light output at a fraction of the wattage, so a smaller transformer and thinner cable do the same job. A 20-watt halogen fixture might be matched by an LED drawing 3 to 5 watts (Purchasing Energy-Efficient Light Bulbs).
| Factor | LED | Halogen |
|---|---|---|
| Wattage for same output | 3-5W | 20W |
| Rated lifespan | 25,000-50,000 hours | 2,000-4,000 hours |
| Color temperature options | 2700K-4000K typical | ~3000K fixed |
| Heat output | Low | High |
| Transformer load | Much lower | Much higher |
The one drawback of LED is that cheap fixtures cut corners on the driver, the electronics that regulate current. A failing driver causes the flickering and premature burnout that gives LED a bad reputation. Look for a replaceable driver and a solid warranty, not just a low sticker price.
Landscape Lighting Transformer Sizing and Installation Best Practices
Transformer sizing saves or dooms most low voltage systems. The transformer converts 120-volt household current to 12 or 24 volts and must be rated for more total wattage than your fixtures draw. Get it wrong and you either cook the transformer or run fixtures so dim they look broken.
Calculating Wattage and Voltage Drop
Start by adding up the wattage of every fixture on a run. A typical LED path light draws 3 to 5 watts; a 7-watt LED spotlight is common for tree uplighting. Twelve path lights at 4 watts plus four spotlights at 7 watts is 48 + 28 = 76 watts of connected load. Add a 20 to 25 percent safety margin, 76 × 1.25 = 95 watts, so a 100-watt or 150-watt transformer is right. Running a transformer at 100 percent of its rating shortens its life and leaves no room to add a fixture later.
Voltage drop is the second calculation, and the one most guides skip. As current travels down a cable, voltage falls and fixtures at the end of a long run dim noticeably. Ohm's law applied to cable resistance governs it: drop = current × resistance × round-trip distance. For 12-gauge copper landscape cable, resistance is roughly 1.6 ohms per 1,000 feet; 10-gauge about 1.0 ohm; 8-gauge about 0.6 ohm. A 76-watt load at 12 volts draws about 6.3 amps. Over a 100-foot run on 12-gauge, round-trip distance is 200 feet, so drop ≈ 6.3 × 1.6 × 0.2 = roughly 2 volts, the last fixture sees about 10 volts instead of 12, a visible dimming. Stepping up to 10-gauge cuts the drop to about 1.3 volts, and 8-gauge to about 0.8 volts.
A practical rule most installers use: keep total voltage drop under 3 percent (about 0.36 volts on a 12-volt system) for fixtures you want to look even, and never exceed 5 percent. If your math says you can't hit that on one run, split the run into two shorter home runs back to the transformer rather than fighting the cable.
Choosing the Right Wire Gauge and Cable
Wire gauge determines how much current a cable can carry over distance without excessive voltage drop; thicker wire (lower gauge number) carries current farther. The table below shows approximate maximum run length for a 12-volt system at 3 percent drop with a 100-watt load:
| Wire Gauge | Approx. Max Run (100W load, 12V, 3% drop) |
|---|---|
| 16 AWG | ~25 ft |
| 14 AWG | ~40 ft |
| 12 AWG | ~65 ft |
| 10 AWG | ~100 ft |
| 8 AWG | ~160 ft |
For longer runs or higher-wattage fixtures, step up to a heavier gauge rather than adding a second transformer. Always use direct burial cable rated for underground use, UF-rated or landscape-specific, and leave 12 to 18 inches of slack at each fixture so you can re-aim or relocate without splicing. With 24-volt fixtures, the same load draws half the current, so voltage drop is roughly halved and you can run about twice the distance on the same gauge.
Low Voltage Lighting Installation Best Practices
Good installation comes down to planning the layout before you dig and protecting every connection from water. Skipping either step is the most common reason systems underperform, and why a system that looked fine in July flickers in January.
Site Preparation and Layout Planning
Walk the property at night with a temporary light source before committing to fixture positions. Stake each location, then map the cable route back to the transformer. Group fixtures into zones for independent control, a common split is path lights, accent/uplights, and hardscape or step lights. Keep the transformer close to the first fixture on each run; if it's 150 feet away, you've spent most of your voltage-drop budget before the run starts.
Low voltage cable doesn't require conduit, but it does need burying: 6 to 8 inches deep for lawn and bed areas, and 12 inches or more where it crosses a driveway, walkway, or traffic area. In cold climates, bury below the local frost line to prevent freeze-thaw heaving from stressing the cable. Use a flat spade or cable-laying shovel to cut a narrow trench, faster and less damaging to roots and turf.
Weatherproofing and Durability Considerations
Every connection is a potential failure point. Use waterproof connectors, silicone-filled wire nuts or heat-shrink butt connectors rated for direct burial, and point them upward or sideways so water can't pool inside. Bury connections below the frost line where possible and leave a drip loop so water runs off the wire rather than into the connector.
Fixture housings matter too. Brass and copper resist corrosion far better than painted aluminum, especially with harsh winters and road salt. Look for IP65 or higher; IP65 means dust-tight and protected against water jets, the minimum for anything exposed to rain and irrigation. IP67 and IP68 add immersion protection and are worth it for fixtures set into grade or near sprinkler heads. Powder-coated aluminum can work in mild climates, but the coating chips at the base and threads, and once bare aluminum oxidizes the fixture looks tired within a few seasons.
Design and Placement Strategies for Maximum Impact
Layering separates a professionally lit property from a string of bright spots. Use three tiers: ambient light for visibility, task light for paths and steps, and accent light for focal points. Aim fixtures away from the viewer's eye to avoid glare, and use warmer color temperatures (around 2700K) near seating areas. The goal is to light what you want seen, not the whole yard.
Energy Efficiency and Long-Term Cost Savings
Because LED fixtures draw so little power, a well-designed low voltage system runs on very little electricity, with the transformer the largest single load. A photocell or dusk-to-dawn sensor and timer mean lights run only when needed, extending fixture life and trimming energy use. The bigger savings come from durability: brass and copper fixtures with replaceable drivers last many seasons, while bargain fixtures are often replaced within a year or two.
Maintenance, Troubleshooting, and Repair
Most low voltage problems trace back to four causes: a tripped transformer, a corroded connection, a failed driver, or a loose fixture. Start at the transformer and work outward, check it has power and hasn't tripped its breaker, then test each run for voltage at the first fixture. If one zone is dark and others work, the fault is almost always in that zone's cable or connectors, not the transformer.
Seasonal maintenance is simple but pays off: clear debris from fixture lenses, re-aim shifted fixtures, and check connections after freeze-thaw cycles. Where climbing ladders or diagnosing wiring isn't practical, a professional service call is cheaper than a fall. Where climbing ladders or diagnosing wiring isn't practical, a professional service call is cheaper than a fall.
A low voltage system only delivers on its promise when the transformer, cable, and fixture quality all match the property. That's the part most homeowners underestimate. Paramount Outdoor Lighting Group designs and installs expertly crafted low voltage lighting through four specialist divisions, offers custom holiday lighting with design, installation, and storage, and is an authorized JellyFish Lighting dealer for permanent architectural lighting. Request a walk-through and see how your property looks unforgettable by night while staying beautiful by day.
Frequently Asked Questions
What is the best wattage for low voltage landscape lighting?
The ideal wattage depends on your fixture type and desired brightness. Path lights typically use 4-7 watts, while spotlights range from 10-20 watts. Calculate total wattage by adding all fixtures in your system, then select a transformer rated 10-20% higher than your total load. This prevents voltage drop and ensures consistent performance across your entire low voltage outdoor lighting system.
How do I size a landscape lighting transformer correctly?
Add the wattage of every fixture you plan to install. For example, if you have ten 5-watt path lights and four 15-watt spotlights, your total is 110 watts. Choose a transformer rated for at least 120-130 watts to account for voltage drop over distance. If fixtures are more than 50 feet from the transformer, consider a larger capacity or add a secondary transformer to maintain consistent illumination.
Are low voltage lights better than solar for outdoor use?
Low voltage lights offer more reliable performance in cloudy climates and during winter months, provide brighter illumination, and work consistently regardless of weather. Solar lights require no wiring but depend on sunlight and battery capacity. Low voltage systems are better for creating professional landscape lighting designs, while solar suits accent lighting in sunny areas. Many homeowners combine both for flexibility.
What weatherproofing features should I look for in outdoor lighting fixtures?
Check the IP rating: IP65 or higher provides protection against water jets and dust. Look for fixtures made from corrosion-resistant materials like aluminum or stainless steel, especially in areas near salt water. Sealed connectors and direct burial cable prevent moisture damage. Fixtures with gaskets and UV-resistant housing last longer in harsh weather. These features ensure your low voltage lighting installation remains functional and attractive for years.