
Outdoor Light Color Temperature: How to Choose
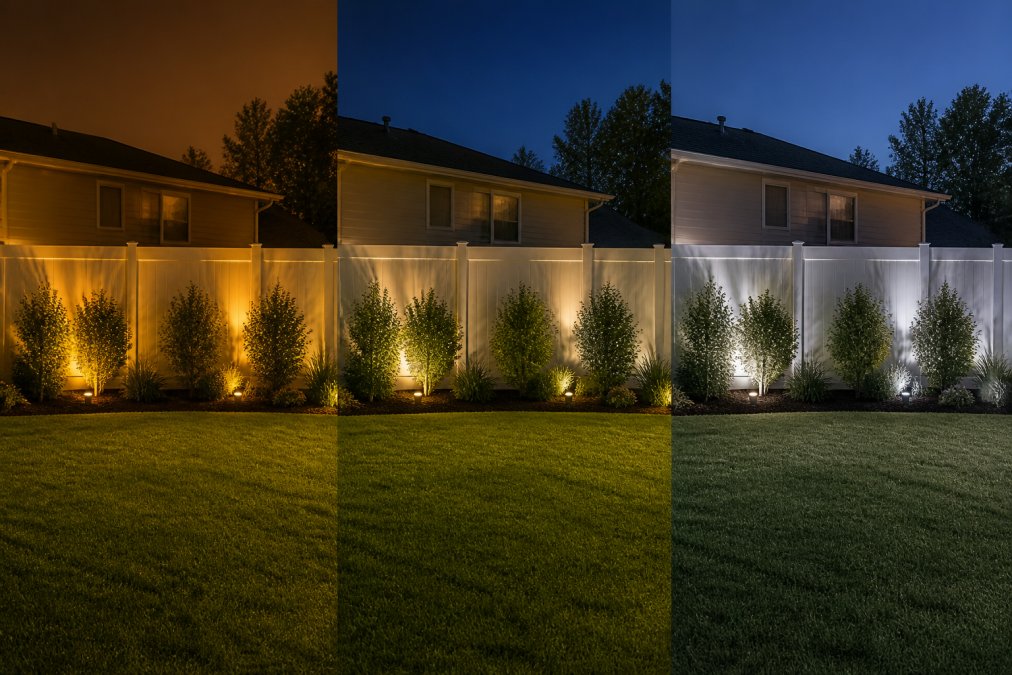
Table of Contents
- Why Color Temperature Determines Your Outdoor Mood
- Warm White vs Cool White Outdoor Lights: The Core Differences
- The Best Kelvin for Landscape Lighting by Area
- Step-by-Step Guide to Choosing Your Color Temperature
- Common Mistakes Homeowners Make With Light Color
- How to Test and Adjust Before You Commit
- Conclusion: Match the Light to the Life You Want Outside
- Frequently Asked Questions
Last Updated: September 9, 2026
Why Color Temperature Determines Your Outdoor Mood
Choosing the right color temperature for outdoor lights is the single most important decision you will make for your nighttime landscape, yet most homeowners overlook it entirely. Color temperature, measured in Kelvin (K), dictates whether your home feels warm and inviting or stark and institutional. At Paramount Outdoor Lighting Group, we see the same mistake repeatedly: people buy fixtures based on brightness alone, ignoring the hue that shapes perception.
The science is straightforward. Lower Kelvin numbers, around 2700K, produce a warm, amber glow similar to a fire. Higher numbers, above 5000K, emit a crisp, blue-white light like a hospital corridor. This choice influences how your architecture reads at night, how your landscaping appears, and even how safe you feel walking to your front door. Before you purchase a single fixture, understand that color temperature is the foundation upon which every other lighting decision rests.
Warm White vs Cool White Outdoor Lights: The Core Differences
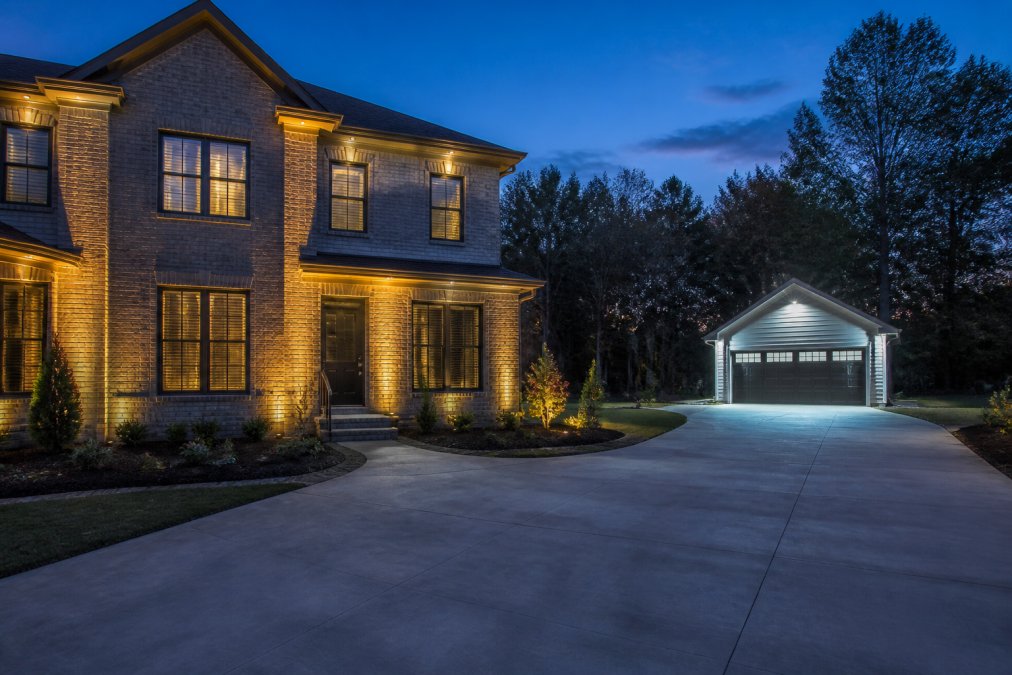
Warm white, typically 2700K, renders brick, wood, and stone with a rich, golden texture that feels natural and cozy. Cool white, ranging from 4000K to 6500K, sharpens edges, boosts contrast, and mimics moonlight, which makes it better for security-focused areas. The visual gap between these two is dramatic, and mixing them carelessly creates a disjointed, amateur look.
But the difference is more than just a vibe. It is rooted in how the human eye and brain process light. Warm white light has a higher proportion of long-wavelength (red and amber) energy, which triggers the parasympathetic nervous system, the 'rest and digest' state. This is why a 2700K patio feels relaxing after dinner. Cool white light, rich in short-wavelength (blue) energy, suppresses melatonin production and signals alertness (peer-reviewed research). That is why a 5000K floodlight keeps you awake and on edge, which is useful for a security perimeter but counterproductive for a hot tub or a conversation pit.
There is a second, often-overlooked factor: color rendering. Two bulbs can both be labeled 2700K, but one will make your lawn look emerald and your brick look rich, while the other will make everything look muddy and flat. The difference is the Color Rendering Index (CRI). A CRI of 90 or above is the professional baseline for landscape lighting (ies.org). A low-CRI warm white bulb (often 80 or below) shifts greens toward brown and reds toward orange, which is why a cheap string light can make a beautiful garden look drab. When you compare fixtures, do not just match the Kelvin number, match the CRI rating.
A third mechanism is the spectral power distribution (SPD). LEDs achieve white light in two ways: by combining a blue chip with a yellow phosphor, or by mixing red, green, and blue (RGB) chips. Phosphor-converted LEDs are the standard for residential work because they produce a continuous spectrum that renders skin tones and foliage naturally. RGB-mixed white light, common in budget 'smart' bulbs, often produces a thin, unnatural spectrum with poor color rendering, even at the same Kelvin rating. If you are buying a tunable white fixture, verify that it uses a phosphor-converted white LED for its 'white' mode, not just RGB mixing.
There is no universally correct answer, only the right choice for each space. Warm white excels at creating an inviting atmosphere for patios, dining areas, and architectural facades where you want guests to linger. Cool white serves a functional purpose for task lighting, like illuminating a grill station or a dark driveway where clarity matters more than ambiance. The key is understanding that warm white flatters, while cool white clarifies, and that the quality of the light, measured by CRI and SPD, matters just as much as the temperature.
The Best Kelvin for Landscape Lighting by Area
The best kelvin for landscape lighting depends entirely on what you are illuminating. A single color temperature across your entire property is the mark of an uninformed installation. Professional designers layer temperatures to guide the eye, create depth, and serve distinct functions simultaneously.
Architectural Surfaces and Facades
For brick, stone, and wood siding, we recommend 2700K to 3000K. These materials absorb warm light beautifully, reflecting the texture and color you chose them for. Uplighting a column or washing a facade in 2700K creates a stately, timeless presence. Cooler light at 4000K can make modern materials like concrete and steel appear sleeker, but it also risks washing out warm tones and making the home feel sterile.
Pathways, Patios, and Outdoor Kitchens
Pathway lights and patio areas function best at 2700K, which provides enough illumination for safe navigation while maintaining a relaxed, social mood. For task-heavy outdoor kitchens, consider 3000K directed specifically at countertops and grilling surfaces. This slight bump in temperature aids visibility for food preparation without the harsh glare of daylight temperatures. Safety lighting for steps and changes in elevation should also stay within the 2700K to 3000K range to remain effective without blinding you.
Step-by-Step Guide to Choosing Your Color Temperature
Selecting the correct color temperature is less about guesswork and more about a deliberate process. Following a structured approach ensures you avoid costly mistakes and reinstallation. Here is how we recommend evaluating your options.
- Audit your materials. Walk your property during the day and note the primary surfaces: brick, stone, siding, concrete, and foliage. Warm materials pair with warm light; cool materials can handle slightly cooler temperatures.
- Define the purpose of each zone. List every area you want to light: the front door, the patio, the driveway, the garden. Assign a primary function, whether that is ambiance, safety, or task work.
- Select a base temperature. Choose 2700K as your default for most residential areas. It is the most forgiving and flattering option for many materials.
- Identify task areas. For outdoor kitchens, reading nooks, or security zones, consider a slightly higher temperature like 3000K to 3500K for added clarity.
- Maintain consistency. Never mix 2700K and 5000K in the same sightline. The contrast will look like a mistake, not a design choice.
- Consult a professional. A lighting designer can create a layered plan that balances these factors and sources fixtures with the exact Kelvin rating you need.
Once you have your plan, the next decision is whether to install it yourself or hire a professional. This choice affects not just your budget but also the quality of the final result.
When DIY makes sense. If you are installing a single string light over a patio or replacing a few path lights on an existing low-voltage system, DIY is reasonable. The cost of a basic low-voltage transformer and a few fixtures runs roughly $150 to $400 at a big-box retailer. The key is to stick to plug-and-play kits that use pre-terminated cables and simple connectors. Avoid cutting and splicing low-voltage wire yourself unless you have experience, a poor splice is the most common cause of voltage drop and flickering.
When to call a professional. If your plan involves more than a dozen fixtures, multiple zones, or any work on line-voltage (120V) circuits, hire a licensed electrician or a lighting design firm. A professional installation typically runs $2,000 to $8,000 for a full landscape system, depending on fixture count and complexity. That price includes a load calculation, transformer sizing, voltage drop testing, and a layout that layers accent, task, and security lighting. A common DIY pitfall is underestimating voltage drop: on a 12V system, running 100 feet of 12-gauge wire with a 100W load can drop the voltage to under 10V at the far end, which shifts the color temperature of the LEDs and makes them dimmer and yellower than intended. A professional will calculate the correct wire gauge and transformer tap to prevent this.
The hidden cost of mistakes. The most expensive error is not the fixture, it is the labor to redo the work. If you install a 5000K floodlight on your garage and decide after a week that it feels too clinical, you are not just swapping a bulb. If the fixture is hardwired or buried, you may need to dig up a trench or re-run conduit. Testing before committing is the cheapest insurance, but even a tested plan can fail if the transformer is undersized or the wire run is too long.
A final consideration is future flexibility. If you think you may want to change the mood of your patio from a bright dinner party to a dim movie night, invest in a dimmable driver or a smart switch from the start. Retrofitting dimming capability later often requires replacing the transformer or the driver, which is a much larger job than choosing the right one upfront.
Common Mistakes Homeowners Make With Light Color
The most frequent error we encounter is choosing a color temperature based on a product photo rather than real-world application. A fixture that looks bright and clean in a store display can feel cold and unwelcoming on your home.
Another widespread problem is using cool white everywhere under the assumption that brighter means better security. In practice, harsh blue-white light creates deep, dark shadows that actually compromise visibility. Warm white light at a lower intensity provides more uniform coverage and is less likely to disturb neighbors.
Finally, many homeowners ignore the color rendering index (CRI) of their bulbs. A high CRI rating, above 90, ensures that colors appear true and vibrant under the light. A low CRI bulb at 2700K can make your landscaping look dull and muddy, defeating the purpose of your investment.
How to Test and Adjust Before You Commit
Testing is the cheapest insurance you can buy. Before you finalize a design or purchase a full system, buy a single fixture or a few bulbs in your suspected temperature and test them on site.
Place the test light in its intended position and observe it at night. Check how it interacts with your specific brick or siding, not a sample in a store. View it from inside your home and from the street to understand the full context. Most lighting suppliers offer multiple Kelvin options in the same fixture, so you can swap bulbs until you find the right match.
If you are considering a permanent system, like the low-voltage LED architectural lighting we install, testing becomes even more critical. Ask about demo options or request a walk-through. Ask about demo options or request a walk-through.
Conclusion: Match the Light to the Life You Want Outside
Choosing the right color temperature for outdoor lights is a balance of physics, aesthetics, and personal preference. Start with a warm 2700K base for living areas and facades, introduce 3000K only for task-specific zones, and avoid cool temperatures unless you have a specific security need. The goal is to create an outdoor living space that feels like a natural extension of your home, not a showroom display.
At Paramount Outdoor Lighting Group, we design and install custom low-voltage lighting systems that layer color temperatures precisely to highlight your property's best features. Our team handles everything from landscape and architectural lighting to holiday displays, with access to millions of colors and patterns through our JellyFish Lighting partnership. If you are ready to transform your property, request a walk-through and see the difference a professional design makes.
Frequently Asked Questions
Should outdoor lights be warm or cool white?
For most residential outdoor spaces, warm white (2700K-3000K) is the safer choice. It makes landscaping and architecture feel inviting, and it flatters skin tones on patios. Cool white (4000K-5000K) looks stark and clinical in a backyard and often creates glare. Use cool light only for security-focused areas or to match specific architectural features like a modern concrete wall. If you are unsure, start with 2700K, which mirrors the warm glow of traditional incandescent bulbs.
What is the best Kelvin rating for outdoor landscape lighting?
The best kelvin for landscape lighting depends on the surface. For natural greenery, trees, and shrubs, 2700K to 3000K produces a warm, flattering glow that makes the landscape feel lush. For hardscape features like retaining walls, stone pathways, or a modern facade, 3000K to 3500K offers a slightly crisper, cleaner light that highlights texture without looking blue. Avoid exceeding 4000K in a garden setting, as it can wash out the warm colors of your plants and make the scene feel harsh.
What is the difference between 2700K and 3000K for outdoor use?
The difference is subtle but noticeable. 2700K has a distinct yellowish, amber glow, similar to a classic incandescent bulb or a candle flame. It feels cozy and intimate, perfect for seating areas. 3000K is a neutral warm white with just a hint of yellow; it appears crisper and cleaner while still feeling warm. 3000K is often preferred for architectural lighting because it reveals the true color of stone, brick, and wood siding better than 2700K. Either works for residential use; your choice should depend on the primary surface you are illuminating.
Does a higher color temperature make outdoor lights brighter?
No. Color temperature (measured in Kelvin) describes the hue of the light, not its intensity. Brightness is measured in lumens. A 2700K bulb and a 5000K bulb can produce the exact same amount of light output. However, cool white light (higher Kelvin) scatters more in the eye, which can make a space feel brighter or harsher than a warm light of the same lumen output. This is why cool light is often used for security, but it is also why it causes more glare.