
Landscape Lighting Design for Curb Appeal: A Complete Guide
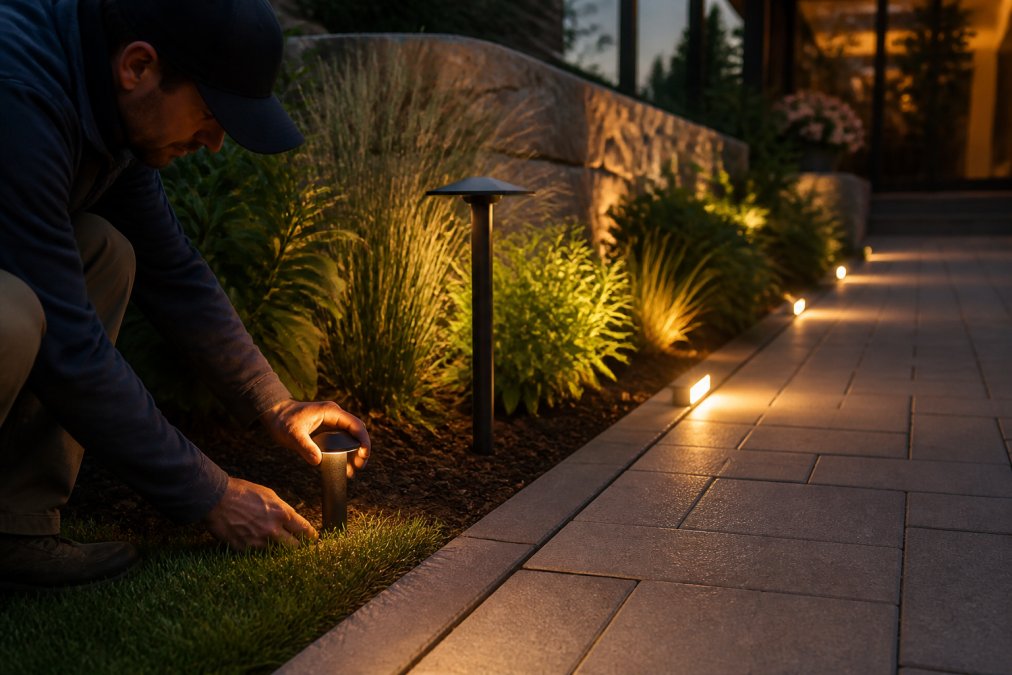
Table of Contents
- Why Landscape Lighting Design Matters for Curb Appeal
- Types of Outdoor Lighting Fixtures and Their Uses
- Best Color Temperature for Outdoor Lighting
- Landscape Lighting Placement Guide: Strategic Positioning
- Architectural Lighting Techniques for Impact
- LED and Low-Voltage Systems: Energy-Efficient Solutions
- Design Principles That Transform Your Home's Appearance
- Conclusion: Your Path to Enhanced Curb Appeal
- Frequently Asked Questions
Last Updated: September 3, 2026
Why Landscape Lighting Design Matters for Curb Appeal
Your home's exterior tells a story after dark. Without intentional landscape lighting design, that story ends at sunset. Most homeowners treat outdoor lighting as an afterthought, scattering generic fixtures across the yard and losing the visual impact their property commands during daylight hours.
Landscape lighting design transforms how your property is perceived. It highlights architectural details, creates depth and dimension, and extends the usable hours of your outdoor spaces. Beyond aesthetics, strategic lighting improves safety, deters unwanted visitors, and increases property value. At Paramount Outdoor Lighting Group, we've worked with homeowners who discovered that the right lighting design fundamentally changes how they experience their own home.
The difference between haphazard outdoor lighting and professional landscape lighting design is dramatic. A well-designed system uses layered illumination, proper color temperature, and strategic fixture placement to create visual hierarchy, guide the eye naturally across your property, and establish ambiance.
Types of Outdoor Lighting Fixtures and Their Uses
Understanding different fixture types helps you choose the right tools for your landscape lighting design strategy. Each creates a distinct visual effect and serves specific functional needs.
Pathway Lights and Ground-Level Fixtures
Pathway lights are the workhorses of landscape lighting design. These low-voltage fixtures illuminate walkways, driveways, and garden borders while creating subtle visual interest. Typically standing 12-24 inches tall, they emit a softer glow than larger accent fixtures.
Ground-level fixtures provide necessary illumination for navigation and safety while creating layers of light that add depth to your landscape. Well-placed pathway lights guide visitors naturally through your property and define the edges of hardscape features like patios and decks. Effective pathway lighting requires consistent spacing, typically 4-6 feet apart, to create continuous visual flow without harsh gaps or overlapping pools of light. Low-voltage systems power these fixtures safely and efficiently, making them ideal for residential applications.
Spotlights, Uplights, and Accent Fixtures
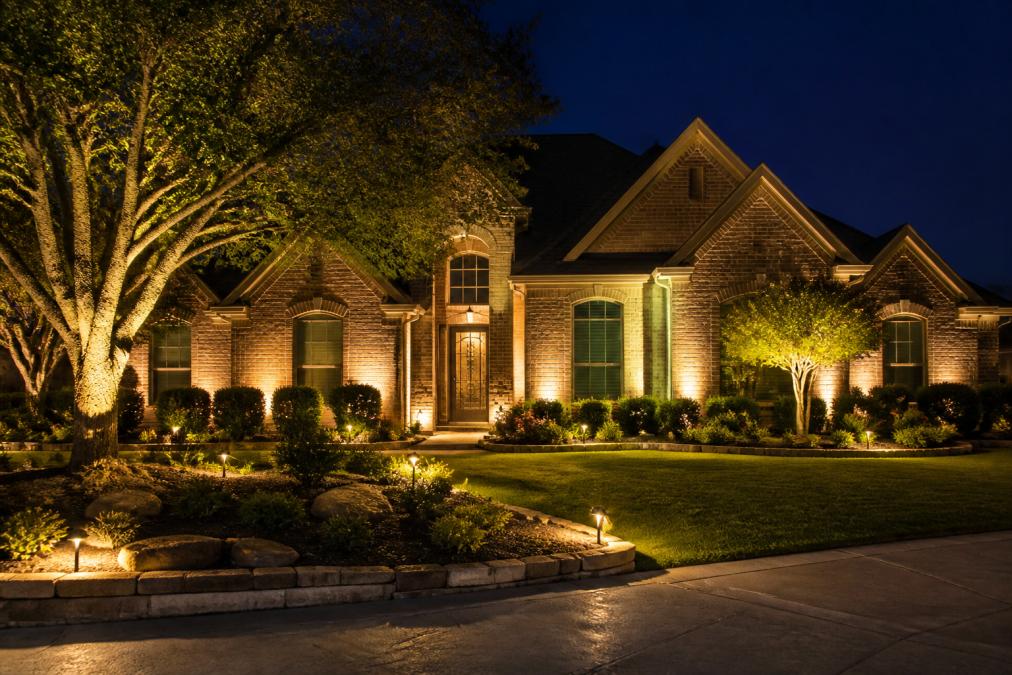
Spotlights and uplights are your primary tools for highlighting focal points in landscape lighting design. Spotlights direct a concentrated beam onto specific features, a tree, architectural detail, or landscape element, creating dramatic visual emphasis. Uplights, positioned at ground level pointing upward, create silhouettes and depth by illuminating trees, shrubs, and building facades from below.
Spotlights work best for features you want viewers to notice immediately, while uplights excel at creating atmosphere and visual complexity. A tree uplit from below appears larger and more dramatic than the same tree lit from above. Accent fixtures offer flexibility in beam spread and intensity, allowing precise highlighting or wider area illumination depending on your landscape features and desired mood.
Wall-Mounted and Architectural Fixtures
Wall-mounted fixtures serve both functional and aesthetic purposes in landscape lighting design. These fixtures illuminate entryways, patios, and building facades while adding architectural interest. Architectural lighting fixtures like soffit lights, fascia lights, and under-eave fixtures emphasize rooflines and architectural details, creating visual definition and making your home's structure more prominent at night.
Proper placement is crucial, fixtures mounted too high cast harsh shadows; incorrect angles create glare. Professional landscape lighting design accounts for these variables, ensuring wall-mounted fixtures enhance rather than detract from your home's appearance.
Best Color Temperature for Outdoor Lighting
Color temperature fundamentally changes how your landscape lighting design feels. Measured in Kelvin (K), it ranges from warm (2700K) to cool (5000K and above), affecting aesthetics, mood, perception of space, and energy efficiency.
Warm color temperatures (2700K-3000K) create inviting, intimate atmospheres that mimic candlelight and sunset. These tones are ideal for residential applications, patios, and areas where you want to encourage relaxation and gathering. Most homeowners find that warm lighting enhances curb appeal by making their property feel approachable and elegant.
Cool color temperatures (4000K-5000K) provide bright, crisp illumination resembling daylight. These tones work well for security lighting, pathway illumination, and areas requiring clear visibility. The critical mistake most homeowners make is mixing color temperatures across their landscape lighting design, creating visual discord. Professional landscape lighting design maintains color temperature consistency throughout the outdoor space.
Warm light appears dimmer than cool light at the same lumen output, meaning you can achieve the same perceived brightness with lower wattage using warm tones, reducing energy consumption while maintaining visual impact.
Landscape Lighting Placement Guide: Strategic Positioning
Strategic placement separates amateur lighting from professional landscape lighting design. Fixture position determines which features are highlighted, how light spreads across your property, and whether the overall effect feels intentional or accidental.
Begin by identifying focal points, the features you want viewers to notice first, typically architectural details, specimen trees, water features, or landscape plantings. Position your primary accent fixtures (spotlights and uplights) to highlight these features, creating visual hierarchy that guides the eye naturally across your property.
Pathway lighting placement requires precision. Fixtures should illuminate walking surfaces without creating blinding glare. Placing lights slightly offset from the center of pathways, with fixtures angled to avoid direct line-of-sight, creates safe, comfortable illumination. Avoid placing fixtures too close together (creating overlapping pools of light) or too far apart (leaving dark gaps that break visual continuity).
Focal Point Highlighting and Shadowing Techniques
Focal point highlighting is the cornerstone of effective landscape lighting design. Proper highlighting makes focal points appear larger, more dramatic, and more valuable.
Uplight techniques position fixtures at ground level, directing light upward to illuminate trees and architectural features from below, creating dramatic silhouettes and making structures appear taller and more imposing. Shadowing techniques use light and shadow to create depth and dimension. Grazing, directing light across a surface at a low angle, emphasizes texture and creates dramatic shadow patterns, working exceptionally well on stone walls, brick facades, and textured plantings.
Silhouetting creates a bold outline effect by placing light behind a feature and positioning the viewer in front. This technique works best with distinctive shapes, ornamental trees, architectural elements, or sculptural plantings.
Safety and Security Through Strategic Placement
Security lighting serves a practical purpose while contributing to your landscape lighting design. Well-placed security fixtures deter unwanted activity by eliminating hiding spots and making your property visible to neighbors and passersby. Motion-sensor fixtures add an extra layer of security, activating only when movement is detected.
Entry points, front doors, side gates, and driveway areas, require dedicated security lighting. Fixtures positioned to illuminate these areas without creating harsh glare improve both safety and visibility. Dusk-to-dawn sensors ensure security lighting operates automatically throughout the night. outdoor living space design.
Pathway lighting contributes to security by providing safe passage and preventing trips and falls. The combination of pathway illumination and strategically placed accent lighting creates a secure, attractive outdoor environment.
Architectural Lighting Techniques for Impact
Architectural lighting highlights your home's structural features and creates visual drama. Professional landscape lighting design integrates architectural lighting seamlessly with landscape elements.
Grazing, Silhouetting, and Downlighting Methods
Grazing is a powerful architectural lighting technique. By positioning a light source close to a surface and directing it at a low angle, you create dramatic shadow patterns that emphasize texture and detail. On brick or stone facades, grazing reveals the surface's character and creates visual interest. This technique requires precise fixture positioning, too high and the effect disappears; too low and shadows become exaggerated.
Silhouetting creates bold outlines by backlighting architectural features. A tree positioned in front of a lit building wall creates a striking silhouette, particularly effective for distinctive architectural elements, peaked roofs, ornamental railings, or architectural details.
Downlighting positions fixtures above architectural features, directing light downward to illuminate rooflines, entryways, and upper-story details. This technique creates a natural, moonlight-like effect that feels less artificial than uplighting and integrates naturally with residential architecture.
Combining these techniques creates sophisticated landscape lighting design with visual richness and complexity.
LED and Low-Voltage Systems: Energy-Efficient Solutions
Modern landscape lighting design relies on LED technology and low-voltage systems. These technologies offer significant advantages over traditional incandescent lighting: lower energy consumption, longer lifespan, and greater design flexibility.
Low-voltage systems operate at 12 volts, significantly lower than standard household current, making them inherently safer for outdoor applications (osha.gov). LED fixtures consume a fraction of the energy required by incandescent bulbs while lasting 25,000-50,000 hours compared to 1,000-2,000 hours for incandescent bulbs (energy.gov). This longevity reduces maintenance and replacement costs substantially.
The combination of LED technology and low-voltage systems creates efficient, reliable landscape lighting design. Smart home integration with LED systems adds convenience and control through dimmers, timers, and color-changing capabilities.
Design Principles That Transform Your Home's Appearance
Effective landscape lighting design follows established principles that create visual harmony and impact.
Creating Outdoor Ambiance and Visual Hierarchy
Visual hierarchy guides viewers' attention across your property. By varying light intensity and color temperature, you create a visual pathway that directs the eye naturally. Primary focal points receive brighter, more dramatic lighting; secondary elements receive softer illumination.
Outdoor ambiance emerges from the interplay of light and shadow. Spaces with varied illumination, bright focal points contrasting with darker areas, feel dynamic and sophisticated. Layered lighting is fundamental to effective landscape lighting design: ambient lighting provides general illumination; task lighting serves functional purposes; accent lighting highlights focal points. These three layers work together to create a complete, balanced system.
Balancing Brightness and Subtlety
The most sophisticated landscape lighting design appears effortless. Fixtures are barely noticeable during the day, yet their impact is obvious at night. This balance requires restraint and precision. Over-lighting creates harsh, unflattering results; under-lighting fails to highlight your property's best features.
Effective landscape lighting design maintains comfortable brightness levels while creating visual interest, often using lower wattage fixtures positioned strategically rather than fewer high-powered fixtures. Ideally, viewers see the light's effects without noticing the fixtures themselves. Contrast between lit and unlit areas creates visual interest, a dark area adjacent to a brightly lit focal point makes that focal point appear more dramatic.
Conclusion: Your Path to Enhanced Curb Appeal
Landscape lighting design is both art and science. Technical aspects, color temperature, voltage drop, fixture placement, must work in concert with design principles to create results that enhance your property's appearance and functionality.
Paramount Outdoor Lighting Group specializes in transforming properties through expertly crafted low-voltage lighting systems and custom landscape lighting design. Our team brings decades of experience designing systems that highlight your property's unique features while maintaining safety and energy efficiency.
Ready to enhance your property's nighttime appearance? Request a walk-through from Paramount Outdoor Lighting Group. We'll assess your property, identify focal points, and develop a custom landscape lighting design that transforms how your home looks after dark.
Key Takeaways for Landscape Lighting Design:
| Design Element | Purpose | Key Consideration |
|---|---|---|
| Pathway Lights | Safe navigation and visual flow | Space 4-6 feet apart for continuous illumination |
| Uplighting | Dramatic focal point emphasis | Position at ground level pointing upward |
| Architectural Fixtures | Highlight building features | Match fixture style to home's design language |
| Color Temperature | Establish mood and atmosphere | Maintain consistency throughout property |
| Low-Voltage Systems | Energy efficiency and safety | |
| Visual Hierarchy | Guide viewer attention | Vary light intensity between primary and secondary features |
The most effective landscape lighting design feels natural and intentional. It enhances your property's best features, improves safety, and extends your home's visual appeal into evening hours. According to the National Association of Landscape Professionals, homes with professional outdoor lighting design show significantly improved property perception and perceived value. The investment in proper landscape lighting design pays dividends through enhanced aesthetics, improved safety, and extended usability of outdoor spaces.
Frequently Asked Questions
Q: What color temperature should I use for landscape lighting design?
A: Warm white light (2700K to 3000K Kelvin) works best for most residential properties, creating an inviting outdoor ambiance that complements natural home architecture. Cooler tones (4000K-5000K) suit modern designs and security applications. For landscape lighting design, consistency across fixtures prevents a disjointed appearance. Consider the style of your home and how you want guests to feel when they approach your property. Mixing warm and cool temperatures can create visual confusion unless intentional for specific focal points.
Q: How do I know where to place landscape lights for maximum curb appeal impact?
A: A landscape lighting placement guide prioritizes focal points: trees, architectural features, and entryways. Space pathway lights 6-8 feet apart for safe navigation and visual continuity. Position uplights at the base of trees angled upward to create silhouetting effects. Place spotlights 10-15 feet from accent features to avoid harsh shadows. Use downlighting from eaves to illuminate plantings without glare. Test placement at dusk to see how shadows fall. Avoid overlapping beam spreads, which flatten visual depth and waste energy. Professional design accounts for sight lines from the street and how light transitions from driveway to entrance.
Q: What architectural lighting techniques create the most dramatic effect?
A: Grazing involves placing lights close to vertical surfaces (walls, tree trunks) and angling them across the texture to highlight detail and create shadow depth. Silhouetting positions lights behind focal points to create bold, recognizable shapes against the home. Downlighting from rooflines or eaves creates pools of light that define spaces and improve security. Uplighting emphasizes height and draws eyes upward to trees or architectural peaks. Layer these techniques: use uplighting for drama, grazing for texture, and downlighting for safety. The key is controlling beam spread and avoiding light spill onto neighbors' properties or into the sky.
Q: Will professional landscape lighting make my home look over-the-top or fake?
A: No. Effective landscape lighting design enhances what's already there rather than creating artificial spectacle. The difference is restraint: subtle, layered lighting looks natural; excessive brightness or misplaced fixtures look overdone. Warm color temperatures (2700K-3000K) feel organic and inviting. Professional design balances uplighting drama with pathway safety and avoids spotlighting every shrub. Most homeowners initially worry about this but are surprised how subtle good design feels at night while still transforming curb appeal. The goal is making your home's best features visible and welcoming, not turning your yard into a display.
Q: How much does landscape lighting design and installation cost?
A: Pricing depends on property size, fixture quantity, complexity of design, electrical requirements, and whether you need trenching or low-voltage transformer installation. A simple pathway system costs less than a comprehensive architectural lighting plan with uplighting, spotlights, and smart home integration. Request a walk-through and quote from a professional installer to get accurate pricing based on your specific property and goals. Many homeowners find the investment worthwhile given the increase in curb appeal and property value, plus energy savings from LED technology.
Q: What's the difference between low-voltage and standard outdoor lighting?
A: Low-voltage systems (typically 12V) use a transformer to step down household current, making them safer to install and maintain than line-voltage systems (120V). Low-voltage fixtures are smaller, more flexible for design, and require less trenching depth. They're ideal for landscape and architectural accents. LED low-voltage systems are extremely energy-efficient and generate minimal heat. Standard line-voltage is better suited to high-power applications like floodlighting large areas. Most residential landscape lighting design uses low-voltage because it's safer, more affordable, and offers greater design flexibility.
Q: How do I maintain landscape lighting systems to ensure they work year-round?
A: LED low-voltage systems require minimal maintenance: clean fixture lenses annually to remove dust and debris, check connections for corrosion (especially after winter), and test dusk-to-dawn sensors monthly. Inspect wiring for damage from lawn equipment or weather. Most LED bulbs last 25,000+ hours, so replacement is rare. Motion sensors and smart home integration may need battery or software updates. Professional installers often offer maintenance plans that catch issues before they become problems. Proper installation with weather-resistant fixtures and appropriate IP ratings prevents most failures.
This article was written using GrandRanker