
How to Safely Hang Holiday Lights on Two-Story Homes
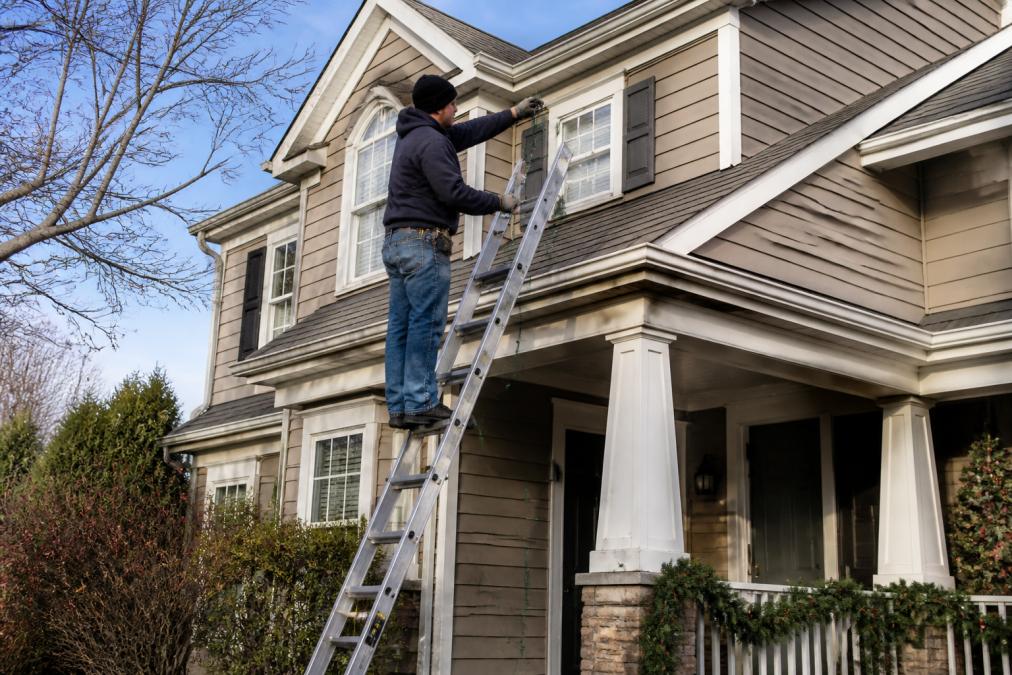
Table of Contents
- What You'll Need Before You Start
- OSHA Ladder Safety Tips for Homeowners
- Step-by-Step: How to Hang Holiday Lights Safely
- Choosing the Right Light Clips and Mounting Hardware
- Avoiding Damage to Roof, Siding, and Gutters
- Permanent Architectural Lighting for Residential Homes
- Post-Season Removal and Storage Strategy
- Frequently Asked Questions
Last Updated: September 1, 2026
What You'll Need Before You Start
Hanging holiday lights safely on a two-story home requires proper equipment. The right gear makes the difference between a smooth installation and a dangerous situation that risks injury and property damage.
Ladder and Stabilization Equipment
An extension ladder rated for your height is essential. For a two-story home, you'll typically need a 24 to 28-foot extension ladder (osha.gov). A ladder stabilizer (stand-off bracket) keeps the base away from the house, preventing sideways slipping and distributing your weight evenly. It also protects gutters and fascia from being bent or cracked under load.
For two-story installations, use a standoff with a minimum 12-inch offset. Aim for a 75-degree angle between the ladder and the ground, for every 4 feet of vertical height, the base should sit about 1 foot away from the wall (osha.gov). Add stabilizer feet or ladder pads to grip the ground and prevent slipping on concrete, asphalt, or grass.
Safety Gear Checklist
- Safety glasses or goggles - Protect against falling debris and light clips
- Work gloves - Leather or nitrile-coated for sharp edges and rough surfaces
- Non-slip shoes with ankle support - Avoid sneakers; choose boots with rubber soles
- Long pants and long-sleeved shirt - Protect skin from cuts and sun exposure
- Headlamp or hands-free flashlight - Essential for early morning or evening work
- Tool belt or apron - Keep clips and tools within reach
- Safety harness (recommended for two-story work) - Attached to a secure anchor point, prevents falls if you slip
Most falls happen at roof edges. If your roof pitch is steep or you'll be leaning significantly from the ladder, a harness is worth the investment.
Best Tools for Hanging Holiday Lights on High Roofs
A telescopic pole (6 to 20 feet) lets you clip lights in place from a stable ladder position without constant repositioning or dangerous stretching. Plastic light clips designed for gutter hooks are gentler on your roof than nails or screws, they grip without puncturing.
A power drill with magnetic bit holder speeds up fastening work. A voltage tester is essential if you're working near existing electrical lines. A ladder stabilizer bar or standoff bracket is non-negotiable insurance against ladder slip or property damage.
OSHA Ladder Safety Tips for Homeowners
Most ladder accidents result from preventable mistakes: unstable setup, poor climbing technique, or overreaching. Understanding OSHA principles gives you the framework to avoid these errors.
Choosing the Right Ladder Type and Height
Extension ladders are designed for reaching high places and leaning against a wall. Your ladder must be tall enough that you never climb to the very top rung, the highest safe standing position is the third rung from the top. For a two-story home, you need a ladder that extends at least 3 feet higher than your target height.
Check the ladder's duty rating. Most household ladders are rated for 250 pounds total weight, including you, your tools, and equipment (osha.gov). If you weigh 200 pounds and carry 30 pounds of clips and lights, you're already at your limit.
Setting Up Your Ladder on Level Ground
An unlevel ladder is unstable. Survey the ground before setup and avoid soft soil or settled areas. Use adjustable leg levelers on uneven terrain, never use bricks or blocks, which shift under load.
Position the ladder at the correct angle using the 75-degree rule: for every 4 feet of vertical height, the base should sit 1 foot away from the wall. Verify by standing at the base and checking that you can touch the ladder with your arm extended at shoulder height.
Using a Ladder Stabilizer and Stand-Off
A ladder stabilizer transforms safety at height. The stabilizer bar attaches to the top of the ladder and extends outward, creating two contact points with the wall instead of one. This distributes your weight and prevents sideways sliding.
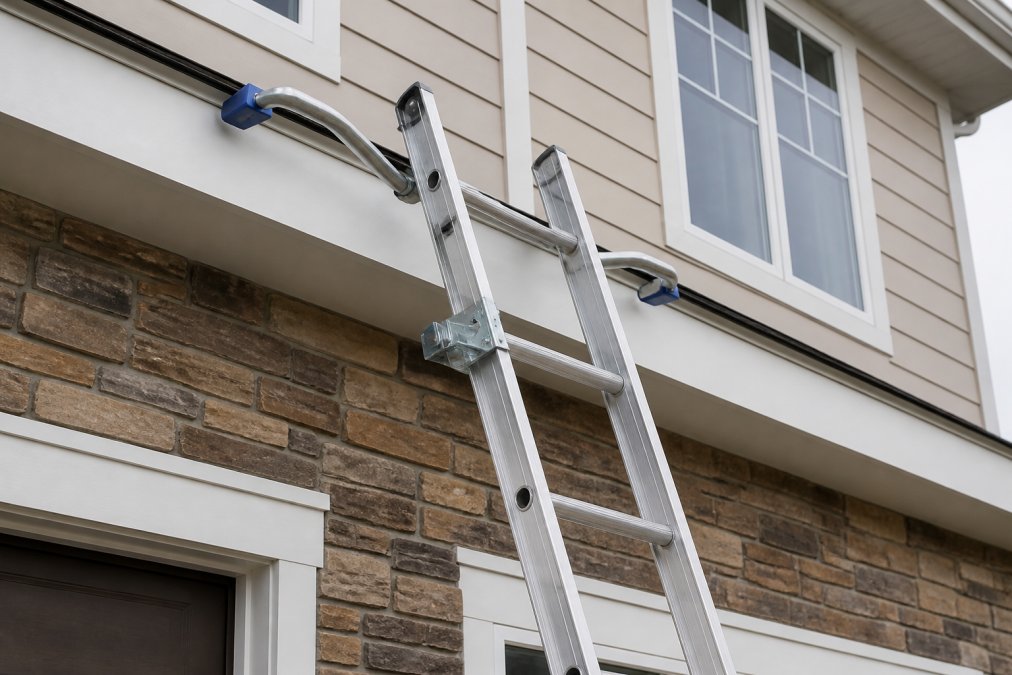
When installing a stand-off, ensure it's fastened securely to both ladder rails. Position it so contact is below the gutter line if possible, or over a gutter support bracket if not.
Step-by-Step: How to Hang Holiday Lights Safely
Step 1: Plan Your Light Layout and Route
Before touching a ladder, plan where every light will go. Measure the perimeter of your roof line, eaves, fascia, around windows, along the roofline. Note the total footage. Most holiday light strings come in 25 or 50-foot increments.
Decide whether you're running lights along the gutter, fascia board, or roofline itself. Sketch your layout on paper or mark up photos from the ground. Identify where you'll place clips, run extension cords, and transition between sections.
Plan your electrical route. Where will your power source be? How many extension cords do you need? Outdoor-rated extension cords are essential. Calculate total wattage, a standard 15-amp household circuit can safely handle about 1,800 watts.
Step 2: Inspect Your Roof, Gutters, and Siding
Before hanging a single light, examine the surfaces where you'll work. Walk around your house and look for deterioration. Check gutters for dents, separation, or rust. Look at siding for cracks or loose boards. Use binoculars to examine your roof for missing or damaged shingles.
Clean clogged gutters before installing lights, clogged gutters can't drain water, and clips make the problem worse. Check your fascia board for soft or spongy spots indicating rot. If you find rot, use temporary mounting solutions rather than fasteners.
Inspect your roof pitch. If it's steeper than 8:12, seriously consider hiring a professional, the risk of slipping increases dramatically on steep pitches.
Step 3: Install Lights Using Damage-Free Mounting
Plastic light clips with gutter hooks are the gold standard for damage-free installation. These clips grip the gutter edge without requiring nails or screws. Position clips every 12 to 18 inches along the gutter for proper support.
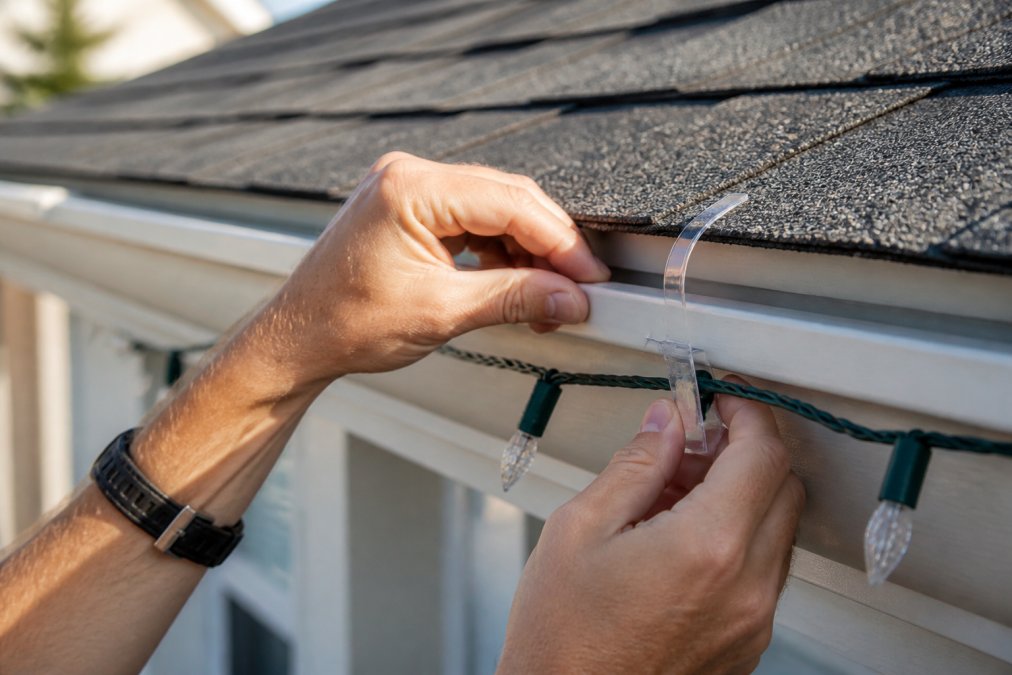
For fascia board installation, use adhesive-backed clips or temporary fasteners. Wipe the fascia with a dry cloth before applying clips to ensure good adhesion. If you must use fasteners, use stainless-steel staples or nails, they resist rust and won't stain siding.
Never drive fasteners through shingles into the roof deck. This creates water entry points leading to leaks and rot. Use clips that grip shingles without penetrating them.
Step 4: Secure Electrical Connections Safely
Use outdoor-rated extension cords rated for your lights' wattage. For a 50-foot run, use 12-gauge cord. For runs under 25 feet, 14-gauge is acceptable. Check the cord's amperage rating and ensure it matches your light string's requirements.
Plug lights into a GFCI outlet (ground-fault circuit interrupter). These outlets detect electrical imbalances and shut off power instantly if a fault is detected. If you don't have a GFCI outlet nearby, use a GFCI-protected extension cord.
Keep extension cords off the ground where people might trip or where they could be damaged. Never coil a cord tightly around a reel while in use, this generates heat and damages insulation. Check connections regularly throughout the season; rain and temperature changes can loosen them.
Use timers and smart plugs to automate your lights, reducing the time they're powered and energy consumption.
Choosing the Right Light Clips and Mounting Hardware
Plastic gutter hooks grip the gutter edge without fasteners and cause no damage. They're ideal for aluminum or vinyl gutters and are your best choice for typical two-story homes with standard holiday lights.
Adhesive clips work on clean, dry fascia boards and siding. They're invisible when installed properly and leave no marks when removed, but only work in moderate temperatures and fail if the surface is damp.
Shingle tabs slip under roof shingles without penetrating the roof deck. They're excellent for asphalt shingles and nearly invisible from the ground.
Avoiding Damage to Roof, Siding, and Gutters
Damage often happens during removal, not installation. Work slowly and deliberately when removing lights in spring. Don't yank clips or pull cords forcefully, loosen each clip and slide it out gently. If a clip is stuck, apply silicone spray and wait a few minutes.
Inspect your gutters after removal for bent edges, dents, or separated sections. Check siding for cracks or puncture holes. Small holes can be filled with exterior caulk. Address damage immediately, water damage worsens over time.
Permanent Architectural Lighting for Residential Homes
If you install holiday lights every year, consider permanent architectural lighting. These low-voltage LED systems run year-round, integrate seamlessly with your home's architecture, and provide consistent performance.
Weatherproof fixtures mount on fascia or under eaves, with wiring run inside conduit or concealed during installation. Timers and smart controls automate schedules and allow seasonal adjustments. The advantage is eliminating the annual installation and removal process, the system is already in place, tested, and ready to use.
Paramount Outdoor Lighting Group specializes in custom architectural lighting design and installation for residential homes. Their team handles the entire process from design consultation through professional installation and maintenance, eliminating the risk and effort of DIY installation while ensuring your system is properly engineered for your home's architecture and electrical requirements.
Post-Season Removal and Storage Strategy
Before removing anything, take photos of your installation from multiple angles. These photos serve as a reference when you reinstall next year.
Remove lights before the first freeze, frozen lights are brittle and more likely to break. Allow cords to dry completely before storing them. Uncoil cords fully and lay them flat to dry, or hang them loosely in a garage or shed.
Inspect each light string before storing. Look for damaged bulbs, broken sockets, or frayed wires. Test each string to confirm it works. Replace burned-out bulbs before storage.
Store lights in a cool, dry location. Organize clips, fasteners, and hardware in labeled containers. Store your photos and installation notes with your lights for next season's reference.
Hanging holiday lights safely on a two-story home is achievable with proper planning, equipment, and technique. The process requires patience and respect for the hazards involved, working at height, managing electrical connections, and protecting your property.
If climbing a 25-foot ladder makes you uncomfortable, that discomfort is worth listening to. Paramount Outdoor Lighting Group offers professional holiday lighting installation, maintenance, and removal services. Their team handles all climbing, electrical work, and property protection. Request a walk-through to discuss your home's specific needs and explore whether professional installation makes sense for your situation.
Frequently Asked Questions
What's the safest way to hang holiday lights on a two-story house?
Use an extension ladder with a stabilizer bar and stand-off bracket to keep it away from the eaves. Always have a spotter on the ground, wear a safety harness if working at heights above 6 feet, and never overreach. Use plastic light clips and gutter hooks instead of nails to avoid damaging your roof and siding. Work on level ground only, and never use a ladder on a roof or unstable surface.
What equipment do I need to hang lights on a second-story roof?
You'll need an extension ladder rated for your height (typically 20-24 feet for two-story homes), a ladder stabilizer or stand-off, plastic light clips or gutter hooks, outdoor-rated extension cords with GFCI protection, a spotter, and safety gear including a harness, gloves, and non-slip footwear. A telescopic pole helps you reach peaks and high fascia without overextending from the ladder. Keep all electrical connections weatherproof and secure.
How can I hang holiday lights without damaging my gutters or siding?
Use plastic light clips and gutter hooks designed for damage-free installation instead of nails or screws. Avoid placing clips directly on shingle tabs; instead, position them on the gutter edge or fascia board. Never hammer hooks into wood siding or fascia. Test clips before fully installing them, and remove all mounting hardware before winter to prevent ice damage and deterioration of your gutters and siding.
Is it better to hire professionals to hang holiday lights on a two-story home?
Professional installation is safer and faster, especially for two-story homes where fall risk is significant. Professionals have proper equipment, insurance, and experience with damage-free mounting techniques. They also handle electrical safety, including GFCI outlets and proper cord management. If you're uncomfortable with ladder work or unsure about your home's structural integrity, professional installation is the better choice and often worth the investment for peace of mind.
This article was written using GrandRanker