
Maximize Patio Seating With Smart Lighting Design
Table of Contents
- How to Maximize Patio Seating With Lighting Design
- Small Patio Lighting Ideas That Free Up Seating Space
- Patio Lighting Ideas for Layering Ambient, Task, and Accent Light
- Outdoor Lighting for Patio Seating: Placement and Measurements
- Layered Landscape Lighting for a Cozy, Inviting Atmosphere
- Power, Installation, and Weather Considerations
- Frequently Asked Questions
Last Updated: October 8, 2026
How to Maximize Patio Seating With Lighting Design
Most patios have room for more seats than their owners think. The problem is rarely square footage, it's that lighting eats the space seating could use.
Patio seating is the usable, comfortable, well-lit area where people can actually sit, eat, and talk after dark. Get that order right and a modest patio can hold six instead of four.
This guide covers how to maximize patio seating with lighting design: which fixtures free up floor space, how to layer light so every seat works at night, fixture spacing, the measurements most guides skip, and the power and weather details that decide whether a layout survives its first winter.
Small Patio Lighting Ideas That Free Up Seating Space
The fastest way to add seats is to get fixtures off the floor. Wall-mounted and recessed lights light the patio without claiming a single square foot of it.
Wall-Mounted and Recessed Fixtures
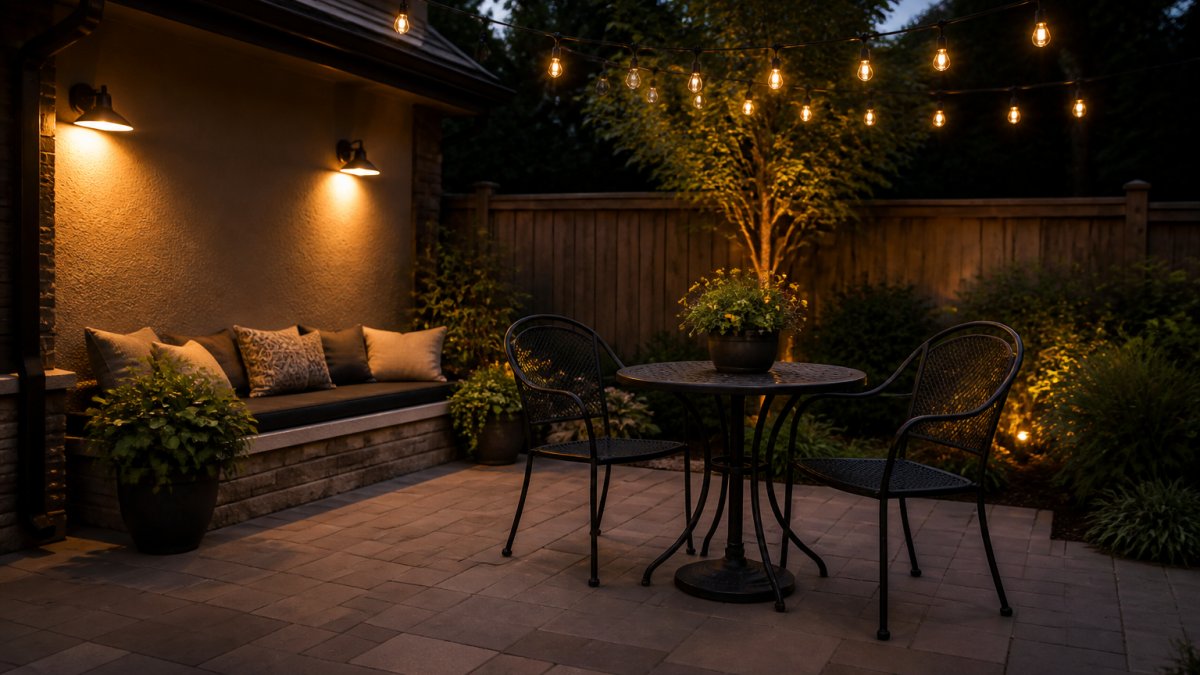
Wall sconces and recessed downlights are the workhorses of a small patio. A sconce mounted at about 1.7 to 1.8 meters above the floor throws light down and out, exactly where people sit and eat.
Three or four well-placed wall fixtures can light a whole seating zone, while freestanding lamps need a cord, a base, and clearance where a chair would have gone.
In-Ground and Step Lighting
In-ground uplights and step lights mark edges without blocking them. A step light tucked into the riser shows guests where to walk. An in-ground uplight aimed at a wall or tree adds glow without taking up walking room.
Use them to define the border of the seating area, keeping chairs inside the lit zone and traffic paths clear.
Sample Layouts by Patio Size
These are planning baselines, not rules. Adjust for furniture style, but keep the clearances intact so guests can reach their seats.
| Patio Footprint | Typical Seating Capacity | Layout Notes |
|---|---|---|
| 2.4 m x 2.4 m (about 5.8 sq m) | 2 seats | One bistro table with two chairs, wall sconce above, step light at the edge. No room for a freestanding fixture. |
| 3 m x 3 m (about 9 sq m) | 4 seats | Built-in bench along one wall plus two movable chairs. Recessed downlight over the table, in-ground uplight on the opposite wall. |
| 3.6 m x 3.6 m (about 13 sq m) | 6 seats | L-shaped bench with a low table, two dining chairs, one lounge chair. Two wall sconces, one downlight, string lights overhead. |
| 4.5 m x 3 m (about 13.5 sq m) | 6 to 8 seats | Dining table for four plus a bench and two lounge chairs. Layer sconces, downlights, and step lights; keep the center path clear. |
Clearances That Decide Real Capacity
Seat count is set by clearance, not furniture footprint. Plan for these minimums:
- 75 to 90 cm of clear space behind a pulled-out dining chair so guests can stand and sit without brushing the wall or a planter.
- 90 cm minimum for a main circulation path; 120 cm if two people need to pass.
- 45 cm between the edge of a table and a wall or fixed bench for a seated guest to slide in.
A common pattern is a patio that looks like it holds six but really holds four, because two chairs sit in the walkway. Moving the light to the wall and the chairs out of the path is often the whole fix.
Patio Lighting Ideas for Layering Ambient, Task, and Accent Light
One light source flattens a patio; three layers make it work. Layering is the difference between a patio that looks lit and one people want to sit in.
Layered lighting combines ambient, task, and accent light so each covers what the others miss: ambient sets the overall glow, task light puts useful light where hands and plates are, and accent light adds depth.
Ambient Lighting for Overall Illumination
Ambient light is your base layer, filling the patio with soft, even light so no corner goes dark. Wall sconces, overhead string lights, or recessed fixtures can all serve as ambient light.
Aim for a warm color temperature, around 2700K. Warm light reads as cozy at night; cool white reads as clinical, the last thing you want over a dinner table.
Task Lighting for Dining and Prep Areas
Task light goes where people do things: the dining table, a grill station, a prep counter. Downlights over a table or a low pendant over a bar top put light exactly where it's needed.
Keep task fixtures close to their target: the closer the light, the less wattage it takes, which means fewer fixtures overall and less space and money spent.
Accent Lighting for Visual Interest
Accent light creates mood. Uplights on a tree, a wash of light on a textured wall, or a small spotlight on a planter all add visual interest.
Accent light also creates depth. A flat, evenly lit patio feels small; one with bright spots and soft shadows feels larger and more inviting.
Outdoor Lighting for Patio Seating: Placement and Measurements
Good lighting for patio seating comes down to numbers: get the heights and spacing right and the patio feels comfortable; get them wrong and you get glare, dark spots, or both. The step most guides skip is planning fixture and furniture placement on the same drawing, so light supports seats instead of competing with them. Dynamic control over these zones becomes effortless when you master smart home lighting integration to synchronize your outdoor ambiance with the rhythm of your evening.
Key Measurements for Fixture Placement
These are the ranges we use when planning a seating area. Adjust them to your space, but stay close to these baselines.
| Fixture Type | Mounting Height | Spacing | Best For |
|---|---|---|---|
| Wall sconce | 1.7-1.8 m above floor | 2.4-3 m apart | Ambient light on walls |
| Recessed downlight | 2.4-3 m above floor | 1.2-1.8 m apart | Task light over tables |
| Step light | 15-25 cm above step | Every 1-1.5 m | Pathway safety |
| In-ground uplight | At grade | 1-2 m from wall | Accent and depth |
| String lights | 2.4-3 m overhead | 30-45 cm bulb spacing | Overhead ambiance |
Two rules matter most. Keep task fixtures directly over the surface they light. Keep ambient fixtures high enough that no one looks straight into the bulb.
A Coordinated Seating-and-Lighting Layout Plan
Start with a simple plan view of the patio on graph paper or in a free layout app, marking walls, doors, steps, and fixed structures. Then work in this order:
- Draw the circulation path first. Trace the route from the door to the farthest seat and to any grill or prep area. Keep it at least 90 cm wide. This path is non-negotiable; it decides where furniture can go.
- Place the fixed seating. Built-in benches, banquettes, and wall-hugging seating go against walls and out of the path. They hold more people per square meter than movable chairs because they need no clearance behind them.
- Place the movable seats. Put chairs where guests can pull them out without entering the path. A dining chair needs 75 to 90 cm of pull-out room behind it.
- Place the fixtures last. Every fixture should either mount above head height, recess into a surface, or sit outside the circulation path. If a fixture lands in the path, move the fixture, not the path.
- Check the sightlines from every seat. Sit in each chair position and look toward the brightest fixture. If you can see the bare bulb, shield it or re-aim it.
Lighting placed after furniture protects the clearances furniture needs.
Glare Control and Guest Comfort
Glare is the number one complaint about outdoor lighting. It happens when a bright bulb sits in a guest's line of sight. The fix is simple: shield the source.
Choose fixtures with baffles, shields, or deep housings. Aim downlights straight down, not across the patio; for uplights, use a glare guard or aim at surfaces that diffuse the light.
A few practical moves that preserve seats while cutting glare:
- Cross-light the table with two downlights rather than one bright fixture. Two dimmer sources cast softer shadows and reduce the hot spot that makes guests squint.
- Keep the brightest light off the seating plane. Aim it at a wall, tree, or overhead surface so the eye sees reflected light, not the source.
- Use a dimmer on every zone. Lower output at dinner cuts glare and makes the patio feel larger.
Zoning for More Usable Seats
Split the patio into at least two lighting zones: one for the main seating or dining area, one for paths and steps, with a third for accent light as a bonus.
A common pattern is a patio with one switch for everything, which is either too bright for conversation or too dark to find the steps. Two or three zones solve both problems.
Layered Landscape Lighting for a Cozy, Inviting Atmosphere
Layered landscape lighting ties the patio to the yard and makes the whole outdoor space feel bigger and more finished.
String Lights and Overhead Options
String lights are the easiest way to add overhead ambiance. Hang them 2.4 to 3 meters above the patio so tall guests clear them. Run them between posts, beams, or a pergola.
Keep bulbs spaced 30 to 45 cm apart for even light. Add a dimmer so you can drop the brightness after dinner. A dimmed patio feels far cozier than a fully lit one.
Pathway and In-Ground Lights for Safety
Path lights and in-ground fixtures keep guests safe after dark. Light every step, level change, and walkway edge, especially where the patio meets grass or gravel.
Aim for soft, low light along paths: bright path lights create glare and pull attention from the seating area. The goal is to guide feet, not light the whole yard.
Power, Installation, and Weather Considerations
The best layout fails without reliable power. Plan the electrical side before you buy a single fixture.
Low-voltage systems are the standard for patios.
Weather decides how long the system lasts.
Here's what to check before install:
- Confirm the transformer can handle the total fixture load, with room to spare
- Bury cable deep enough to avoid damage from tools and frost
- Seal every connection to keep out water
If wiring, trenching, or roof work feels like too much, that's where a pro earns their keep.
A great patio layout can still fall flat if the lighting is an afterthought.
Paramount Outdoor Lighting Group designs and installs custom low-voltage lighting built around your space and your furniture. From layered patio lighting to permanent architectural systems and holiday displays, our team manages the whole project from first walk-through to final adjustment.
Frequently Asked Questions
How do you light a patio without taking up seating space?
Use wall-mounted sconces, recessed step lights, or overhead string lights that attach to existing structures. These fixtures keep the floor clear for chairs and tables. For example, mount sconces 5 to 6 feet above the deck on walls or posts, and run string lights between the house and a tree or pergola. In-ground uplights can also highlight plants without intruding on the seating area.
Where should outdoor lights go around a patio seating area?
Place lights at three levels: overhead for ambient glow (string lights or a pendant), eye-level for task lighting (sconces or portable lamps), and low-level for accents and safety (step lights or path lights). Keep fixtures out of direct sightlines to reduce glare.
What type of lighting is best for an outdoor seating area?
Layered LED lighting works best. Start with warm-white string lights or a dimmable overhead fixture for ambient light. Add battery-operated table lamps for task lighting, and use low-voltage path lights or in-ground uplights for accents. LED bulbs use less energy and last longer than incandescent. Choose fixtures rated for wet locations and ensure they are properly sealed to withstand rain and humidity.
How can lighting make a small patio feel larger?
Lighting can visually expand a small patio by drawing the eye outward. Use uplights on trees or walls beyond the patio edge to create depth. Keep the seating area evenly lit with no dark corners. Avoid harsh spotlights that shrink the space. A combination of string lights overhead and soft path lights along the perimeter makes the patio feel open and inviting without adding physical square footage.