
How to Design Outdoor Patio Lighting Ambiance
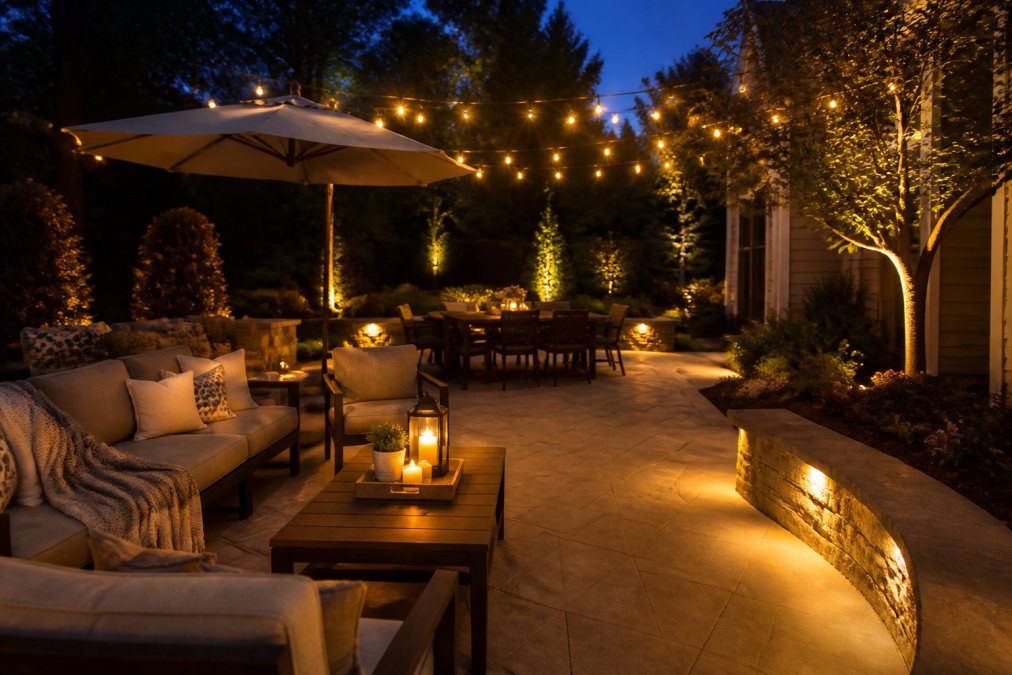
Table of Contents
- What You'll Need to Design Patio Lighting Ambiance
- How to Design Outdoor Patio Lighting Ambiance: Step-by-Step
- Outdoor Lighting Layering Guide: Ambient, Task, and Accent
- How to Choose the Right Color Temperature for Outdoor Lights
- Smart Outdoor Lighting Control Systems for Effortless Ambiance
- Common Mistakes to Avoid in Patio Lighting Design
- Conclusion: Build Your Patio Lighting Ambiance Layer by Layer
- Frequently Asked Questions
Last Updated: September 8, 2026
Most patio lighting fails not because of the fixtures, but because of the plan. Designing outdoor patio lighting ambiance is about intentional layering, thoughtful placement, and understanding how light shapes mood. This guide from Paramount Outdoor Lighting Group walks through a practical, step-by-step method to transform your patio.
What You'll Need to Design Patio Lighting Ambiance
Patio lighting ambiance is the result of combining three distinct layers: ambient, task, and accent lighting. Each serves a specific purpose, and the magic happens when they work together.
Ambient lighting provides the overall, soft illumination that lets you move around safely. Task lighting focuses on functional areas like the grill or outdoor dining table. Accent lighting draws the eye to architectural details, trees, or water features.
Your toolkit will also include practical elements: low-voltage LED fixtures, a transformer to step down power, weatherproof connections, and a control system. Considering the energy efficiency guidelines from the Department of Energy, LED options are the clear choice for longevity and lower energy use. Think in terms of lumens for brightness and IP ratings for weather resistance, not just wattage.
How to Design Outdoor Patio Lighting Ambiance: Step-by-Step
Step 1: Map Your Patio's Zones and Focal Points
Start by drawing a simple bird's-eye sketch of your patio. Identify the primary zones: where you dine, lounge, and the main walkways.
Next, note focal points you want to highlight after dark, such as a stone fireplace, specimen tree, or water feature, and mark where you need practical light for safety like steps. This map becomes your blueprint.
Step 2: Choose Your Light Sources and Fixtures
With your map in hand, select fixtures that match each zone's function. For ambient light, consider wall sconces or recessed deck lights. For task lighting over a dining table, a linear suspension light or dimmable pendant works well. For accenting focal points, uplights and directional well lights are standard tools.
Pay close attention to the beam spread of each fixture. A narrow beam creates a dramatic spotlight effect, while a wide beam washes a wall gently. Mixing beam spreads adds sophistication to the overall patio lighting ambiance.
Step 3: Plan Placement for Even, Glare-Free Light
Placement is where most DIY designs go wrong. The common mistake is placing fixtures where they shine directly into eyes; light should be aimed at surfaces, not at people.
For walkways, position pathway lights so their beams overlap slightly. For seating areas, keep light sources at or below eye level to prevent glare. When uplighting trees, aim the fixture so the light grazes the trunk, creating texture rather than a flat wash.
Outdoor Lighting Layering Guide: Ambient, Task, and Accent
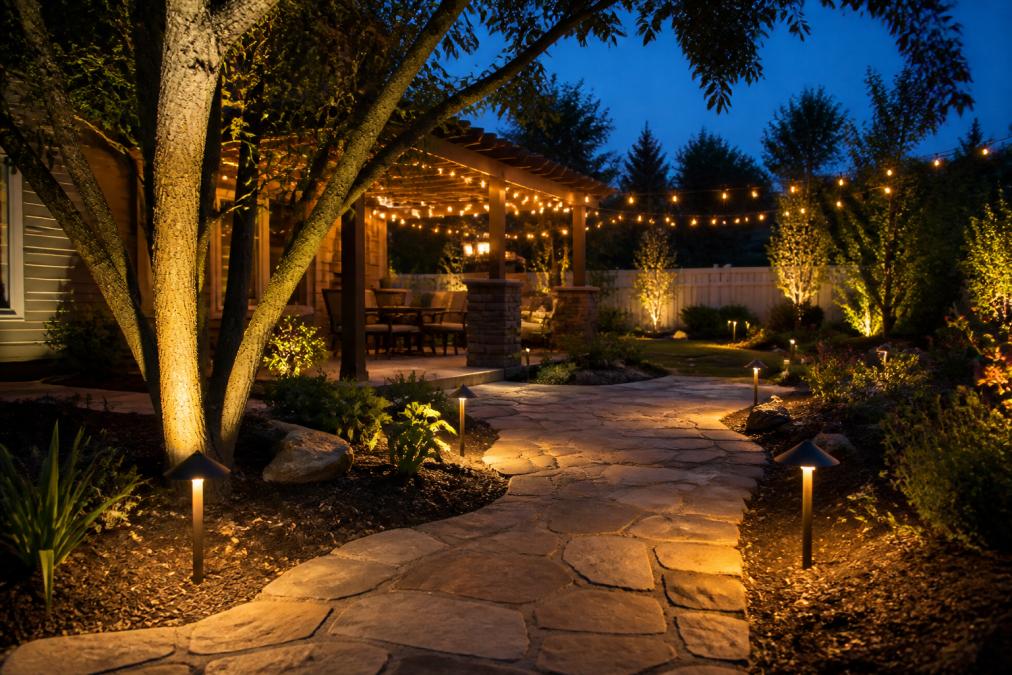
A successful outdoor lighting layering guide follows the same principles as interior design, requiring three distinct types of light to create a space that is both functional and atmospheric.
- Ambient Lighting: This is your base layer. It fills the space with soft, overall illumination. Options include string lights overhead, lanterns, or dimmable wall lights.
- Task Lighting: This layer is purely functional. It ensures you can see what you are doing when grilling, reading a menu, or preparing food. Consider under-cabinet lights in an outdoor kitchen or a focused light over the grill.
- Accent Lighting: This is the personality layer. It adds drama and depth by highlighting textures and focal points, drawing the eye to specific areas of your landscape design.
The ratio matters. Many designers suggest accent and ambient layers should dominate, with task lighting used sparingly and only where needed.
How to Choose the Right Color Temperature for Outdoor Lights
Choosing the right color temperature for outdoor lights is critical because it sets the entire mood. Measured in kelvin (K), this scale determines whether your light appears warm and cozy or cool and clinical, and it taps into human biology.
The Science of Warm Light and Circadian Rhythm
Most residential patio designs default to 2700K to 3000K, and for good reason. This range produces a soft, golden-white glow similar to candlelight, flattering skin tones and creating a relaxing atmosphere. But the benefit is physiological, not just aesthetic.
Our eyes contain photosensitive ganglion cells sensitive to blue-wavelength light (roughly 480nm). Exposure to cooler, blue-rich light in the evening suppresses melatonin production, the hormone that regulates sleep, which is why the American Medical Association has issued guidance on reducing blue-rich lighting at night outdoors (ama-assn.org). Sticking to the 2700K-3000K range works with your body's natural rhythm.
When Cooler Temperatures Make Sense
Cooler temperatures in the 4000K to 5000K range cast a stark, blue-white light, better suited for security lighting or commercial applications where clarity and alertness are prioritized over mood. A motion-sensor floodlight for a side yard or garage area is acceptable at a cooler temperature.
However, a common mistake is using these cooler fixtures in the same visual field as warm patio lights. The human eye perceives the contrast as harsh and disjointed. If you need security lighting near your entertaining area, consider a warm-white security fixture (2700K-3000K) or position the cooler light out of view.
The CRI Factor Most Guides Ignore
Color temperature is only half the story. The Color Rendering Index (CRI) measures how accurately a light source reveals true colors compared to natural sunlight. A fixture can be 2700K but have a low CRI, making plants look dull and food unappetizing. style outdoor seating.
For outdoor living spaces, look for LEDs with a CRI of 90 or above, particularly for task lighting over grills and dining tables where food presentation matters (energy.gov). Many budget LED string lights have CRI ratings in the 70s or 80s, which is why some patios look flat even with warm lighting. High-CRI fixtures cost slightly more but make a measurable difference.
Matching Color Temperature to Surface Materials
The materials on your patio should influence your Kelvin choice. Warm wood tones, terracotta, and brick reflect warm light beautifully, 2700K enhances their natural richness. If your patio features cool gray stone, concrete, or stainless steel, a slightly higher temperature around 3000K can prevent the space from feeling muddy or overly amber.
The One-Temperature Rule and Its Exception
Mixing color temperatures in one space is a common error that makes the design feel disjointed. Stick to one temperature family for a cohesive look. The single exception is accent lighting on architectural features or specimen plants, where a very subtle cool accent (around 3500K) can create contrast, but this is an advanced technique. For most homeowners, staying within one temperature family delivers the most polished result.
Smart Outdoor Lighting Control Systems for Effortless Ambiance
Once your lighting is installed, the control system makes it truly effortless. Smart outdoor lighting control systems allow you to adjust scenes without walking outside to a switch, but the real power lies in designing "ambiance scenes", pre-programmed combinations of light levels and zones that transform your patio with a single tap.
Understanding the Control Hierarchy
Before buying anything, understand the three levels of control available in the US market:
-
Standalone timers and photocells, The simplest option. A photocell automatically turns lights on at dusk and off at dawn; a timer adds schedule-based control. These cost $15-$50, require no Wi-Fi, and are reliable but offer no flexibility for scene changes.
-
Smart plugs and Wi-Fi switches, Products like Kasa, Wemo, or Lutron Caseta let you control individual circuits from a smartphone app, with schedules and voice assistants like Alexa or Google Home. This works well for retrofitting existing fixtures but treats each light as a single on/off device rather than a dimmable zone.
-
Professional low-voltage control systems, Systems from companies like FX Luminaire, Kichler, or VOLT use a central controller connected to your low-voltage transformer. These allow per-zone dimming, scene programming, and integration with home automation platforms like Control4 or Savant, the level where true ambiance design becomes possible.
Designing Ambiance Scenes: The Zone Approach
Professional lighting designers think in zones, not individual fixtures. Divide your patio into functional groups: ambient overhead, pathway, accent (focal points), and task (grill/dining). Each zone should be on a separate channel of your control system so it can be dimmed independently.
Once your zones are wired, program scenes that match how you actually use the space:
- Dinner Scene: Ambient at 60%, task lighting over the table at 80%, accent at 40%, pathway at 30%. This keeps the table bright enough to see food while maintaining a warm glow around the edges.
- Party Scene: Ambient at 80%, accent at 70%, pathway at 50%, task at 20%. Brighter overall to encourage movement and conversation, with accent lights showing off the landscape.
- Late Night / Stargazing Scene: Ambient at 20%, accent at 10%, pathway at 15%, task off. Just enough light to navigate safely without overwhelming the night sky.
- Security Scene: All zones at 100%, triggered by motion sensors or a manual override. This is separate from your ambiance scenes and should be programmed to activate only when needed.
The Dimming Curve Matters
Not all dimming is created equal. LED fixtures require dimmers rated for LED loads, using an incandescent-rated dimmer causes flicker or a limited dimming range. Look for dimmers with a low-end trim adjustment so you can set the minimum level where your LEDs stay stable.
Also consider the dimming curve. Some controllers dim linearly, while others follow a logarithmic curve that matches human perception. The latter feels more natural.
Automation Triggers Beyond Schedules
Schedules are just the starting point. Advanced systems can use multiple triggers:
- Astronomical clock: Automatically adjusts on/off times based on sunrise and sunset for your exact ZIP code. This is standard on quality controllers and eliminates seasonal adjustments.
- Motion sensors with scene logic: Instead of simply turning lights on, a motion sensor can trigger a low-level "welcome" scene at 30% when someone approaches, then ramp to a full "entertaining" scene when a second sensor is triggered deeper in the yard.
- Geofencing: Your phone's location can trigger scenes. When you arrive home after dark, the system can bring pathway and entry lights to 40%. When you leave, it can switch to security mode.
- Voice control: Integrating with Alexa or Google Home allows simple commands like "set patio to dinner scene." This is convenient but should be a supplement to, not a replacement for, automated triggers.
Practical Considerations for Retrofit vs. New Installation
If you are installing new low-voltage lighting, specify a smart controller from the start. The controller sits between your transformer and the fixture wires, and adding it later requires rewiring. Most quality low-voltage transformers in the US operate at 12V or 15V AC, and the controller must match your system.
For existing installations with standard line-voltage fixtures, a smart switch like the Lutron Caseta or a Wi-Fi dimmer is the practical path. These replace your wall switch and give you app control without rewiring.
The Maintenance Angle: Smart Systems Need Updates Too
Smart systems rely on firmware and apps that receive updates. Set aside time twice a year to check for controller firmware updates and verify that your schedules still align with current sunset times. A system programmed correctly in June will be off by nearly two hours by December if the astronomical clock feature is not functioning properly. Most quality controllers handle this automatically, but budget systems may not.
Common Mistakes to Avoid in Patio Lighting Design
Even with a solid plan, several recurring mistakes can undermine the patio lighting ambiance you are trying to achieve.
- Overlighting: More light is not better. Too many fixtures create glare and wash out the space.
- Ignoring Glare: Placing lights at eye level causes discomfort. Always aim light downward or shield the source.
- Mismatched Color Temperatures: Mixing cool and warm lights creates a chaotic, unprofessional look.
- Forgetting the Transformer: Low-voltage systems need a properly sized transformer. Undersizing it leads to dim lights and premature failure.
- Skipping Maintenance: Outdoor fixtures accumulate dirt and debris. A simple seasonal cleaning keeps light output high.
Conclusion: Build Your Patio Lighting Ambiance Layer by Layer
Designing outdoor patio lighting ambiance is not about buying the most expensive fixtures; it is about making deliberate choices that serve your space and lifestyle. Start with a clear map, layer your lighting types, keep your color temperatures warm, and automate the system for convenience. Avoid the common mistakes of glare and overlighting, and you will create an outdoor space that feels natural and inviting.
Planning a full installation or a holiday lighting setup can be complex, especially when it involves two-story homes or tricky wiring. This is where professional guidance pays off. At Paramount Outdoor Lighting Group, our team handles the design and installation with custom, low-voltage systems and offers permanent architectural lighting with instant access to millions of colors for any occasion. We bring decades of experience to ensure your property looks its best by night and stays beautiful by day.
Frequently Asked Questions
What color temperature is best for outdoor patio ambiance?
For a relaxed, inviting patio ambiance, stick with warm white light in the 2200K to 2700K range. This mimics the glow of candlelight or a fire and flatters skin tones. Avoid 4000K or higher, which reads as stark, blue-white light more suited to security or task areas. If you want flexibility, choose a dimmable or smart system that lets you adjust both brightness and color temperature for different occasions.
How do you layer lighting for an outdoor patio?
Layer lighting the same way you would indoors: combine ambient light for overall illumination, task light where you cook or eat, and accent light to highlight focal points. Start with ambient sources like string lights or wall sconces. Add task lighting under cabinets or above a grill. Finish with accent lighting, such as uplights on trees or downlights on a water feature, to create depth and visual interest.
How can I make my patio lighting look professional?
Professional patio lighting avoids glare and looks intentional. Hide light sources where possible, use shielded fixtures, and aim light where it is needed rather than scattering it. Keep color temperatures consistent across all fixtures, and use a low-voltage system with a transformer and photocell so lights turn on automatically at dusk. Most importantly, follow an outdoor lighting layering guide to balance ambient, task, and accent light instead of relying on a single fixture type.
What are the benefits of smart outdoor lighting control systems?
Smart outdoor lighting control systems let you set scenes, schedules, and automation from your phone. You can program lights to turn on at dusk via a photocell or motion sensor, dim them for a quiet dinner, or brighten them for a party. Many systems also support color changes for holidays and integrate with voice assistants. This convenience removes the guesswork from daily operation and helps extend the life of your fixtures by limiting runtime.
Getting the perfect ambiance is about more than just picking bulbs. It is about a design that works for your specific space. Request a walk-through with Paramount Outdoor Lighting Group and see how professional, layered lighting can transform your patio into your favorite room of the house.