
Subtle Architectural Lighting Design Ideas for 2026
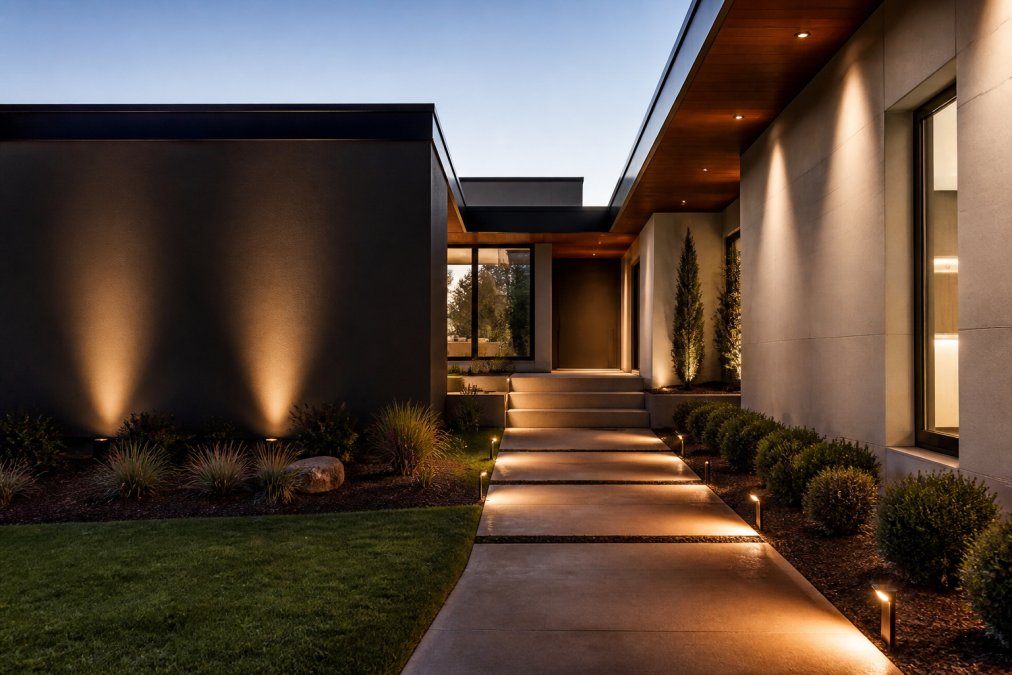
Table of Contents
- What Makes Lighting Architectural?
- Architectural Lighting Techniques for Homes
- How to Light a Brick House Exterior at Night
- Recessed Lighting Placement Guide for Subtle Effects
- Choosing Color Temperature and Dimming Controls
- Budget-Friendly Ways to Start Small
- Conclusion
- Frequently Asked Questions
Last Updated: September 5, 2026
Good architectural lighting is the difference between a house that looks like a showroom and one that feels quietly inviting after dark. Subtle architectural lighting design ideas focus on revealing texture, depth, and form rather than announcing the fixtures themselves.
This guide covers the core techniques, placement rules, and color choices that deliver that restrained, high-end look, then closes with budget-friendly ways to start small.
What Makes Lighting Architectural?
Architectural lighting integrates light sources into the building structure itself, using concealed, recessed, or flush-mounted fixtures to illuminate surfaces rather than emit bare bulbs. The fixture is secondary; the illuminated wall, ceiling, or facade is the focal point.
The discipline rests on three pillars: layering, precision, and restraint. You combine ambient lighting for overall visibility, accent lighting to highlight features, and task lighting where activities happen. Each layer serves a purpose, and dimming controls let you shift emphasis throughout the evening.
What most guides get wrong is assuming more fixtures equal better design. The opposite is true. A single well-placed linear LED grazing a stone wall creates more drama than a dozen visible downlights. The Illuminating Engineering Society's lighting fundamentals emphasize that successful design is measured by what you see, not by the equipment list.
Architectural Lighting Techniques for Homes
Several techniques form the vocabulary of architectural lighting for homes.
Wall Washing vs. Wall Grazing
Wall washing and wall grazing both illuminate vertical surfaces but produce different textures. Wall washing uses fixtures placed 12 to 18 inches from the wall for a smooth, even pool of light. Wall grazing places fixtures within 2 to 6 inches so the light rakes across the material, exaggerating every brick, stone, or stucco texture.
Choose wall washing for clean, modern surfaces like smooth plaster or painted drywall where uniformity matters. Choose wall grazing for textured materials like brick, stone, or wood siding where shadow play adds depth. A common mistake is grazing a smooth surface, which reveals every imperfection, or washing a textured one, which flattens its character.
Cove Lighting and Linear LEDs
Cove lighting is a recessed or concealed light source in a ledge, valance, or ceiling perimeter that bounces light upward or across a surface, creating indirect ambient lighting with no visible glare.
Modern cove lighting relies on linear LED strips, which offer consistent lumen output and long life. Position them to wash the ceiling for an airy feel, or angle them down a wall for a soft gradient. Integrated lighting like this reads as part of the architecture, not an add-on. For a more detailed breakdown of layering techniques, the Architectural Lighting Magazine's technique library offers useful reference diagrams.
How to Light a Brick House Exterior at Night
Lighting a brick house exterior at night starts with grazing, not flooding. Mount low-profile fixtures at the base of the walls, aiming upward at a steep angle to accentuate the brick's texture and color. This creates shadow play that gives the facade depth, whereas broad floodlights wash out detail and create glare.
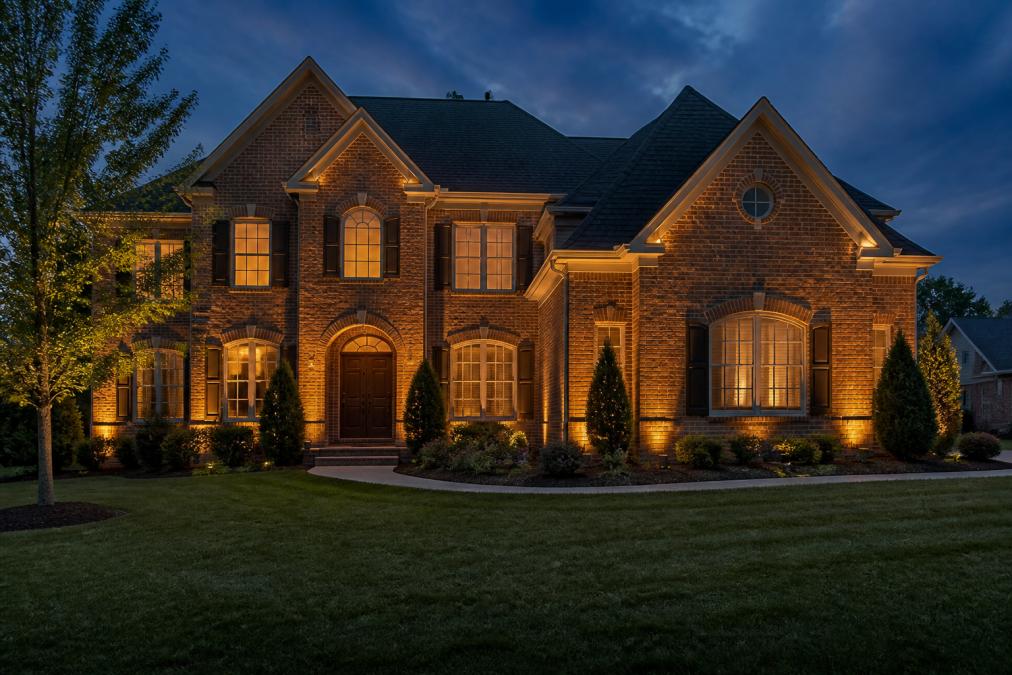
Space fixtures evenly, roughly 2 to 3 feet from the wall, and angle them to avoid light spilling into windows. Use a warm color temperature around 2700K to complement brick's earthy tones. Add accent lighting on details like columns or cornices, but resist lighting every surface; dark areas create contrast that makes lit areas feel intentional.
For the entry path, rely on low-level path lights for safety without competing with the facade. The overall composition should read as one cohesive scene, not a collection of individual fixtures.
Recessed Lighting Placement Guide for Subtle Effects
Recessed lighting placement determines whether a room feels calm or clinical. The rule of thumb is to space fixtures roughly half the ceiling height apart, but for subtle effects, you break that rule deliberately.
Use recessed fixtures for precision tasks: a narrow beam over a kitchen island, a picture light above a fireplace, or a downlight grazing a curtain wall. Keep beam angles tight, 15 to 30 degrees, so light lands where you want it and falls off quickly elsewhere. Place them at least 24 inches from walls to avoid harsh scalloping.
For hallways and staircases, recessed step lights mounted low on the riser or wall provide visual comfort and safety without overhead glare. Subtle effects always prioritize fewer fixtures with precise aiming over a uniform grid.
Choosing Color Temperature and Dimming Controls
Color temperature, measured in Kelvin (K), is the single most important decision for subtlety. It determines whether your lighting feels like a warm embrace or a clinical inspection. Match the light to the material and the mood you want after dark.
The Kelvin Scale for Subtle Effects
Here is how different ranges read in practice:
- 2200K - 2400K: A deep amber, candle-like glow. Best for rustic materials like reclaimed wood, dark stone, or adobe. It reads as intimate but can feel too dim for task areas.
- 2700K - 3000K: The sweet spot for most residential exteriors and interiors. It is warm without being orange, flattering to brick, stucco, and warm paint tones. Standardize here for consistency.
- 3500K - 4000K: A neutral, crisp white. Useful in modern kitchens or bathrooms where you need clarity, but it can feel stark on textured facades. Use sparingly and only in specific task zones.
- 5000K+: Daylight mimicry. Avoid this for subtle architectural effects; it flattens texture and creates harsh shadows.
A common failure is mixing a 2700K fixture on one wall with a 4000K fixture on another; the eye notices the discrepancy immediately. Decide on one Kelvin value for the entire property. If you must vary, keep the difference within 300K and confine it to separate zones.
Dimming: The Mechanism Behind the Mood
Dimming is about controlling the fade curve and minimum light level. Use dimmers rated for LED loads, often labeled "ELV" or "MLV" for low-voltage systems. A standard incandescent dimmer will often cause flicker or a minimum brightness that is too high.
For low-voltage systems, look for dimmers that support a 1% to 10% dimming range, allowing a barely-there glow without shutting off entirely. Many high-end systems use 0-10V dimming protocols, increasingly common in residential control systems.
Smart Home Integration: The Missing Layer
Most design articles stop at aesthetics, but the real utility comes from automation. A subtle lighting scheme is only as good as its ability to adapt to your life.
- Protocols: Look for fixtures and controllers that support standard protocols like Zigbee, Z-Wave, or Wi-Fi. For permanent outdoor installations, a wired control system (like those from Lutron or Crestron) is more reliable than Wi-Fi, which can drop signals. If you are using a smart home hub (e.g., Hubitat, Home Assistant, or a proprietary app), verify that the lighting controller is compatible before purchase.
- Scenes and Schedules: Program scenes that shift over the evening. For example, a "Welcome" scene at 6:00 PM runs at 80% brightness, a "Dinner" scene at 7:30 PM drops to 50%, and a "Wind-down" scene at 10:00 PM goes to 20%. This is not just convenience; it prevents the harshness of full-brightness light when your eyes have adapted to the dark.
- Occupancy Sensors: For hallways and staircases, pair step lights with occupancy sensors so they only illuminate when someone is present. This saves energy and keeps the space dark when not in use, which is the ultimate form of subtlety.
- Sunset Triggers: Use astronomical clocks or GPS-based triggers to turn on exterior lights at sunset, not at a fixed time. This keeps the lighting aligned with the season without manual adjustment.
The U.S. Department of Energy's LED lighting guidance confirms that dimming LEDs also extends their operational life, which matters for fixtures that are hard to reach. A fixture that runs at 50% brightness can last significantly longer than one at 100%, reducing the frequency of costly replacements in permanent installations.
Practical Dimming Setup for Homeowners
If starting small, begin with a single smart dimmer on your front entry light to experiment with scenes and schedules. For permanent fixtures, consider a centralized control panel that manages all zones, avoiding clutter and allowing complex scene programming.
A control keypad at the main entry that cycles through preset scenes gives one-touch control over the entire property. The goal is to make lighting disappear into the background until you need it, then respond instantly.
Budget-Friendly Ways to Start Small
You do not need to light the entire property at once. Starting small lets you test the effect before committing to a full system. Prioritize impact per dollar and avoid pitfalls that lead to wasted money.
The 3-Tier Starter Approach
Tier 1: The $50 to $150 Experiment
Before buying new fixtures, fix what you have. Replace existing porch or garage bulbs with dimmable LED bulbs at 2700K for under $20, and add a smart plug or timer. This is the cheapest way to see if warm, dimmable light changes the feel of your entry.
Next, purchase a single, low-profile well light or bullet fixture (often $40 to $80) and aim it at your most prominent brick or stone surface. Place it 2 to 3 feet from the wall and angle it upward to graze the texture. This one fixture will do more than a dozen floodlights.
Tier 2: The $300 to $600 Zone Upgrade
Once you see the effect, expand to a second or third fixture on the same facade. Look for fixtures that use a common low-voltage transformer (12V or 24V) so you can run them off a single power supply. Add a photocell or astronomical timer to automate on/off.
Tier 3: The $1,000+ Professional System
If happy with the look, bring in a professional for a permanent, low-voltage installation. This ensures proper wiring, weatherproofing, and a centralized control system, protecting against failures that plague DIY setups.
What to Avoid When Budgeting
- Non-weatherproof fixtures: Indoor-rated fixtures will fail within a season outdoors. The cost of replacing them, plus the labor, exceeds the savings.
- Cheap transformers: A low-quality transformer can cause voltage drop, leading to dimmer lights at the end of the run. Invest in a reputable brand (e.g., FX Luminaire or Kichler) for reliability.
- Overloading circuits: When adding fixtures to an existing transformer, check the total wattage. Do not exceed 80% of the transformer's rated capacity to prevent overheating.
Maintenance: The Hidden Cost of Permanent Fixtures
A common anxiety is what happens when an integrated fixture fails. Unlike a table lamp, you cannot just unplug it.
- LED Lifespan: Most quality LEDs are rated for 25,000 to 50,000 hours. At 4 hours per night, that is 17 to 34 years. The driver (the power supply) is often the first component to fail, not the LED itself.
- Driver Replacement: When a fixture dims or flickers, it is usually the driver. These are replaceable, but you need access to the fixture. This is why professional installation matters: fixtures mounted with proper access points are easier to service.
- Weatherproofing: Outdoor fixtures have gaskets and seals that degrade over time. Inspect them annually and replace any that are cracked. A small investment in a new gasket prevents moisture ingress that can short the system.
- Cleaning: Dirt and pollen accumulate on lenses, reducing light output by up to 30% over a year. A simple wipe-down with a damp cloth twice a year keeps the system performing as designed.
The Smartest First Purchase
If you only buy one thing, make it a single, well-aimed well light with a warm LED (2700K) and a smart plug. This combination costs under $100 and delivers the highest impact-to-cost ratio. Aim it at your front door surround or a textured wall. You will see the difference immediately, and it will guide your decisions on what to add next.
The table below summarizes where to focus first, balancing cost, impact, and ease of installation.
| Priority | Area | Technique | Estimated Cost | Impact |
|---|---|---|---|---|
| 1 | Front entry | Warm accent on door surround | $20 - $50 | High visibility, low cost |
| 2 | Main facade | Wall grazing on brick or stone | $40 - $100 | Adds texture and depth |
| 3 | Walkway | Low-level path lighting | $50 - $150 | Safety and guidance |
| 4 | Architectural detail | Spot on columns or cornice | $30 - $80 | Finishes the composition |
Starting small is not a compromise; it is a strategy. It lets you learn what works on your specific home, build confidence, and avoid costly mistakes. When ready to expand, you will know exactly what you need and why.
Conclusion
Subtle architectural lighting design ideas come down to a simple principle: light the architecture, not the yard. Start with one textured surface, use a warm color temperature, and control everything with dimmers.
Designing a layered scheme that balances shadow and light takes experience, especially when it involves permanent, low-voltage fixtures integrated into your home's structure. At Paramount Outdoor Lighting Group, our team handles the full process, from custom design to professional installation, as an authorized JellyFish Lighting dealer offering permanent, energy-efficient LED systems with access to millions of colors. We deliver seamless integration that looks natural by day and intentional by night, and we stand behind the longevity of our low-voltage work.
Request a walk-through and see how your home could look with lighting designed to disappear into the architecture.
Challenge: Most homeowners settle for glaring floodlights or visible fixtures that fight the architecture. The fix is a restrained, layered design that respects your home's materials and lines. Paramount Outdoor Lighting Group specializes in exactly this kind of subtle, permanent architectural lighting, with custom designs, decades of experience, and a seamless process from consultation to installation. Get started with Paramount Outdoor Lighting Group and see your property transformed by night while staying beautiful by day.
Frequently Asked Questions
What is the difference between ambient and architectural lighting?
Ambient lighting provides general illumination for a room or space, ensuring you can see and move around safely. Architectural lighting is designed to highlight the structure itself, such as washing a wall to reveal texture or using cove lighting to make a ceiling appear taller. While ambient light serves a practical purpose, architectural lighting is a design tool that shapes perception, adds depth, and creates a specific mood in your home.
How do you achieve a minimalist lighting look?
A minimalist look relies on the principle of 'less is more.' Focus on lighting the architecture, not the room's contents. Use low-profile fixtures like recessed lights or linear LED strips that disappear into the structure. Choose a single color temperature (usually warm white around 2700K) and install dimming controls. The goal is to create layers of light that feel intentional and clean, without visible clutter from lamps or bulky fixtures.
Can architectural lighting be integrated into existing structures?
Yes, many retrofitting options exist. Surface-mounted linear fixtures can be added to ceilings or walls to create a cove effect without major construction. For highlighting a brick exterior, low-profile spotlights can be mounted on the ground or under eaves. Recessed lighting can often be installed in existing ceilings if there is access from above. A professional design consultation can identify the best low-impact solutions for your specific home.
How can I use lighting to highlight architectural features?
The technique depends on the feature. For a textured wall, use wall grazing by placing a light close to the surface to emphasize shadows and material. For a large, flat surface, wall washing with lights placed further away creates a smooth, even glow. To highlight a fireplace or a piece of art, use an adjustable accent light. The key is to illuminate the focal point while keeping the light source itself hidden from view.
This article was written using GrandRanker