
Beam Angle for Brick Uplighting: A 2026 Guide
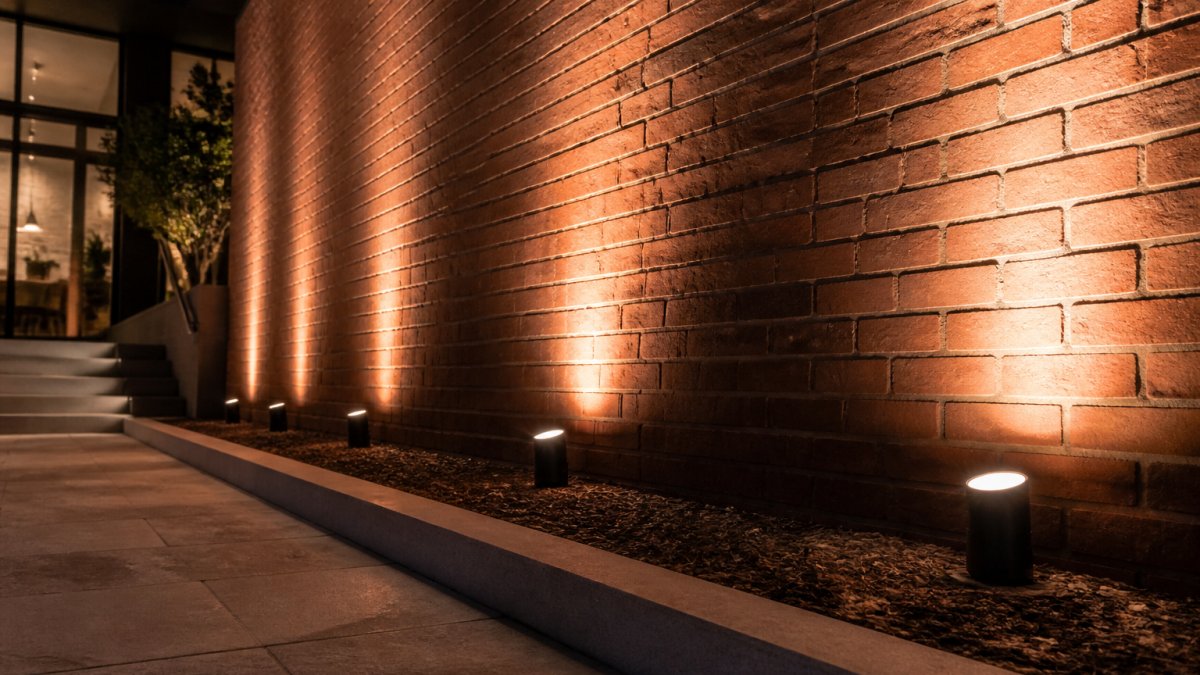
Table of Contents
- Understanding Beam Angle and Light Spread for Brick Surfaces
- Narrow, Medium, and Wide Beam Angles Explained
- Uplighting Placement on a House: Distance and Aiming
- Wall Washing Brick Exterior: Matching Beam Spread to Your Wall
- Uplight Spacing for Exterior Walls: Avoiding Dark Gaps and Hot Spots
- Practical Steps: Testing and Adjusting Your Beam Angle Selection
- Common Mistakes to Avoid When Selecting Beam Angles for Brick Uplighting
- Frequently Asked Questions
Last Updated: October 17, 2026
Understanding Beam Angle and Light Spread for Brick Surfaces
Choosing the right beam angle brick uplighting transforms how your home's exterior looks after dark. Get it wrong, and you'll end up with dark patches, harsh hot spots, or wasted light spilling into your neighbor's yard.
The most common mistake homeowners make is picking a beam angle without measuring their wall.
How beam angle affects light intensity and coverage
Beam angle is measured in degrees. A narrow beam concentrates light into a tight cone. A wide beam spreads light across a larger area with less intensity at any single point.
Imagine a flashlight with an adjustable lens: narrowing the beam makes the spot brighter but smaller, while widening it covers more ground but feels dimmer.
This matters for beam angle brick uplighting because brick isn't smooth. A beam that's too narrow creates a harsh spotlight effect; one that's too wide washes out the brick's natural character.
Why brick texture and color matter
Rough, tumbled brick reflects light diffusely, spreading it in many directions. Smooth, polished brick reflects it more directly, creating sharper shadows and highlights.
Mortar color also matters: dark mortar absorbs light and makes the wall appear darker, while light mortar brightens the facade. The same beam angle and fixture placement can look completely different on two walls with different mortar colors.
Red and orange brick tones warm under uplighting, while tan and gray brick can look cool or institutional depending on color temperature. Most professionals recommend warm white light (2700K-3000K) for residential brick.
Narrow, Medium, and Wide Beam Angles Explained
Beam angles fall into three practical categories for outdoor uplighting, each suited to different wall sizes and distances.
Narrow beams (10° to 17°) for accent and drama
Narrow beams create focused, dramatic lighting that makes architectural details pop. They work best for accent lighting on specific features: a brick chimney, an arched entryway, or a textured section of wall.
A 10° beam at 10 feet away illuminates roughly a 1.8-foot-wide area. At 15 feet, that same beam covers about 2.7 feet. The light remains bright and defined, creating strong contrast between lit and unlit areas.
Use narrow beams for drama and visual interest, such as highlighting masonry patterns or creating shadow play on textured brick.
Medium beams (20° to 40°) for balanced coverage
Medium beams offer the best balance for most residential brick uplighting projects, spreading light across a reasonable area while maintaining good intensity. A 25° beam at 10 feet covers roughly 4.5 feet; at 15 feet, about 6.7 feet.
This range works well for walls 15 to 25 feet wide with fixtures 10 to 15 feet away. Shadows and texture remain visible, but the overall effect is polished and intentional.
Medium beams are forgiving if spacing isn't perfect and look professional without precise installation.
Wide beams (60° and beyond) for soft, uniform wash
Wide beams spread light across large areas with soft, even coverage. A 60° beam at 10 feet illuminates roughly 11 feet; at 15 feet, about 16.5 feet.
Wide beams work best for large, broad brick surfaces where you want uniform illumination, including wall washing for even, shadow-free light across the entire facade.
The trade-off: wide beams have lower intensity at any point on the wall and can look flat if the brick has interesting texture you want to showcase.
Uplighting Placement on a House: Distance and Aiming
Where you place your fixtures matters as much as the beam angle. Distance from the wall and aiming angle determine how much of your wall gets lit and how even that light appears.

How fixture distance affects the illuminated area
Closer fixtures create smaller illuminated areas; fixtures placed farther from the wall spread light wider but with lower intensity.
A 20° beam 8 feet from the wall covers roughly 2.8 feet of width. Move that same fixture to 15 feet away, and it covers 5.3 feet.
For brick uplighting, most professionals install fixtures 8 to 15 feet from the wall for a good balance between coverage and intensity.
Taller walls benefit from fixtures placed farther away so light reaches the top without harsh shadows at the base.
Aiming angle and vertical coverage
Aiming angle is the vertical angle at which you point the fixture. Aimed straight up at 90 degrees, it creates maximum vertical coverage; at 45 degrees, light spreads more horizontally and covers less height.
For most brick facades, aim fixtures at 60 to 75 degrees from horizontal.
Tall, narrow walls benefit from steeper aiming angles (closer to vertical); short, broad walls work better with shallower angles (closer to horizontal). Test your angles at night before finalizing installation.
Wall Washing Brick Exterior: Matching Beam Spread to Your Wall
Wall washing creates even, shadow-free illumination across an entire facade. It requires careful beam angle selection and fixture spacing to avoid dark gaps or bright hot spots.
Beam spread calculations for wall dimensions
To calculate the beam spread you need, measure your wall's width and decide how many fixtures you'll use. Divide the wall width by the number of fixtures.
A 30-foot-wide brick wall with 3 fixtures needs each beam to cover roughly 10 feet of width.
The same wall with 6 fixtures needs each beam to cover 5 feet. A 20° beam at 12 feet works well for this spacing.
Write down your wall width, planned fixture count, and distance from the wall.
Choosing beam angles for tall or narrow brick walls
Tall walls present a vertical coverage challenge. A standard 20° or 25° beam aimed at 60 degrees covers height effectively.
Narrow walls (under 12 feet wide) work best with wider beams (30° to 40°) or fewer fixtures. A single wide-beam fixture can wash a narrow wall evenly.
Measure your wall's height-to-width ratio. Walls that are taller than they are wide benefit from steeper aiming angles and narrower beams. Walls that are wider than they are tall work better with shallower angles and wider beams.
Choosing beam angles for broad brick surfaces
Broad walls (wider than 25 feet) need multiple fixtures and careful spacing. Medium beams (20° to 40°) work well for most broad surfaces. They provide even coverage without creating harsh lines between fixture zones.
Space fixtures so their light cones overlap slightly. Overlap prevents dark gaps between beams. A good rule: fixtures should overlap by 10 to 20 percent of their coverage width.
For very broad surfaces, consider mixing beam angles. Use narrower beams (17° to 25°) in the center and wider beams (30° to 40°) at the edges.
Uplight Spacing for Exterior Walls: Avoiding Dark Gaps and Hot Spots
Proper fixture spacing is the difference between professional results and an amateur installation. Too much space creates dark gaps. Too little space creates bright hot spots and wastes fixtures.
Calculating fixture spacing based on beam angle
Start with your beam angle and fixture distance. Calculate the width each fixture illuminates at that distance.
A 25° beam at 12 feet covers roughly 5.3 feet. Using 0.9 as your overlap factor, space fixtures 4.8 feet apart.
A 35° beam at 12 feet covers roughly 8.5 feet. Space fixtures 7.6 feet apart for smooth coverage. A 15° beam at 12 feet covers roughly 3.2 feet.
These calculations assume fixtures are aimed at the same angle. If you're varying aiming angles, adjust spacing accordingly. Test spacing with a single fixture first.
Overlap and uniform illumination
Overlap creates uniform illumination across the wall. Without overlap, you see distinct bright zones and dark zones between fixtures. With overlap, light blends smoothly from one fixture to the next.
Aim for 10 to 20 percent overlap for most applications. This creates smooth transitions without excessive brightness in overlap zones.
Check your spacing at night before finalizing installation. Walk the length of the wall and look for dark gaps or overly bright spots. Adjust fixture position slightly if needed.
Practical Steps: Testing and Adjusting Your Beam Angle Selection
Installation isn't the end of the process. Real-world testing reveals what calculations can't predict. Nighttime conditions, brick color, and surrounding darkness all affect how your lighting looks.
Nighttime testing and real-world adjustments
Install one fixture first and observe it for several nights. Notice how the light changes as the brick warms or cools, how surrounding landscape lighting affects perception, and whether the beam angle matches your expectations.
Take photos at night from different distances and angles. Photos reveal what your eyes adjust to in real time. A photo from across the street shows whether the lighting looks balanced or awkward.
If the beam is too narrow, light appears harsh and dramatic. If it's too wide, the wall looks flat and washed out. Adjust the fixture's aiming angle first.
If aiming adjustments don't solve the problem, consider swapping to a different beam angle. Most quality fixtures allow lens swaps. Test a narrower or wider beam before committing to the final installation.
Managing glare and spill light
Glare occurs when light is too bright or aimed at the wrong angle.
Aim fixtures so light hits the brick, not windows or landscape above the wall. Use shields or louvers if spill light is unavoidable.
Check for glare from the street and from inside your home. Fixtures that create glare from inside windows distract from the view and can feel intrusive.
Spill light into the sky wastes energy and contributes to light pollution. Aim all fixtures at the wall or ground.
Common Mistakes to Avoid When Selecting Beam Angles for Brick Uplighting
Most installation problems stem from skipping the planning stage.
Don't guess at beam angle. Measure your wall and calculate the coverage you need.
Don't mix beam angles randomly.
Don't install fixtures too close to the wall. Fixtures closer than 6 feet create harsh hot spots on brick.
Don't aim all fixtures identically if your wall has varying heights or widths. Adjust aiming angles to match wall geometry.
Don't skip nighttime testing. What looks right during installation often looks wrong at night.
Achieving professional brick uplighting results requires planning, measurement, and real-world testing. At Paramount Outdoor Lighting Group, we help homeowners select fixtures and beam angles that transform their brick facades into stunning nighttime focal points.
Frequently Asked Questions
What does a 40-degree beam angle mean for brick uplighting?
A 40-degree beam angle spreads light in a cone that opens 40 degrees wide. At 10 feet from the wall, this creates an illuminated area roughly 7 feet tall. For most residential brick walls, 40-degree beams offer balanced coverage without excessive brightness concentration. They work well for medium-height walls and provide softer light distribution than narrow angles, reducing harsh shadows and bright spots while maintaining clear texture visibility on the brick.
How far from a brick wall should an uplight be placed?
Placement depends on your beam angle and wall height. For narrow beams (10-17°), position fixtures 6-12 feet from the wall base to create focused accent lighting. Medium beams (20-40°) work best 8-15 feet away for balanced coverage. Wide beams (60°+) can be placed closer, around 4-10 feet. Test placement at night to confirm the light reaches the top of your wall without creating dark gaps at the base. Adjust forward or back to fine-tune coverage.
How do you choose a beam angle for brick uplighting?
Start by measuring your wall height and width. For tall, narrow walls (20+ feet), use narrow to medium beams (12-25°) to concentrate light upward. For broad, shorter walls, wider beams (30-60°) provide even coverage. Consider brick texture and color: darker brick absorbs light, so slightly wider beams help achieve uniform illumination. Test with temporary fixtures at night to see how different angles interact with your specific brick before finalizing placement and purchasing permanent fixtures.
Should brick uplighting use narrow or wide beam spreads?
Narrow beams (10-20°) create dramatic accent lighting that highlights architectural details and mortar lines, ideal for showcase walls. Wide beams (40-60°+) deliver soft, uniform wall washing that flatters most brick textures and hides imperfections. Most residential applications benefit from medium beams (25-40°) as a practical middle ground. Choose narrow if you want architectural drama; choose wide for subtle, flattering illumination. Your brick color and condition, plus desired visual effect, should guide the decision.