
How to Choose Outdoor Lighting Fixtures: 2026 Guide
Table of Contents
- Start With Purpose: Accent, Task, or Ambient Lighting
- How to Choose the Right Color Temperature for Outdoor Lights
- Outdoor Lighting Sizing Guide: Scale Fixtures to Your Architecture
- Wet-Rated vs. Damp-Rated: Match the Ingress Protection Rating to the Spot
- Materials and Finishes That Survive Freeze-Thaw Cycles
- Power Sources: Hardwired, Low-Voltage, or Solar-Powered
- Smart Controls, Dimming, and Dark-Sky Compliance
- Frequently Asked Questions
Last Updated: September 12, 2026
Start With Purpose: Accent, Task, or Ambient Lighting
The first decision in how to choose outdoor lighting fixtures isn't the fixture at all. It's the job you need the light to do. Outdoor lighting falls into three functional categories, and every fixture you buy should serve one of them.
Accent lighting highlights architecture: a stone wall, a mature oak, a gable. Task lighting makes a space usable after dark, such as steps, a grill station, or a patio table. Ambient lighting provides general illumination and depth across the whole property.
Most disappointing installations skip this step and buy matching fixtures for every spot. We plan by layer instead, because a wall wash, a path light, and a patio fixture each solve a different problem.
How to Choose the Right Color Temperature for Outdoor Lights
Color temperature describes how warm or cool a light appears, measured in kelvin (K). For most homes, warm white between 2700K and 3000K flatters brick, stone, and wood, while cooler temperatures suit modern facades and commercial entries (energy.gov).
Kelvin Ranges and Where They Belong
| Kelvin Range | Appearance | Best For |
|---|---|---|
| 2200K-2400K | Candlelight amber | Dark-sky areas, rustic stone |
| 2700K-3000K | Warm white | Homes, patios, most landscapes |
| 3500K-4000K | Neutral white | Commercial entries, signage |
| 5000K+ | Daylight blue | Security and parking areas only |
Mixing temperatures on one property can be jarring. A 2700K path light next to a 5000K floodlight can read as an accident, not a design.
Outdoor Lighting Sizing Guide: Scale Fixtures to Your Architecture
Outdoor lighting sizing is about proportion: a fixture should relate to the surface it lights, not dominate it. The fastest way to get this wrong is to shop by style before you have measured the wall, the entry, and the walkway. Size is a math problem first and an aesthetic choice second.
Start With Three Measurements
Before you compare fixtures, measure these on site:
- Wall height at the mounting point. This sets your maximum fixture height. A common rule of thumb is that a wall sconce should be no more than about one-third the height of the wall section it sits on, so a fixture on an 8-foot wall section tops out around 30 to 32 inches tall (hgtv.com).
- Entry width and door height. A sconce flanking a standard 36-inch door usually reads best at roughly one-quarter to one-third the door height, about 18 to 24 inches tall for a typical 80-inch door.
- Walkway and bed depth. Path lights and well lights need to sit far enough back that the light source stays out of the sightline. A common pattern is to set path lights 12 to 18 inches from the edge of the walk and space them so the pools of light just touch.
Wall Sconce Height and Spacing Rules
Mount wall sconces at roughly eye level or slightly above, typically 66 to 72 inches from the finished grade to the center of the fixture, and space them so the light cones overlap rather than leave dark gaps (thisoldhouse.com). On a two-story facade, fixtures placed too low wash the grass instead of the wall; raise the mounting height so the beam grazes the wall surface.
- For a single door, center the sconces on each side and keep them equidistant from the door edge.
- For a long facade, space sconces evenly and check the spacing at night, if you can see a dark band between two cones, tighten the spacing or choose a wider beam.
- On columns, match the fixture width to the column width; a fixture wider than the column looks like a hat, and one much narrower disappears.
- Keep path lights low, usually 18 to 24 inches tall, so they guide feet without blinding eyes.
Match Fixture Size to Beam Spread
Fixture size and beam spread are two halves of the same decision. A large fixture with a narrow beam creates a hot spot; a small fixture with a wide beam looks underpowered. As a working rule:
- Narrow beams (10°-20°) suit tall trees, flagpoles, and architectural details you want to graze.
- Medium beams (25°-40°) suit wall washes and most facade uplighting.
- Wide beams (60°+) suit path lights, patio perimeters, and general area lighting.
Scale Rules by Surface
| Surface | Fixture Size Guidance | Mounting Height |
|---|---|---|
| Single-story wall | Up to ~1/3 wall height | 66-72 in to center |
| Two-story facade | Larger, but not wider than the column | Above the first-floor line |
| Narrow column | Fixture no wider than the column | Eye level or slightly above |
| Garden bed | Low path or well light | 18-24 in |
| Tree uplight | Small, aimable | At grade, aimed up |
Measure first, then buy. The fixtures that look oversized in the showroom are usually the ones that look right on a tall wall, and the ones that look delicate on the shelf are usually the ones that disappear on a low bed. Proper scale ensures that these investments remain visually balanced, yet you must also establish a routine to maintain high performance fixtures throughout the changing seasons.
Wet-Rated vs. Damp-Rated: Match the Ingress Protection Rating to the Spot
The ingress protection rating tells you where a fixture can safely live. A wet-rated fixture handles direct rain, sprinklers, and standing splash, while a damp-rated fixture tolerates moisture but not direct water contact.
- Wet-rated: open exposures, low beds, coastal and lakefront properties
- Damp-rated: covered porches, soffits, and sheltered entries
- Never install a damp-rated fixture where rain or irrigation hits it directly
This single spec explains most premature fixture failures. Water gets in, corrodes the driver, and the light flickers or dies.
Materials and Finishes That Survive Freeze-Thaw Cycles
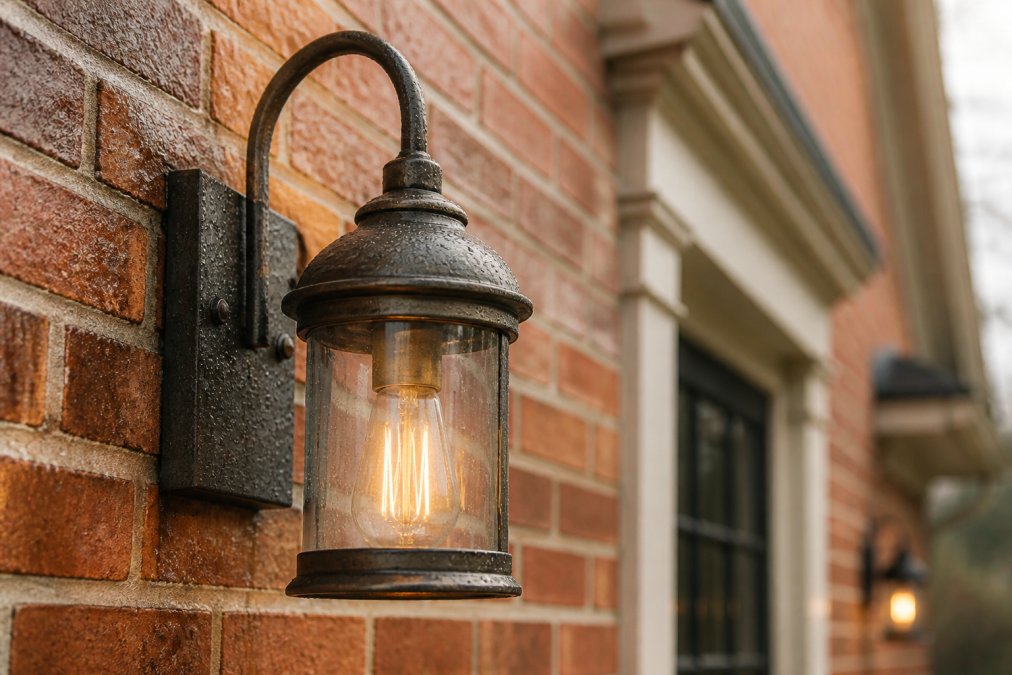
Freeze-thaw cycles are brutal on outdoor fixtures, and the material you choose decides whether yours last a decade or a season. Water seeps into seams, freezes, expands, and forces metal apart.
Solid brass and copper hold up best over time, developing a patina rather than failing. Powder-coated aluminum and steel resist corrosion well when the coating stays intact, but chips expose bare metal to rust.
- Brass and copper: longest lifespan, ages gracefully
- Powder-coated aluminum: light, corrosion-resistant, budget-friendly
- Painted steel: only with a durable, intact finish
- Avoid thin, hollow housings that trap and hold water
The fixture finish matters as much as the metal beneath it. A quality coating is the difference between a fixture that survives winter and one that pits and peels.
Power Sources: Hardwired, Low-Voltage, or Solar-Powered
Hardwired systems run on standard line voltage and suit permanent, high-output installations. Low-voltage systems step down to a safer current, which makes them easy to extend, rearrange, and control. Solar-powered fixtures need no wiring at all, but output depends on sun exposure and panel condition.
| Power Source | Best For | Trade-Off |
|---|---|---|
| Hardwired | Permanent, high-output lighting | Higher install cost, less flexibility |
| Low-voltage | Landscape and architectural systems | Requires a transformer |
| Solar | Remote spots, quick installs | Dimmer output, weather-dependent |
Voltage Drop: The Low-Voltage Detail Most Guides Skip
Run cable too far from the transformer and lights at the end dim noticeably. Voltage drop is the reason. The longer the run and the thinner the wire, the more voltage is lost before it reaches the fixture. Plan your runs and wire gauge before you dig:
- Keep home runs as short as practical and place the transformer near the center of the load, not at one end.
- Use a heavier gauge for long runs; stepping up one wire size is often cheaper than adding a second transformer.
- Split the load across multiple runs rather than daisy-chaining every fixture on one cable.
- Add fixtures in small increments and check the far end after dark, if the last light looks dimmer than the first, you have a voltage-drop problem.
Total Cost of Ownership: Where the Money Actually Goes
Most guides list power sources and stop. The more useful exercise is to think about cost over the life of the system, not just at the register. Three buckets matter:
- Upfront cost. Hardwired systems usually carry the highest installation cost because they involve line voltage, conduit, and often an electrician. Low-voltage systems sit in the middle, the fixtures and transformer are the main expense, and the wiring is friendly to a capable DIYer. Solar fixtures have the lowest upfront cost because there is no wiring at all.
- Energy cost. LED fixtures draw a fraction of the power of older incandescent or halogen lamps, so the energy line item is small for any of the three options. The bigger variable is how long the lights run. A timer or photocell that limits runtime to the hours you actually use the space will save more than switching power sources ever will.
- Maintenance and replacement cost. This is where the options separate. Hardwired and low-voltage systems with quality fixtures and solid brass or copper housings tend to have the longest service life. Solar fixtures carry the shortest, the battery is a wear item, and in most residential solar fixtures the battery is the part that fails first, often within a few seasons depending on climate and sun exposure.
A Simple Way to Compare
Ask three questions before you choose:
- Is the location permanent? If yes, hardwired or low-voltage is usually the better long-term investment. If the spot is temporary, rented, or hard to reach with wire, solar earns its place.
- Do you want to control it? Smart dimming, scenes, and schedules are easiest on hardwired and low-voltage systems. Solar fixtures rarely integrate cleanly with smart controllers.
- How much sun does the spot get? A shaded north-facing bed is a poor home for solar no matter how good the panel is.
For many permanent residential landscapes, a low-voltage LED system with a quality transformer and shielded fixtures can offer a good balance of upfront cost, energy use, and service life. Solar can be a suitable answer for spots wiring cannot reach.
Smart Controls, Dimming, and Dark-Sky Compliance
Smart controls turn a static system into one you actually use. Dimmable fixtures paired with a smart controller let you set scenes, schedules, and color changes from a phone, which matters for holiday displays and restaurant patios that shift mood by the hour.
Dark-sky compliance is the angle most competitors ignore. Dark-sky compliant fixtures direct light downward and shield the source, cutting glare and light pollution while still lighting what matters. A photocell or motion-sensor switch adds automation and saves energy.
- Layer accent, task, and ambient light rather than flooding the yard
- Choose shielded fixtures to keep light on your property, not your neighbor's
- Use timers and sensors so lights run only when needed
Frequently Asked Questions
How do I choose the right size outdoor wall light?
Match the fixture height to about one-third of your door height. For an 8-foot door, a sconce around 24 to 32 inches tall looks proportional. Mount wall lights at roughly two-thirds the door height, or about 66 to 72 inches from the ground. Space multiple sconces 6 to 8 feet apart so light overlaps without hot spots. Undersized fixtures make an entry look sparse; oversized ones overpower the trim.
What color temperature is best for outdoor lighting?
Most outdoor lighting fixtures look best between 2700K and 3000K, a warm white that flatters brick, stone, and wood. Use 2700K for cozy patios and residential facades, 3000K for paths and driveways, and 4000K only for security areas where visibility matters more than warmth. Avoid anything above 5000K, which reads blue, washes out landscaping, and contributes to light pollution that bothers neighbors.
How many lumens do I need for outdoor lighting?
Lumens depend on the job. Accent and landscape lighting typically use 100 to 300 lumens per fixture. Path lights run 50 to 100 lumens. Wall sconces at an entry need 400 to 800 lumens. Security floodlights can reach 1,000 to 2,000 lumens, but aim them downward and add a photocell or motion-sensor so they only fire when needed. More lumens is not better; layered light at modest output looks richer.
What are the most durable materials for outdoor light fixtures?
Solid brass, copper, and marine-grade aluminum hold up best against moisture and freeze-thaw cycles. Look for a powder-coated or anodized finish and stainless-steel hardware to resist corrosion. Composite and resin fixtures cost less but tend to chalk and crack after a few seasons. Check the ingress protection rating too: IP65 or higher for exposed spots, IP44 for covered porches. In cold climates, brass and copper pay for themselves over a decade of use.
Choosing outdoor lighting fixtures is really a series of small decisions: purpose first, then color temperature, sizing, rating, material, power, and control. Get the order right and the installation looks intentional instead of improvised. Paramount Outdoor Lighting Group handles that entire process, with expert low-voltage design, permanent architectural lighting, and custom holiday displays backed by decades of experience. Request a walk-through and see how your property looks after dark.