
How to Light Pathways and Garden Beds: A 2026 Guide
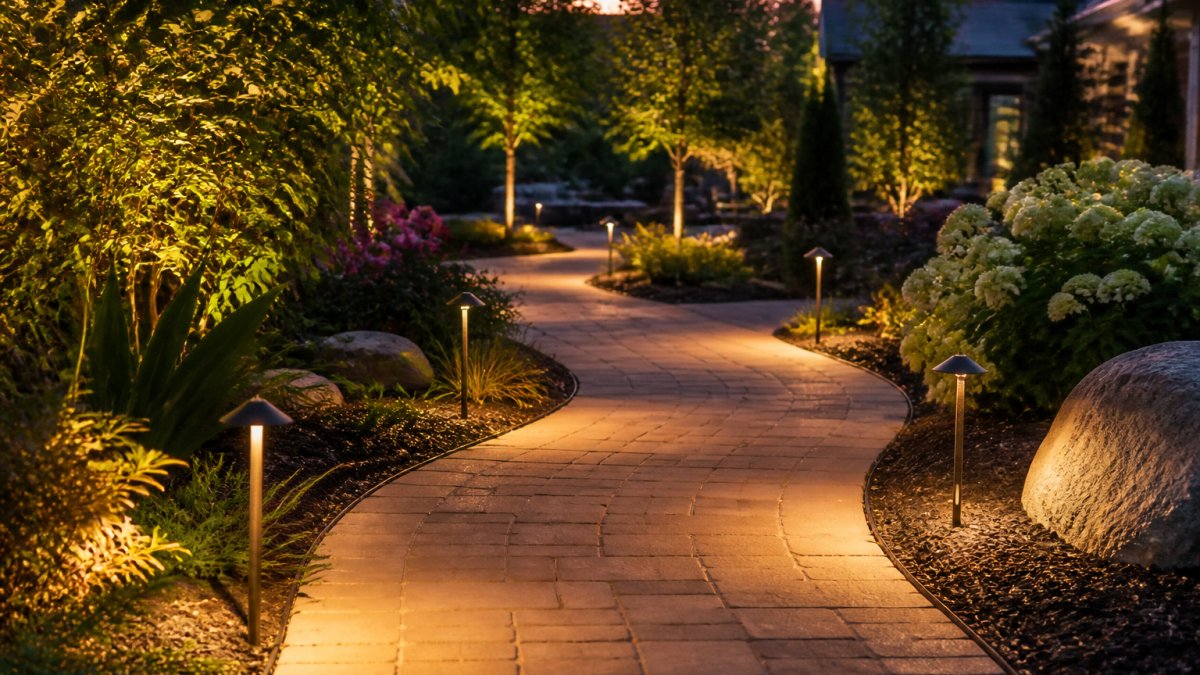
Table of Contents
- Why Lighting Pathways and Garden Beds Transforms Your Outdoor Space
- Pathway Lighting Ideas That Work for Any Landscape
- Landscape Lighting Placement: Spacing, Height, and Aiming
- How to Light Garden Beds Without Overpowering Them
- Low-Voltage Landscape Lighting Installation: A Step-by-Step Walkthrough
- Professional Landscape Lighting Installation Cost: What to Expect
- Maintenance and Troubleshooting for Long-Lasting Results
- Frequently Asked Questions
Last Updated: October 14, 2026
Why Lighting Pathways and Garden Beds Transforms Your Outdoor Space
Most homeowners stop using their yard when the sun goes down. That is a waste. Well-planned light pathways can turn a dark, unused yard into a space you enjoy every night.
The goal is not brightness. It is safety, depth, and mood, all at once.
A good plan does three things:
- Lights the path so guests can walk without tripping
- Adds depth by layering light across garden beds and trees
- Keeps glare low so the yard still feels calm
Pathway Lighting Ideas That Work for Any Landscape
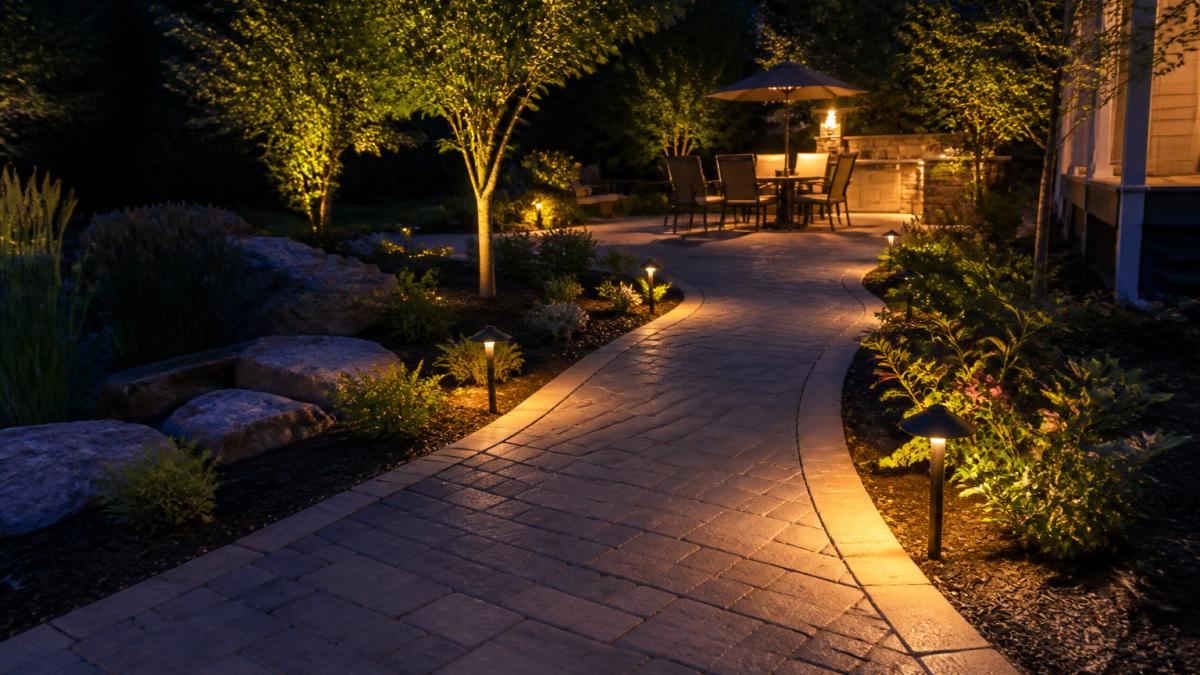
Great light pathways come down to two moves: staggered fixtures and mixed light types. Space your path lights about 6 to 8 feet apart, offset them on each side of the walk, and pair them with wider area lights for open spots.
Staggered Placement for Natural, Organic Look
Staggered placement means you do not line fixtures up like runway lights. Put one on the left, then one on the right, then back to the left. This softens the look and spreads light evenly. In practice, this means fewer dark gaps and less glare.
Mixing Path Lights with Area Lights for Wider Coverage
Path lights handle the walkway. Area lights cover driveways, patios, and open lawn. Together they create even illumination. A common mistake is using only path lights, which leaves wide areas black.
Landscape Lighting Placement: Spacing, Height, and Aiming
Good landscape lighting placement follows one rule: aim the light down and away from the eye. Keep fixtures low, angle them toward the ground, and let the beam spread do the work. This cuts glare and gives you even light across the surface.
Quick guide:
- Spacing: 6 to 8 feet apart on paths
- Height: path lights sit low, area lights sit higher
- Aiming: point downward, never toward a window or street
Downward aiming also protects your neighbors. Light that spills over a fence causes complaints. Keep it on your side of the property line.
How to Light Garden Beds Without Overpowering Them
The trick with garden beds is restraint. Use less light than you think you need, and place fixtures behind plants so the light grazes forward.
Most guides stop there. The part they skip is that a garden bed is a living, changing target. A fixture that looks perfect in April can be swallowed by a hosta by July and buried under a sedum by September.
Match the Fixture to the Plant's Height and Habit
Plant height and growth habit should drive your fixture choice more than the fixture's looks. A few working rules:
- Low groundcovers and creeping plants (under 12 inches): Use a wide, low-output wash, a beam angle around 60 to 120 degrees, mounted just above the canopy. A narrow spotlight on a 6-inch plant just makes a hot dot.
- Mid-size perennials and shrubs (12 to 36 inches): A 30- to 45-degree beam grazing from behind reads as soft uplight. Keep the fixture head at or slightly below the plant's top so the light skims the foliage.
- Tall shrubs and small ornamental trees (3 to 8 feet): A 25- to 36-degree spotlight aimed up through the branching structure creates the layered look. Place it 12 to 24 inches from the trunk so the beam spreads as it rises.
- Specimen trees and large shrubs (8 feet and up): Use two or three narrow-beam fixtures (15 to 25 degrees) spaced around the trunk to avoid a single flat wash and to reveal the canopy from more than one angle.
Plan for Seasonal Growth So Fixtures Don't Get Blocked
The single most common bed-lighting failure is a fixture that disappears under foliage. Two habits prevent it:
- Set fixtures on a stake or riser tall enough to clear the plant's mature height, not its spring height. If a shrub will reach 30 inches, a 6-inch stake will be buried by midsummer.
- Leave a maintenance gap. Keep 6 to 12 inches of clear space around each fixture so you can re-aim it without crawling through the bed.
Re-aim fixtures two to three times a year, early spring after cutback, midsummer at peak growth, and late fall after dieback. This is also the moment to check that mulch, leaves, or new growth aren't covering lenses.
Use Beam Angle and Color Temperature to Set the Mood
Two specs do most of the mood work in a bed:
- Beam angle controls spread. Narrow beams (10 to 25 degrees) create drama and highlight a single specimen. Wide beams (45 to 120 degrees) wash a whole bed evenly. Mixing both in one bed is what produces the layered look.
- Color temperature controls warmth. Warm white (around 2700K to 3000K) flatters foliage and blends with most home exteriors. Cooler temperatures (4000K and up) tend to look clinical in a garden and can wash out greens.
Keep total light output modest. A bed rarely needs more than a soft wash; if you can see the fixture's beam edge on the ground, it's probably too hot.
Using Spotlights and Wall Wash for Depth and Dimension
Spotlights pick out focal points like a tree or statue. Wall wash spreads light up a wall or fence for a soft glow. Use both to build depth. The mix of light and shadow is what makes a yard look layered instead of flat.
Low-Voltage Landscape Lighting Installation: A Step-by-Step Walkthrough
Here is the full sequence we follow on a typical low-voltage landscape lighting installation, including the electrical details most guides leave out.
Total time: a weekend for a small yard, longer for a full property
What you'll need:
- Low-voltage transformer sized to your load
- LED fixtures and direct-burial cable
- Waterproof wire connectors and stakes
- Cable staples or clips
Step 1: Plan the layout. Mark every fixture spot with a flag before you dig.
Step 2: Calculate your load. Add up the wattage of every fixture on the system.
Step 4: Connect the fixtures. Use waterproof connectors at each tap.
Step 6: Test before you bury. Turn the system on and check every fixture.
Transformer Sizing, Voltage Drop, and Electrical Safety
Transformer sizing is where most DIY installs go wrong. Add up the wattage of every fixture, then pick a transformer with room to spare, a common rule of thumb is to keep the connected load at or below about 80 percent of the transformer's rating. A transformer that matches your load exactly leaves no headroom when you add fixtures later, and it runs hotter.
Voltage drop is the other silent killer. Low-voltage systems run on 12 volts (or 15 volts on some taps), and voltage falls as cable length increases. If the fixtures at the end of a long run look dim or orange compared to the ones near the transformer, you have voltage drop. Fixes include:
- Shortening the run or splitting it into two runs
- Using a heavier-gauge cable on long runs
- Using a multi-tap transformer and moving the long run to a higher-voltage tap
- Reducing the number of fixtures on the longest run
For safety, follow the UL standards for low-voltage lighting systems. Low-voltage systems are safer than line voltage, but they still need proper wiring:
- Use only fixtures and transformers listed by a recognized testing lab.
- Plug the transformer into a GFCI-protected outlet.
- Keep connections above ground or in waterproof housings, never leave a bare splice in a puddle.
- Check your local code for outdoor outlet and trenching requirements before you dig. Call 811 before any digging to have underground utilities marked (811 Before You Dig).
When to Call a Licensed Electrician
Low-voltage work is within reach for a careful DIYer, but bring in a licensed electrician when:
- You need a new outdoor outlet or circuit run from the panel.
- Your transformer will draw enough current to require a dedicated circuit.
- You're mixing line-voltage fixtures (like some wall or flood lights) into the system.
- Local code requires a permit or inspection for the work.
A short consult is cheap compared to redoing a buried run or failing an inspection.
Professional Landscape Lighting Installation Cost: What to Expect
Professional landscape lighting installation cost depends on how many fixtures you need, the size of your property, and the design work involved. There is no single number, and any quote that ignores your layout is a guess.
Pricing usually reflects:
- Fixture count and quality
- Transformer size
- Cable runs and trenching
- Design and labor time
We do not publish flat rates because every yard is different. For general guidance on energy use, see the U.S. Department of Energy guidance on outdoor lighting.
| Project Type | Fixture Count | Time to Install | Best For |
|---|---|---|---|
| Small path only | 6-10 | Half day | Front walkways |
| Path plus beds | 12-20 | One day | Full front yard |
| Full property | 25+ | Two days or more | Large yards, patios |
Maintenance and Troubleshooting for Long-Lasting Results
Most lighting problems trace back to three things: water in a connection, a loose tap, or a fixture that shifted. Check these first before you assume a fixture is dead.
Simple upkeep:
- Re-aim fixtures after plants grow
- Clear mulch and leaves off lenses
- Check connections after heavy rain
- Replace burned-out LEDs one at a time
If a whole run goes dark, the transformer is the likely cause. If one fixture flickers, it is almost always the connection at that tap. Fix the small stuff early and your system will last for years.
Frequently Asked Questions
How far apart should pathway lights be?
Most pathway lights work best spaced 6 to 8 feet apart, but the ideal distance depends on fixture height, beam spread, and the effect you want. For a soft, continuous glow, keep them closer together. If you prefer pools of light with darker gaps, space them farther apart. Always walk the path at night before finalizing placement to ensure even illumination and safe navigation.
What types of lights work best along a pathway?
Low-voltage LED path lights are the most popular choice for pathways because they run on safe 12-volt power, use minimal energy, and last for years. Choose fixtures with downward-facing lenses to reduce glare and direct light onto the ground. For wider areas or driveways, consider area lights that cast a broader beam. Spotlights can also be used to highlight nearby trees or architectural features.
How do you light a garden bed without making it look too bright?
To avoid an overly bright garden bed, use low-wattage fixtures and aim them at specific plants or focal points rather than flooding the entire area. Wall wash and indirect lighting techniques create a soft, layered effect. Also, use plants themselves to filter and diffuse light. The goal is to create depth and shadow, not uniform brightness. Start with fewer fixtures and add more only if needed.
When should you hire a professional to install landscape lighting?
Hire a professional when your project involves complex wiring, multiple zones, or extensive hardscaping. Professionals ensure proper transformer sizing, voltage drop management, and code compliance, which are critical for safety and performance. If you want a custom design that integrates pathways, garden beds, and architectural features, a pro can save you time and prevent costly mistakes. For simple, single-path setups, DIY is feasible.
Dark yards go unused, and unused yards add nothing to your home. A clear plan fixes that. Paramount Outdoor Lighting Group designs and installs expertly crafted low-voltage lighting, plus custom holiday lighting with design, installation, maintenance, removal, and storage. As an Authorized JellyFish Lighting Dealer, we bring millions of colors and patterns to your property. Request a walk-through and see your home the way it should look at night.