
Best Outdoor Lighting Techniques for Garden Paths
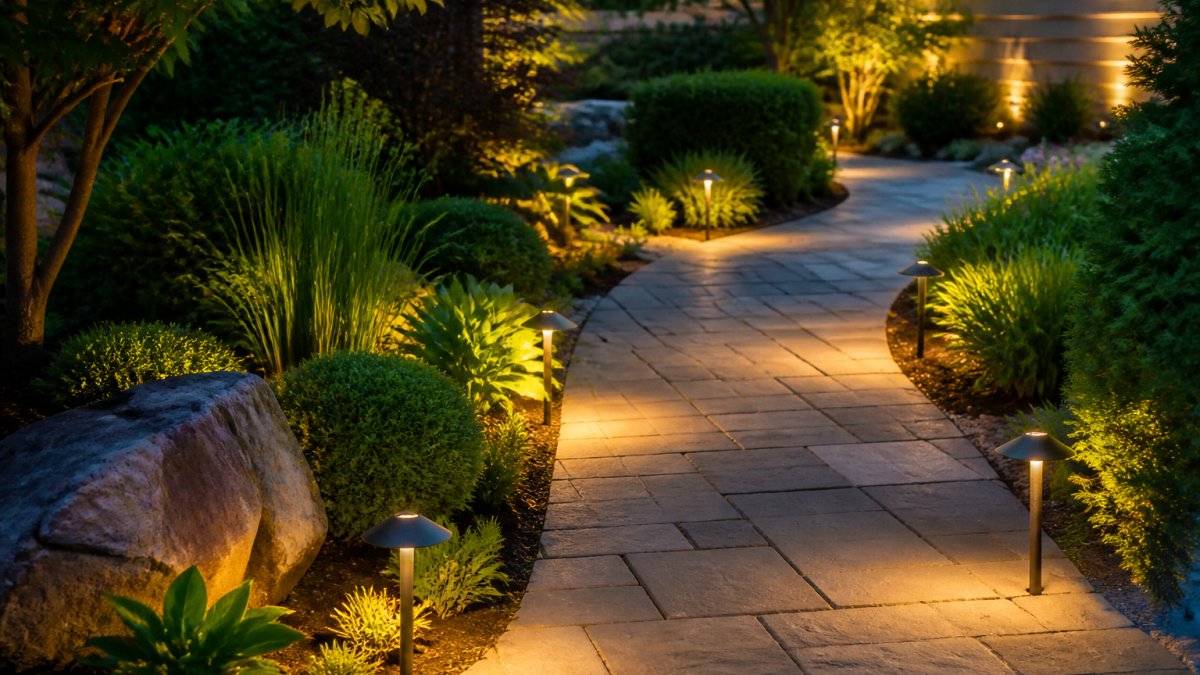
Table of Contents
- Understanding Garden Path Lighting Fundamentals
- Pathway Light Placement and Spacing for Safety and Aesthetics
- Low-Voltage Landscape Lighting Systems and Installation
- Choosing Between Solar Path Lights and Hardwired Options
- Garden Path Lighting Ideas Using Downlighting and Accent Techniques
- Balancing Safety and Visual Appeal Without Glare
- Maintenance, Warranty, and Long-Term Performance
- Frequently Asked Questions
Last Updated: October 13, 2026
Understanding Garden Path Lighting Fundamentals
The best outdoor lighting techniques for garden paths combine safety, aesthetics, and smart fixture placement.
Garden path lighting serves two purposes: keeping visitors safe by illuminating steps, edges, and hazards, and highlighting landscape features like trees, plantings, and architectural elements.
Most homeowners install too many lights or position them incorrectly, creating glare and wasting energy. The solution is strategic placement and proper fixture selection.
Pathway Light Placement and Spacing for Safety and Aesthetics
Most guides stop at "space path lights 6 to 8 feet apart." That number is a starting point, not a layout. Four decisions separate a designed path from a runway: spacing, setback, side-to-side rhythm, and beam overlap.
Step 1: Measure the path and set a baseline interval
Measure the path's total run in feet, noting every break point: steps, landings, curves, gates, and driveway aprons. Treat each uninterrupted run as its own segment.
To sanity-check the count: divide segment length by your interval, round up, and add one fixture for every step run, landing, or sharp turn.
Step 2: Set fixtures back from the path edge
Setback, the distance from path edge to fixture, controls how much walking surface gets lit and how much glare reaches the eye.
A common range is 12 to 18 inches back from the edge for a standard 3- to 4-foot-wide walk.
Two failure modes to avoid:
- Too close to the edge. The fixture sits in the walking line, gets kicked, and throws light sideways into the eye.
- Too far back. The beam lands on planting beds instead of pavement, leaving the path dim while shrubs glow.
If bordered by lawn, leave enough setback for a mower deck or string trimmer to pass.
Step 3: Break the runway with staggered placement
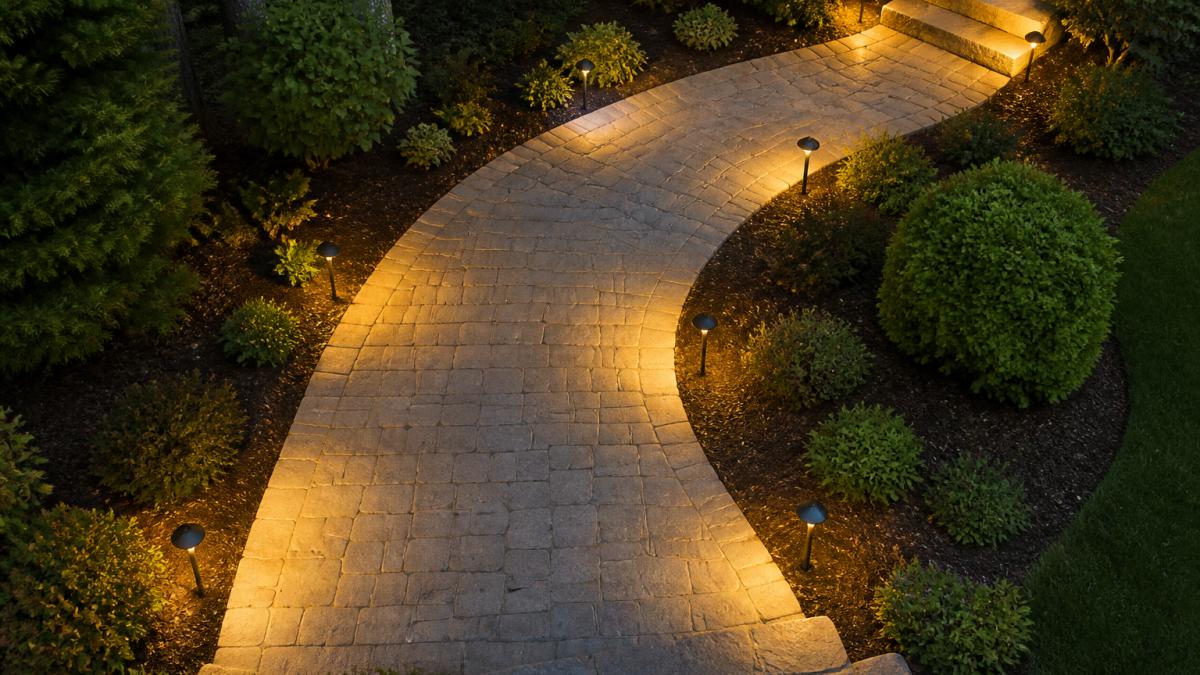
Evenly spaced fixtures on both sides create the classic airport-runway look. Stagger them: alternate sides so no two fixtures directly face each other across the path.
On curves, place the fixture on the inside of the bend so the beam sweeps across the turn. On S-curves, alternate inside and outside to keep the rhythm consistent.
Step 4: Overlap beams, don't stack them
Path light beams are typically 8 to 12 feet wide at ground level. Adjacent pools of light should just touch or slightly overlap, not pile on top of each other.
Aim each fixture so the beam's center falls on the walking surface, not the path edge or planting bed. Keep the slight forward tilt modest so light lands where feet will go.
Step 5: Adjust for width, surface, and elevation
Path width, paving color, and elevation changes shift the numbers:
- Narrow paths (under 3 feet). Tighten spacing to 4 to 6 feet and reduce setback so the beam covers the full width.
- Wide paths and driveways (4 feet and up). 8-foot spacing works, but add a second row if the path is wider than about 6 feet.
- Dark paving (bluestone, dark concrete, asphalt). Tighten spacing by about a foot or increase fixture output slightly.
Step 6: Test in the dark before you commit
Before burying cable or mounting fixtures, lay them out at dusk and walk the path from both directions. Check for dark gaps between pools of light, hot spots or glare, step edges that don't read clearly, and fixtures that catch your shin. Adjust setback, aim, and spacing until the path reads as a continuous ribbon of light with no visible source in your line of sight, then lock in the layout.
Low-Voltage Landscape Lighting Systems and Installation
Low-voltage systems are the workhorse of residential path lighting, running on 12 volts instead of 120-volt household current, which makes them safer to install and easier to expand. But "low voltage" is not a single product: wired low-voltage, solar, and battery behave very differently once the sun goes down and the seasons change.
Wired low-voltage: the reliable default
A wired low-voltage system has four parts: a transformer plugged into an outdoor GFCI receptacle, direct-burial cable, fixtures, and connections.
Transformer sizing. Add up every fixture's wattage, most path lights draw 4 to 12 watts each.
Voltage drop is the hidden constraint. Twelve volts doesn't travel far without losing pressure, so fixtures at the far end of a long run dim noticeably. Two levers control this:
- Cable gauge. Thicker cable carries voltage farther. Use 12-gauge for long runs or high-wattage loads; 16-gauge is fine for short, light runs.
- Run length and load. Keep wattage per run modest, and split long paths into multiple home runs back to the transformer rather than daisy-chaining.
Connections. Use the manufacturer's waterproof connectors, not wire nuts, which corrode and fail within a season or two in wet soil.
Solar: convenient, with real limits
Solar path lights need no trenching or transformer, charging by day and switching on at dusk. The trade-offs are output and consistency.
- Output. Solar fixtures produce less light than comparable wired fixtures, and output drops on cloudy days and in winter.
- Shade. A path under tree canopy or on a building's north side may never get enough direct sun to charge fully.
- Batteries. Rechargeable batteries typically degrade in 2 to 3 years. Look for user-replaceable batteries rather than sealed units.
Solar suits accent lights, temporary layouts, rental properties, and paths where trenching isn't practical, not a primary safety path that must perform every night year-round.
Battery: the middle option
Battery-powered fixtures sit between solar and wired, running on disposable or rechargeable batteries and often including timers or motion sensors. They're easy to place and move, but trade convenience for ongoing battery cost. They suit short-term setups, seasonal accents, and spots where a wired run isn't worth the effort.
Choosing between them
| Factor | Wired low-voltage | Solar | Battery |
|---|---|---|---|
| Upfront cost | Highest (transformer, cable, trenching) | Lowest | Low to moderate |
| Ongoing cost | Electricity only | Battery replacement every 2-3 years | Battery replacement, often more frequent |
| Reliability | Consistent year-round | Weather- and season-dependent | Depends on battery life |
| Installation effort | Trenching and wiring | None | None |
| Best use | Permanent primary path lighting | Accents, temporary, remote spots | Short-term or movable setups |
A common pattern is to combine them: wired low-voltage for the main path and steps, solar or battery for accent pieces and spots where running cable isn't worth it.
Weather resistance and long-term durability
Outdoor fixtures face rain, snow, freeze-thaw cycles, and UV. Look for an IP65 or higher rating (sealed against dust and water jets), stainless steel or powder-coated aluminum housings, and tempered glass lenses rather than acrylic.
| Component | Typical lifespan | What to look for |
|---|---|---|
| LED path lights | 10-15 years | IP65+ rating, replaceable LED module |
| Low-voltage cable | 10-20 years | Direct-burial rated, correct gauge |
| Transformer | 10-15 years | GFCI-protected outlet, 20-25% headroom |
| Metal fixtures | 15-20 years | Stainless steel or powder-coated aluminum |
Warranty coverage is a useful quality signal. Many reputable manufacturers offer 5- to 10-year warranties on fixtures and components, though some require professional installation or periodic maintenance to stay valid.
Choosing Between Solar Path Lights and Hardwired Options
Your choice between solar and hardwired depends on site conditions, budget, and maintenance preferences.
Solar lights need no trenching or wiring and switch on automatically at night, but perform poorly in shade or cloudy climates, and batteries degrade after 2 to 3 years. Hardwired low-voltage systems provide consistent light regardless of weather and last 10+ years with minimal maintenance, better long-term value for permanent landscape lighting.
How to decide:
- Use solar for temporary installations, shaded paths, or rental properties
- Choose hardwired for permanent installations on properties you own
- Combine both: solar for accent lighting, hardwired for main pathways
Garden Path Lighting Ideas Using Downlighting and Accent Techniques
The best outdoor lighting techniques for garden paths layer downlighting for safety with accent lighting for visual interest, creating depth and guiding visitors naturally.
Downlighting for Steps and Elevation Changes
Downlighting shines light downward from above, illuminating the ground directly below. It's essential for steps, slopes, and elevation changes, showing depth and edges clearly to prevent trips and falls.
Mount downlights on pergolas, overheads, or tall fixtures above stairs, aimed straight down or slightly forward. Choose fixtures with diffusers or shields to control direction and avoid glare.
Accent Lighting for Trees, Walls, and Landscape Features
Accent lighting highlights specific landscape features, trees, stone walls, plantings, architectural details, creating visual interest and drawing the eye.
Use uplighting to illuminate tree canopies from below: position the fixture 3 to 5 feet from the trunk, angled upward, with warm white light (2700K to 3000K). Wall-wash lighting illuminates vertical surfaces like stone walls or fences; place fixtures at the base, angled upward at 45 degrees.
Try these strategies:
- Uplight specimen trees as focal points along your path
- Graze stone walls to highlight their texture and color
- Accent plantings with subtle light from behind or below
Balancing Safety and Visual Appeal Without Glare
The best outdoor lighting techniques for garden paths achieve safety and beauty without glare or light spill. Glare is light entering the eye directly from a fixture; light spill is unwanted light spreading beyond your property.
Warm Color Temperatures and Light Direction
Color temperature, measured in Kelvin (K), affects how light feels. Warm white (2700K to 3000K) creates a natural, inviting atmosphere; cool white (4000K and above) feels harsh and institutional.
Light direction matters as much as color. Direct light downward or toward landscape features, never upward toward the sky or horizontally toward neighbors.
Reducing Light Spill and Dark-Sky Considerations
Light spill wastes energy, disturbs neighbors, and reduces your ability to see stars and natural darkness, which matters for wildlife and human health.
To minimize spill:
- Use fully shielded fixtures that direct light downward only
- Position fixtures so light hits only your intended target
- Keep brightness appropriate for the space, more light isn't better
Dark-sky friendly fixtures are fully shielded and direct all light downward. They cost slightly more but perform better and are environmentally responsible; many municipalities now require them for new installations.
Maintenance, Warranty, and Long-Term Performance
Outdoor lighting systems need periodic maintenance to perform reliably.
Inspect fixtures monthly during the outdoor season for water inside the lens or housing, loose or corroded connections, cracks, and dimming or flickering.
LED bulbs typically last 10 to 15 years; replace them when they dim significantly.
Warranty coverage protects your investment.
Creating beautiful, functional garden path lighting combines technique, proper equipment, and thoughtful placement.
Frequently Asked Questions
How far apart should garden path lights be spaced?
Most garden paths perform best with fixtures spaced 6 to 8 feet apart. This spacing provides even illumination and safe nighttime visibility without creating dark gaps. Adjust spacing tighter on curves or steep sections, and wider on straight, level paths. Test spacing by walking the path at night to confirm adequate visibility before finalizing placement.
Are solar path lights or low-voltage landscape lighting better?
Low-voltage landscape lighting offers brighter, more reliable illumination and works consistently in all seasons. Solar path lights require no wiring but depend on sunlight exposure and perform poorly in cloudy climates. For garden paths where safety and consistent nighttime visibility matter, low-voltage systems typically deliver superior results. Solar works well as accent lighting for less-critical areas.
What color temperature should I choose for garden path lighting?
Warm white light at 2700K to 3000K creates an inviting, natural appearance and reduces eye strain during nighttime navigation. Cooler temperatures (4000K+) feel clinical and can increase glare. Warm tones also complement most landscape features and home exteriors. Consistency across your garden path lighting creates a cohesive, professional look.
How do I prevent glare and light spill in garden path lighting?
Use downward-facing fixtures with shields or baffles to direct light onto the path surface. Avoid uplighting directly in sight lines. Position fixtures to graze rather than flood the area. Choose low-profile fixtures that sit close to ground level. Test light direction during installation to confirm no harsh glare reaches seating areas or neighboring properties. Less is more, adequate visibility requires less light than most homeowners expect.