
Install Outdoor Lights on Brick Without Drilling
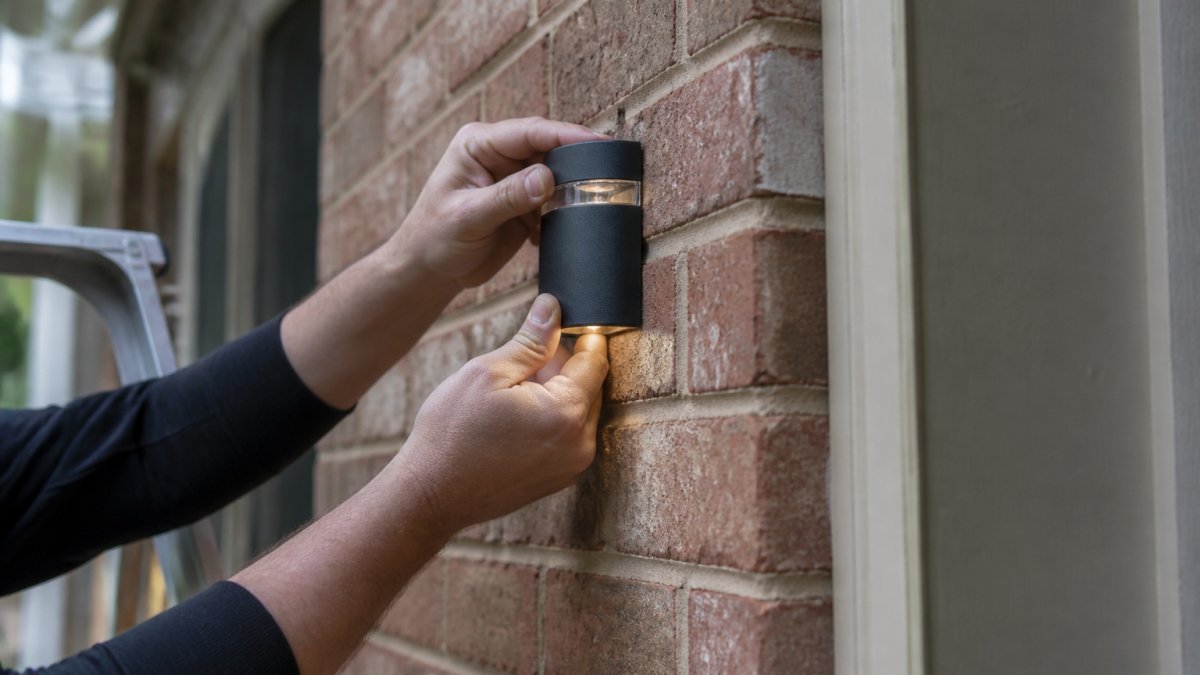
Table of Contents
- Why Drilling Isn't Your Only Option for Outdoor Lights on Brick
- Understanding Your Outdoor Light Options: Plug-In vs. Hardwired
- How to Hang Outdoor String Lights on Brick Without Drilling
- Using Outdoor Adhesive Hooks for Brick: Performance and Preparation
- How to Attach Christmas Lights to Brick Without Drilling
- How to Install Wired Exterior Lights on Brick Using No-Drill Methods
- Choosing the Right Method for Your Brick Installation
- Common Mistakes to Avoid When Installing Lights on Brick
- Frequently Asked Questions
Last Updated: October 21, 2026
Why Drilling Isn't Your Only Option for Outdoor Lights on Brick
Installing outdoor lights brick without drilling doesn't require a drill. This is one of the most common misconceptions homeowners have when they want to add lighting to their exterior walls. At Paramount Outdoor Lighting Group, we know the best ways to mount lights without damaging the masonry.
The truth is simple: drilling into brick creates permanent holes, risks damaging mortar joints, and often voids warranties on newer fixtures. Non-drilling methods exist that work just as well, and often better, depending on your light type and installation duration. Preserving the integrity of your masonry ensures that you avoid the more intensive process of repairing brick joints should a previous attempt at mounting fixtures leave behind unsightly gaps.
Here's what matters most:
- Adhesive hooks work on clean, dry brick surfaces
- Gutter clips and roof edge mounts support heavier string lights
- Zip ties and existing structures cost almost nothing
- Poles and planters create freestanding support without any wall contact
The method you choose depends on three factors: the weight of your lights, how long you'll keep them up, and whether you want a permanent or temporary installation.
Understanding Your Outdoor Light Options: Plug-In vs. Hardwired
Not all outdoor lights are created equal. The installation method changes completely depending on whether you're hanging decorative plug-in lights or installing hardwired wall fixtures.
Plug-in decorative lights (string lights, fairy lights, solar lights) draw power from an outdoor outlet or battery. They're temporary by nature. You can remove them without any permanent changes to your brick. Most homeowners choose these for seasonal use or special events.
Hardwired exterior lights (wall sconces, flood lights, architectural fixtures) require electrical wiring run through walls or conduit. These are permanent installations. They need a licensed electrician and proper permits. Hardwired lights demand drilling or conduit routing, there's no way around it.
For non-drilling installations, focus on plug-in decorative lights. Here's the difference:
| Light Type | Power Source | Installation | Removal | Best For | | --- | --- | --- | --- | | String lights (plug-in) | Outdoor outlet | Adhesive hooks, clips, zip ties | Minutes | Patios, temporary displays | | Solar lights | Solar cells | Adhesive hooks, ground stakes | Minutes | Decks, pathways | | Wall sconce (hardwired) | Electrical wiring | Drilling required | Professional removal | Permanent exterior lighting | | Flood lights (hardwired) | Electrical wiring | Drilling required | Professional removal | Security, architectural lighting |
If you're renting or want to avoid permanent changes, stick with plug-in lights. If you're building a permanent outdoor lighting system, hardwired fixtures create a more polished look, but that requires professional installation.
How to Hang Outdoor String Lights on Brick Without Drilling
Hanging outdoor string lights on brick is the most popular non-drilling project. String lights are lightweight, affordable, and work with multiple mounting methods.
Step 1: Clean the brick surface. Dust and dirt reduce adhesive grip. Use a dry brush or cloth to wipe down the area where you'll attach hooks.
Step 2: Choose your attachment method. You have three solid options:
- Adhesive hooks (best for short-term use, 1-3 months)
- Gutter clips (best for eaves and roof edges)
- Zip ties (best for wrapping around existing structures like downspouts)
Step 3: Space your anchor points correctly. For string lights, install hooks every 4-6 feet along your path. Spacing them too far apart causes the wire to sag.
Step 4: Attach the first hook. Press firmly for 30 seconds. Many adhesive hooks need this contact time to set properly.
Step 5: Run the string light wire. Drape the wire gently through or over each hook. Avoid sharp bends that stress the wire or damage the light bulbs.
Step 6: Test before finalizing. Plug in the lights and check for any dark bulbs or connection issues. Make sure the wire tension feels even across all anchor points.
Common mistakes here: installing hooks on damp brick, spacing them too far apart, and hanging lights before the adhesive fully cures.
Using Outdoor Adhesive Hooks for Brick: Performance and Preparation
Outdoor adhesive hooks are the easiest non-drilling option for outdoor lights brick installations. They're inexpensive, require no tools, and leave no permanent marks. But success depends entirely on surface preparation.
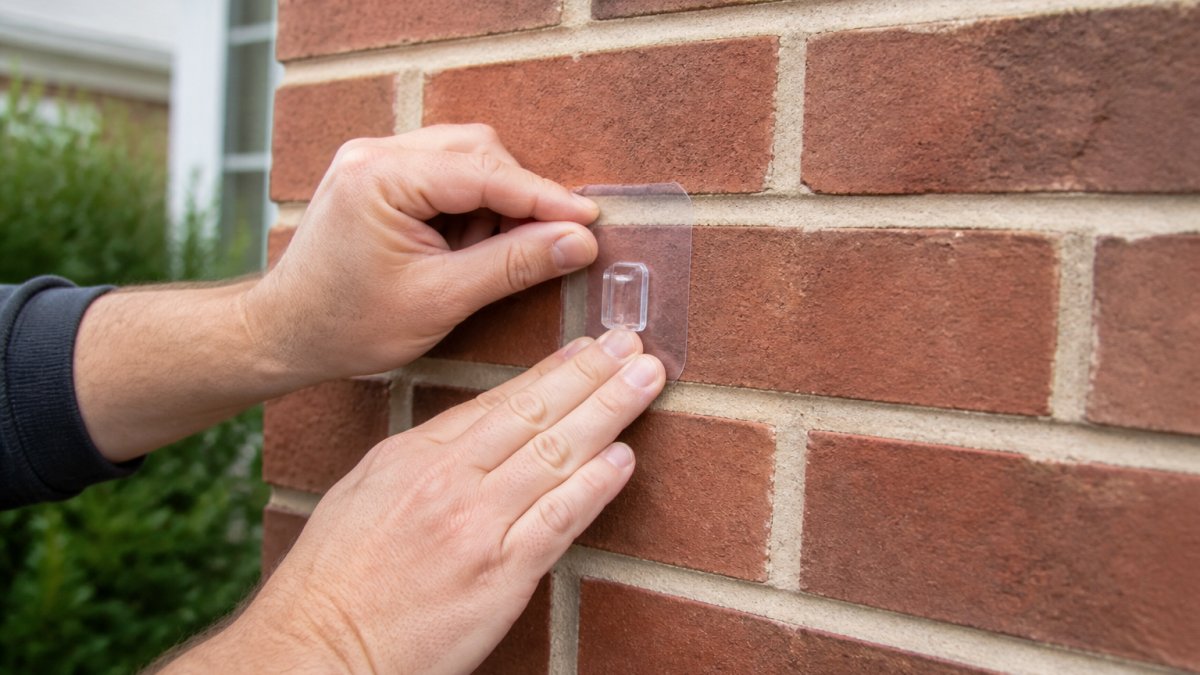
Why adhesive hooks work on brick. Brick is porous and rough, which gives adhesive something to grip. The texture creates mechanical adhesion, the adhesive fills tiny pores and locks in place.
Why adhesive hooks fail. The most common reason is moisture. Brick absorbs water from rain, humidity, and even morning dew. Wet brick won't hold adhesive. Dust and loose mortar also prevent proper contact.
How to prepare brick for adhesive hooks:
- Clean with a dry brush first. Remove loose dust, spider webs, and debris. A stiff-bristled brush works best.
- Wipe with a dry cloth. Get any remaining dust off the surface.
- Wait for dry conditions. Install hooks on a clear day, at least 24 hours after rain. Brick dries slowly, especially in shaded areas.
- Test in an inconspicuous spot first. Install one hook where it won't be visible. Wait 48 hours and pull hard. If it holds, the rest will work.
Weight limits for adhesive hooks. Most outdoor adhesive hooks hold 3-5 pounds. String lights are typically light enough, a 50-foot strand weighs 2-4 pounds.
Adhesive hook removal. When you're ready to take them down, pull slowly at a 45-degree angle. Most come off cleanly. If they leave residue, rubbing alcohol removes it safely without damaging brick.
How to Attach Christmas Lights to Brick Without Drilling
Christmas lights follow the same rules as other string lights, but the seasonal timeline matters. You'll install and remove them within weeks, not months.
Best method for Christmas lights: adhesive hooks or clips. Both are temporary and won't damage your brick when you take them down after the season ends.
Install in stages. Map out your light path before you start. Do you want lights along the roofline? Around a doorway? Along a patio edge?
Spacing for Christmas lights. The standard is one hook every 4-6 feet. For a 40-foot wall, you'll need 7-10 hooks. Buy extra, you'll always use more than you think.
Weatherproofing matters. Christmas lights face rain, snow, and temperature swings. Use outdoor-rated extension cords and make sure all connections are waterproof.
Removal timing. Take lights down within 24 hours of the last day you want them up. Adhesive hooks weaken over time, especially in winter cold and humidity.
Storage tip. Coil lights loosely and store in a dry place. Tangled lights are frustrating next season. Use a cardboard tube or storage box to keep them organized.
How to Install Wired Exterior Lights on Brick Using No-Drill Methods
Wired exterior lights (wall sconces, flood lights, architectural fixtures) typically require hardwired installation, which means drilling. But there are workarounds if you want to avoid permanent holes.
Conduit routing. Instead of drilling through brick, run electrical conduit along the surface. Conduit is a metal or plastic tube that protects wiring. It mounts to the brick with clips or adhesive-backed straps.
Surface-mounted fixtures. Some exterior lights mount flush to the brick surface without drilling through it. The fixture sits against the wall, and wiring runs along the surface inside conduit.
Temporary hardwired solutions. If you're renting or testing a design, run wiring through conduit along the surface. Once you commit to a permanent installation, you can drill and hide the wiring inside the wall.
Why drilling is often necessary. Hardwired lights need power from an interior breaker or outlet. Running that wire safely requires either drilling or surface conduit.
For most homeowners, plug-in decorative lights are the practical choice. Hardwired installations create a more finished look, but they require professional help and permanent changes to your brick.
Choosing the Right Method for Your Brick Installation
The best mounting method depends on four factors: light type, weight, installation duration, and whether you're renting.
For temporary installations (1-3 months): Use adhesive hooks or clips. They require no tools and leave no marks. Perfect for seasonal decorating or testing a design.
For semi-permanent installations (3-12 months): Use gutter clips if you have eaves, or zip ties wrapped around existing structures like downspouts. These hold up through weather changes and multiple seasons.
For permanent installations: Consider hardwired fixtures mounted with conduit routing. This requires a licensed electrician but creates a professional appearance.
For renters: Stick with adhesive hooks and plug-in lights. Everything comes down cleanly without landlord disputes. Avoid anything that leaves permanent marks or requires drilling.
Weight matters most. Adhesive hooks max out at 3-5 pounds. String lights are usually under this limit. But if you're hanging heavy fixtures or multiple strands, gutter clips and zip ties are safer choices.
Weather exposure is critical. Brick exposed to direct rain and wind needs stronger mounting. Gutter clips and zip ties handle weather better than adhesive hooks alone.
Here's a quick decision guide:
- Under 3 pounds, temporary: adhesive hooks
- 3-10 pounds, temporary to semi-permanent: gutter clips or zip ties
- Over 10 pounds or permanent: hardwired with conduit routing (hire a professional)
- Rental property: adhesive hooks only
Common Mistakes to Avoid When Installing Lights on Brick
Most installation failures come from rushing or skipping preparation steps. Here are the mistakes we see most often.
Mistake 1: Installing on wet or damp brick. This is the #1 reason adhesive hooks fail.
Mistake 2: Skipping surface cleaning. Dust, algae, and loose mortar create a barrier between the adhesive and the brick. Spend 10 minutes cleaning.
Mistake 3: Spacing hooks too far apart. String lights sag between anchor points.
Mistake 4: Hanging lights before adhesive cures. The hook feels secure after a few minutes, but the adhesive needs 24 hours to fully harden.
Mistake 5: Using the wrong hook type. Indoor adhesive hooks won't survive outdoor weather. Always buy outdoor-rated hooks rated for your climate.
Mistake 6: Overloading a single anchor point. Each hook has a weight limit. Don't hang multiple light strands from one hook.
Mistake 7: Ignoring electrical safety. If you're running extension cords, keep connections away from water. Tape over exposed connectors.
Mistake 8: Leaving lights up too long. Adhesive hooks degrade over time, especially in sun and heat. Plan for removal before the adhesive fails.
Installing outdoor lights on brick without drilling is absolutely doable when you choose the right method. Paramount Outdoor Lighting Group can help you design a lighting plan that works for your brick exterior, whether you want temporary seasonal lights or a semi-permanent setup.
Frequently Asked Questions
Can adhesive hooks really hold outdoor lights on brick without drilling?
Outdoor-rated adhesive hooks can hold decorative string lights and lightweight fixtures on brick if the surface is properly prepared. Clean the brick thoroughly to remove dust and mortar residue, then allow the adhesive to cure fully (typically 24 hours) before hanging lights. Weight capacity depends on the hook's rating and brick surface texture; rough, porous brick generally provides better adhesion than smooth surfaces. For heavier fixtures or permanent installations, clips or zip ties anchored to existing structures offer more reliable support.
What's the difference between plug-in decorative lights and hardwired exterior lights on brick?
Plug-in string lights and decorative fixtures are temporary, lightweight, and require only surface mounting without electrical connections. Hardwired exterior lights are permanently connected to your home's electrical system and require proper grounding, weatherproof conduit, and often professional installation to meet electrical codes. Hardwired fixtures are more durable for year-round use but typically demand drilling for conduit routing. For no-drill installations, stick with plug-in decorative options or surface-mounted clips that don't penetrate the brick.
How do I prevent brick damage when removing lights I've installed without drilling?
Remove adhesive hooks slowly by pulling at a low angle to separate the adhesive bond rather than tearing the brick surface. Use a heat gun on low setting to warm adhesive residue before removal. For clips and zip ties, simply cut and unwind them. Test removal on a small area first if you're concerned about your brick's condition. Rental-friendly methods like gutter clips and pole-mounted lights leave no permanent marks and are ideal if you don't want to risk surface damage.
What outdoor lighting methods work best for rough or porous brick surfaces?
Rough, porous brick provides excellent grip for adhesive hooks and clips because the uneven surface increases contact area. Adhesive bonds typically perform better on porous brick than on smooth stucco or concrete. Gutter clips, zip ties anchored to existing fixtures, and pole-mounted systems also work well on rough surfaces. Clean the brick thoroughly first to remove dust and loose mortar. If using adhesive, choose products rated for outdoor masonry and allow full cure time before hanging lights to ensure maximum bond strength.