
How to Upgrade to Energy Efficient Landscape Lighting
Table of Contents
- Why Upgrade to Energy Efficient Landscape Lighting Now
- Step 1: Audit Your Existing System and Map Your Goals
- Step 2: Replace Halogen Landscape Lights with LED
- Step 3: Check Landscape Lighting Transformer Compatibility
- Step 4: Low-Voltage Landscape Lighting Installation and Wiring
- Step 5: Add Outdoor Lighting Timers and Photocells
- Step 6: Calculate Your Energy and Cost Savings
- Common Mistakes to Avoid When Upgrading to Energy Efficient Landscape Lighting
- Frequently Asked Questions
Last Updated: October 5, 2026
Why Upgrade to Energy Efficient Landscape Lighting Now
Energy efficient landscape lighting is the fastest way to cut outdoor electricity use while keeping your yard bright and safe.
Halogen bulbs waste most of the energy they draw as heat. LED fixtures flip that ratio, turning far more of each watt into visible light.
Below, we'll show you exactly how to upgrade to energy efficient landscape lighting in six steps, from auditing your current setup to calculating what you'll save.
Step 1: Audit Your Existing System and Map Your Goals
Start by counting what you already have. Walk your property at dusk and note every fixture, its location, and whether it runs on line voltage or a low-voltage 12-volt system.
Write down three things for each fixture:
- Bulb type and wattage (check the label or the old bulb)
- Fixture condition (rust, cracked lenses, loose stakes)
- What it lights (path, wall, tree, sign)
Then decide your goals. Do you want the same look, or warmer, dimmer, more even light? Most people want softer light and fewer hot spots.
What You'll Need Before You Start
Gather these before you touch a wire. A voltage meter, wire strippers, waterproof wire connectors, and replacement LED bulbs or fixtures that match your socket type.
You'll also want a notepad or phone for photos. Snap each connection point before you disconnect anything.
Step 2: Replace Halogen Landscape Lights with LED
Most guides treat this as a bulb swap. In practice, a halogen-to-LED retrofit is a compatibility project, and the order you do things in determines whether the run works on the first try. Here is the full sequence.
Before you buy anything: the compatibility check
- Record the existing load. Add up the rated wattage of every halogen bulb on the run (a 20-watt bi-pin is common; a 35-watt MR16 is common for accent fixtures). Write the total down.
- Read the transformer label. Note the maximum wattage and, if listed, the minimum load. Many older magnetic transformers need a minimum load, often 20 to 30 percent of rated capacity, to regulate voltage. A 300-watt transformer may not start reliably below roughly 60 to 90 watts of connected load.
- Estimate the new LED load. A 20-watt halogen typically maps to a 3 to 5-watt LED. If your old run was 200 watts of halogen, the LED equivalent is often 30 to 50 watts, which can fall below the transformer's minimum. That is the single most common reason a retrofit flickers.
- Decide: keep, add, or replace. If the new LED total stays above the minimum and below the maximum, keep the transformer. If it falls below the minimum, either add fixtures, add a resistive load module if the manufacturer supports one, or replace the transformer with an electronic LED-compatible unit.
Match the base, then match the light
- Base type: bi-pin (G4/GY6.35) and wedge (T5) are the two you will see most. Pull one old bulb and match it exactly. Adapters exist but add a failure point.
- Voltage: confirm the fixture is 12V AC, 12V DC, or line voltage. LED bulbs are voltage-specific; a 12V AC bulb in a DC system may flicker or fail early.
- Color temperature: 2700K to 3000K reads warm and natural against stone, brick, and foliage. Above 4000K looks cold and blue and is best reserved for security-only zones.
The retrofit, in order
- Kill power at the transformer and unplug it. Confirm with a voltage meter at the first fixture.
- Replace bulbs fixture by fixture, testing each one as you go rather than waiting until the end. This isolates a bad socket immediately.
- Replace any fixture that is rusted, cracked, or has a corroded socket. Water intrusion kills LEDs faster than anything else, and a $25 fixture is cheaper than chasing a dead run later.
- Re-check the total load against the transformer label before restoring power.
- Power up and walk the run at dusk. Look for flicker, uneven brightness, or fixtures that do not start.
If you are replacing the whole fixture instead of the bulb
Integrated LED fixtures (where the LED is sealed into the housing) are now common and often more efficient than a bulb-in-socket design, because there is no socket to corrode. The trade-off: when the LED eventually dims, you replace the fixture, not a $6 bulb.
For label-reading help, the U.S. Department of Energy lighting guide explains how to compare lumen, Kelvin, and wattage ratings across products.
Step 3: Check Landscape Lighting Transformer Compatibility
Landscape lighting transformer compatibility is where most DIY upgrades fail. LED bulbs draw far less power than halogens, and some transformers need a minimum load to run at all.
Add up the wattage of every LED fixture on the run. Compare that total to your transformer's minimum and maximum ratings, usually printed on the case.
| Transformer Issue | What You'll See | The Fix |
|---|---|---|
| Load below minimum | Flicker, no start | Add a fixture or swap the transformer |
| Load above maximum | Dim output, heat | Split the run or upgrade capacity |
| Wrong voltage tap | Uneven brightness | Move to the correct tap |
| Old magnetic unit | Buzz, poor dimming | Replace with an electronic LED driver |
Troubleshooting Flicker, Dimming, and Voltage Drop
Flicker usually means the load is too small for the transformer. Dimming at the end of a run points to voltage drop, which happens when wire is too thin for the distance.
Test voltage at the first and last fixture. If the last one reads much lower, you need heavier wire or a shorter run.
Step 4: Low-Voltage Landscape Lighting Installation and Wiring
Low-voltage landscape lighting installation and wiring come down to three rules: keep runs short, use heavier wire for long distances, and seal every connection.
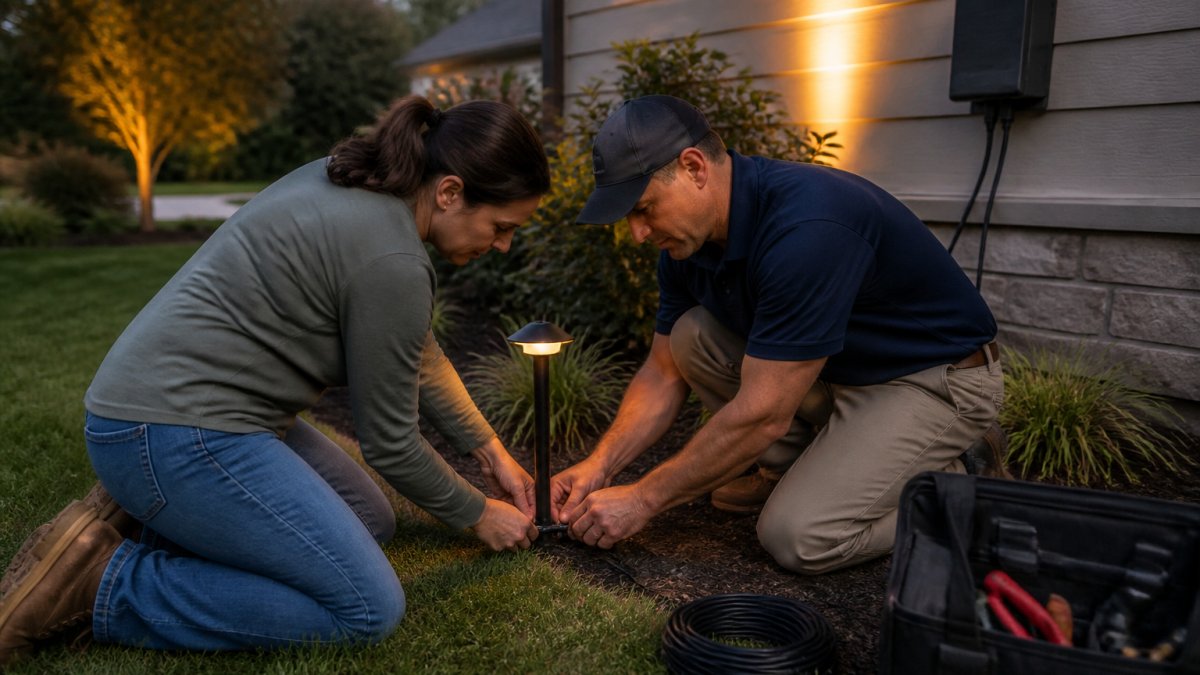
Run cable along the soil, not across walkways where it can be cut. Bury it a few inches deep or tuck it under mulch.
Use waterproof connectors at every splice. A single exposed connection will corrode and take down the whole run.
Step 5: Add Outdoor Lighting Timers and Photocells
Outdoor lighting timers and photocells turn your system on at dusk and off at dawn without you thinking about it.
A photocell senses darkness and switches the circuit on.
Pair the two for the best control. Many modern transformers include both, plus a smartphone app.
Controls are also the easiest way to cut light pollution. The International Dark-Sky Association explains why upward light wastes energy and disrupts wildlife.
Step 6: Calculate Your Energy and Cost Savings
Efficiency claims mean nothing until you run the numbers on your own system. Here is a worked example you can copy, then a payback framework that includes the costs most guides ignore.
The worked example
Assume a typical residential run: 12 halogen fixtures at 20 watts each, running 6 hours per night, at an electricity rate of $0.16 per kWh (a common residential average; check your own bill for the exact figure).
Before (halogen):
- 12 fixtures × 20 watts = 240 watts
- 240 watts × 6 hours = 1,440 watt-hours per night
- 1,440 ÷ 1,000 = 1.44 kWh per night
After (LED):
- 12 fixtures × 4 watts = 48 watts
- 48 watts × 6 hours = 288 watt-hours per night
- 288 ÷ 1,000 = 0.288 kWh per night
Annual electricity savings: roughly $67. The wattage dropped by 80 percent, and the bill dropped by the same proportion.
Add the savings most guides leave out
Electricity is only part of the story. Halogen bulbs also burn out, often once a season on a heavily used run. If you replace 12 bulbs a year at a few dollars each, that is real money, plus the time and ladder work. LED bulbs commonly run for years of nightly use, so that recurring cost largely disappears. Add your own bulb-replacement cost to the $67 above to get the true annual savings.
Payback period
Divide your upfront cost by the annual savings to get payback in years.
- If you spent $150 on LED bulbs and the annual savings is $67 plus, say, $40 in bulbs you no longer buy, payback is under two years.
- If you replaced the transformer as well, add that cost. A $200 transformer pushes payback out but extends the life of the whole system.
A common pattern: bulb-only retrofits pay back fastest; fixture-and-transformer retrofits pay back more slowly but deliver better reliability and design control.
Lifecycle cost, not just first cost
Total cost of ownership over, say, 10 years includes:
- Fixture and bulb purchase price
- Electricity (the numbers above)
- Replacement bulbs you no longer buy
When you stack those, LED systems usually win on 10-year cost even when the upfront price is higher, but run your own numbers, because a short seasonal run changes the math.
Rebates and incentives
Utility rebates for efficient outdoor lighting exist in some service territories and change frequently. Check your provider's current residential programs directly rather than relying on a blog post's list. The ENERGY STAR lighting resources is a good starting point for what qualifies as an efficient fixture.
The non-dollar savings: light pollution and placement
A well-aimed, lower-wattage system also cuts light trespass and skyglow. Aim fixtures down, shield the tops, and shut off after midnight where safety allows. The International Dark-Sky Association explains why upward light wastes energy and disrupts wildlife, and why fewer, better-aimed fixtures often look better than a crowded run.
Common Mistakes to Avoid When Upgrading to Energy Efficient Landscape Lighting
The mistakes repeat, so here's the short list to check before you buy anything:
- Buying bulbs before checking the transformer. Confirm minimum load first.
- Mixing color temperatures. Stay within one range across the yard.
- Using thin wire on long runs. Voltage drop kills brightness.
A clean, well-placed system with fewer fixtures can often be more effective than a crowded one.
That's also where a professional design pays off. Our team at Paramount Outdoor Lighting Group designs low-voltage systems around your property, not a template, and we handle installation from start to finish. As an authorized JellyFish Lighting dealer, we also offer permanent architectural lighting with millions of colors and patterns for holidays and everyday use.
Frequently Asked Questions
Do landscape lights use a lot of electricity?
Halogen systems are the biggest draw. A single 20-watt halogen bulb running 6 hours a night uses about 44 kWh a year, and a typical 10-fixture yard can add up fast. Switching to energy efficient landscape lighting with LED bulbs drops that fixture to roughly 3-5 watts, cutting energy use by 75-90 percent depending on the replacement you choose.
Can you replace halogen landscape bulbs with LED bulbs?
Yes, in most cases. Match the base type (often bi-pin), the voltage (typically 12V), and the lumen output you want rather than the wattage. The catch is the transformer: an older magnetic unit may not handle the much lighter LED load well, so check compatibility before you swap every bulb. If lights flicker or dim after replacement, the transformer is usually the reason.
Do LED landscape lights work with existing transformers?
Sometimes, but not always. LED fixtures draw far less power, which can confuse older magnetic transformers that expect a heavier load. Look for a transformer rated for LED use, check that its total wattage exceeds your connected load with headroom to spare, and confirm it outputs 12V consistently. If your current unit hums, runs hot, or dims LEDs, replace it.
What controls can make outdoor lighting more energy efficient?
Timers and photocells are the two biggest wins. A photocell turns lights on at dusk and off at dawn so nothing runs during daylight. A programmable timer lets you shut off after a set number of hours instead of running all night. Pairing both, or adding a smart controller, can trim another 20-30 percent off your already-reduced LED consumption.
Most homeowners can handle the bulb swap and the audit on their own. The tricky parts are transformer compatibility, wiring, and getting the design to look natural instead of overdone. That's the work Paramount Outdoor Lighting Group does every day, with custom low-voltage design, expert installation, and permanent architectural lighting options built to last. Request a walk-through and see how your property looks after dark before you commit to anything.